

Introduction: Weighing DIY Electric Heater Installation
You just bought a new electric baseboard heater for the drafty bedroom, and the box says installation is straightforward. A few wires, a screwdriver, maybe forty minutes of work. The alternative is paying an electrician $150 to $300 an hour, and that feels like burning cash you’d rather spend elsewhere.
Here’s the thing: electric heaters are not light fixtures. They draw continuous current for hours, and a loose connection or undersized wire can start a fire inside your wall long after you’ve forgotten the project. This guide walks through which heaters you can realistically install yourself, what it actually costs when things go wrong, and the specific safety checks that separate a clean install from a dangerous one. You’ll leave with a clear decision framework, not just a list of vague warnings.
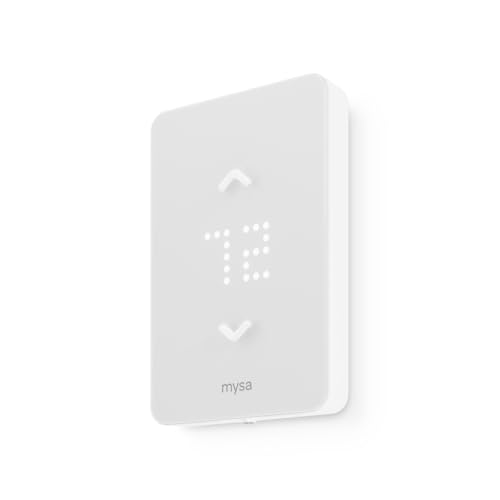
Mysa
Mysa Smart Thermostat LITE for Electric Baseboard…
- 🛡️ 5-YEAR LIMITED WARRANTY: Applies only to products sold by "Mysa – Smart Thermostats." North America based support team, 7 days…
- ✅ NO SUBSCRIPTION: Scheduling, remote control, voice control, geofencing, and the monthly runtime email are included. The Mysa app…
- ⚡ 120V OR 240V LINE VOLTAGE: For electric baseboard, fan-forced, wall, and convector heaters, plus radiant ceiling heat. Up to 1,9…
Understanding Electric Heater Types: DIY Feasibility
Not every heater is the same difficulty, and pretending otherwise gets people hurt. Some units are genuinely plug-and-play. Others require new circuits, load calculations, and permits. Here’s the honest breakdown.
Wall-Mounted & Baseboard Heaters
These are the most common DIY candidates. A 120V baseboard heater with a cord and plug is as simple as furniture assembly. You mount the unit, plug it in, and you’re done. The 240V hardwired versions are a different story. They require a dedicated double-pole breaker, proper wire gauge (usually 10 or 12 AWG depending on amperage), and a secure connection inside a junction box.
If you’re comfortable checking that the breaker is off, testing wires with a multimeter, and making solid wire connections with wire nuts, a 240V baseboard install is within reach. The key is knowing your home’s wiring. Older homes often have aluminum wiring or no ground wire, and those situations are not for beginners. A smart thermostat like the Mysa Smart Thermostat LITE can simplify control after installation, but it doesn’t fix bad wiring underneath.
Radiant Floor & Advanced Systems
Radiant floor heating is a completely different beast. You’re embedding cables or mats in concrete or thinset, which means there’s no way to access them after the pour. One mistake—a kinked cable, a nail through the mat, a poorly placed sensor—and you’re tearing up flooring to fix it. These systems also need a dedicated GFCI breaker and careful spacing calculations to avoid overheating. Leave this to professionals.
Ductless mini-splits are technically heat pumps, not electric resistance heaters, but they get lumped into this conversation often. They require refrigerant lines, vacuum pumps, and electrical work. Not a DIY project for most people.
The Rewards of DIY Electric Heater Installation
Let’s be fair: there are real reasons to do this yourself beyond just saving money. The sense of accomplishment is genuine. You learn how your home works, and that knowledge pays off on the next project. But the financial picture is more nuanced than most articles admit.
Potential Cost Savings & Control
A licensed electrician might charge $200 to $600 to install a single baseboard heater, depending on your location and whether they need to run new wire. Doing it yourself saves that entire amount, minus the cost of tools and materials. If you already own a multimeter, wire strippers, and a voltage tester, your out-of-pocket cost drops to maybe $20 for wire nuts and a new box.
The control aspect matters too. You decide when the work happens, how it’s done, and what materials go in. No waiting for appointments, no explaining your home to a stranger. For someone who’s methodical and detail-oriented, that’s a genuine reward.
Energy Efficiency Considerations
Here’s where DIY can actually improve efficiency. A poorly installed heater—one with gaps in the mounting, poor wall sealing, or an improperly sized unit—wastes energy. When you do the work yourself, you control the details. You can insulate around the box, seal the wall penetration, and verify the heater is level. That attention to detail can reduce heat loss by 5% to 10% compared to a rushed professional install.
Pairing your new heater with a programmable thermostat multiplies those savings. The Mysa Smart Thermostat LITE, for example, lets you set schedules for every day of the week, so you’re not heating an empty house. It connects to your WiFi and works with HomeKit, Alexa, and Google. The app walks you through the wiring step by step, and it’s compatible with 120V, 208V, and 240V systems. That combination—a tight install plus smart scheduling—is where the real energy savings live.
The Significant Risks of DIY Electric Heater Installation
Now the part nobody likes to talk about. The risks are not abstract. They’re specific, measurable, and potentially catastrophic. Understanding them is not about fear-mongering; it’s about making a rational choice.
Electrical Hazards & Fire Safety
The single biggest risk is fire. Electric heaters are high-current devices by design. A 240V baseboard heater can draw 12 to 15 amps continuously. If a wire connection is loose, it creates resistance, which creates heat. That heat can melt insulation, ignite wood framing, and start a fire inside your wall. You won’t see it until it’s too late.
Shock is the other immediate danger. Working on live circuits causes hundreds of injuries every year. Even with the breaker off, a mislabeled panel or a shared neutral can leave a wire energized. The only safe way to work is to verify zero voltage with a tester at the exact wires you’re touching, every single time.
Code Violations, Warranties, & Insurance
Here’s a scenario most DIY guides skip: you install the heater perfectly, but you didn’t pull a permit. Your local building code requires permits for new circuits or modifications to existing ones. If you sell the house later, the inspector flags the unpermitted work. You now have two options: pay an electrician to rip it out and redo it, or disclose the violation and watch buyers walk away.
Your homeowner’s insurance has a similar clause. Most policies exclude coverage for damage caused by unpermitted or unprofessional electrical work. If a fire does occur, the adjuster will look for signs of DIY installation. A missing permit, a non-standard wire connection, or a junction box that’s not accessible—any of these can void your claim. You’re not just risking the heater; you’re risking your entire policy.
Manufacturer warranties are another trap. Many heater warranties require professional installation. If the unit fails and the manufacturer finds DIY wiring, they’ll deny the claim. Read the warranty terms before you buy, not after.
Performance Issues & Hidden Costs
Even if nothing catches fire, a DIY install can underperform. Undersized wire causes voltage drop, which makes the heater run longer and use more power. An improperly grounded system can cause nuisance tripping or a persistent hum. Fixing these issues costs more than doing it right the first time.
There’s also the time cost. A professional does this in two hours. A careful homeowner might spend a full weekend: researching codes, buying tools, making mistakes, redoing connections. Your time has value, and that value should factor into the equation.
When Professional Installation is Essential
Some situations are non-negotiable. If any of the following apply, call a licensed electrician and don’t look back.
Complex Wiring & Circuit Upgrades
If your panel is full, if you need a new breaker, or if the existing circuit is already near capacity, you need a pro. Adding a 240V circuit requires running new cable from the panel to the heater, which means fishing wire through walls, cutting drywall, and potentially upgrading your panel’s amperage. That’s a job for someone with liability insurance and a permit.
Specific Heater Types & Local Regulations
Radiant floor systems, ceiling-mounted radiant panels, and any heater that’s not a simple wall unit should be professionally installed. Some municipalities require a licensed electrician for any hardwired appliance above a certain wattage. Check with your local building department before you start. A quick phone call can save you from a costly mistake.
DIY vs. Professional: A Comprehensive Cost & Value Comparison
Let’s put the numbers side by side. The table below shows typical scenarios, but your actual costs will vary based on location, heater type, and your existing wiring.
| Factor | DIY Installation | Professional Installation |
|---|---|---|
| Upfront labor cost | $0 (your time) | $200 – $600 per heater |
| Tools & materials | $50 – $150 (if starting from scratch) | Usually included in labor quote |
| Permit & inspection fees | $50 – $200 (if you pull them yourself) | Often bundled into the quote |
| Warranty validity | Often voided | Typically preserved |
| Insurance coverage | Potentially voided if unpermitted | Covered under contractor’s liability |
| Risk of fire/shock | Moderate to high for novices | Low (licensed and insured) |
| Time commitment | 4 – 12 hours per heater | 1 – 3 hours per heater |
| Long-term repair costs | You pay for mistakes | Often covered by workmanship warranty |
| Energy efficiency | Depends on your skill level | Consistently high |
The math changes depending on your skill. A retired electrician doing their own baseboard install saves hundreds and gets a perfect result. A first-time homeowner with no tools and a vague memory of a YouTube video is gambling. Be honest about which one you are.
Essential Safety Protocols for Any Electrical DIY
If you decide to proceed, follow these rules without exception. They’re not suggestions.
- Turn off the breaker and lock the panel. Use a physical lock or a piece of tape with a warning note. Tell everyone in the house what you’re doing.
- Test for zero voltage. Use a non-contact voltage tester and a multimeter. Test the wires you’ll touch, and test them again right before you touch them.
- Check wire gauge and breaker size. A 15-amp breaker needs 14 AWG wire minimum. A 20-amp breaker needs 12 AWG. A 240V heater typically needs a double-pole breaker sized to the heater’s amperage.
- Use the right connectors. Wire nuts must match the wire size and count. Twisting wires together and wrapping them in tape is not an acceptable connection.
- Leave all connections in accessible junction boxes. No buried splices, ever. The box must be flush with the finished wall surface and have a cover plate.
- Verify polarity and grounding. Connect black to black, white to white, and ground to ground. A reversed connection can energize the heater chassis.
- Test the heater before closing the wall. Turn the breaker on, check for proper heat output, and feel for unusual warmth at the connections after 10 minutes of operation.
One more thing: keep a fire extinguisher rated for electrical fires (Class C) within reach. It’s a small investment that gives you a way out if something goes wrong.
Making the Call: What I’d Do
Here’s my honest opinion after years around this industry. If you’re replacing an existing heater on an existing circuit, and you’re comfortable with a multimeter, you can likely handle it. The risk is manageable, and the savings are real. If you’re adding a new circuit, upgrading your panel, or working with radiant floor systems, hire a professional. The cost difference is a few hundred dollars. The downside of a mistake is your house.
For those who do go the DIY route, consider pairing the heater with a smart thermostat like the electric heater installation trends article covers. The Mysa Smart Thermostat LITE is a solid choice for baseboard and fan-forced heaters. It’s not perfect—the app took me a day to get used to—but the scheduling features genuinely cut heating costs. Check the Mysa Smart Thermostat LITE on Amazon for current pricing and compatibility details.
Before you start, read up on securing the environment around the heater to avoid common placement mistakes. And if you’re weighing different heating options, this comparison of portable heaters might change your mind about going electric at all.
Frequently Asked Questions
Can I install a 240V baseboard heater myself?
Yes, if you have a dedicated circuit and you’re comfortable with electrical work. The process involves mounting the heater, connecting the wires in a junction box, and verifying the breaker size matches the heater’s amperage. If you need to run new wire from the panel, call a professional.
What happens if I don’t pull a permit for electrical work?
You risk a code violation that surfaces during a home sale or inspection. The local building department can require you to open up walls, redo the work, and pay fines. Your insurance company can also deny claims for damage caused by unpermitted work.
How much does a professional electrician charge to install a heater?
Expect to pay between $200 and $600 per heater for labor, plus materials. The exact price depends on your location, the heater type, and whether new wiring is needed. Get at least three quotes before choosing a contractor.
Will a DIY installation void my heater’s warranty?
Many manufacturers require professional installation for the warranty to remain valid. Read the warranty terms before buying. If it requires a licensed electrician, either hire one or accept that you’re self-insuring against defects.
What tools do I need for a basic baseboard heater install?
You’ll need a voltage tester, multimeter, wire strippers, screwdrivers, a level, and wire nuts. If you’re cutting drywall or running new wire, add a drywall saw and fish tape. Most of these cost under $100 total if you don’t already own them.
Final Thoughts Before You Start
- Match your skill level to the project. Replacing a heater on an existing circuit is DIY-friendly. Adding a circuit is not.
- Pull a permit if your local code requires one. The cost is small compared to the insurance headache later.
- Verify zero voltage with a tester before touching any wire. Every time.
- Use the correct wire gauge and breaker size for your heater’s amperage.
- Leave all connections in accessible junction boxes with cover plates.
- Consider a smart thermostat to maximize energy savings after the install.
- When in doubt, hire a licensed electrician. The $300 you save isn’t worth the risk to your home and family.

I am a mechanical engineer and love doing research on different home and outdoor heating options. When I am not working, I love spending time with my family and friends. I also enjoy blogging about my findings and helping others to find the best heating options for their needs.
Related guides

Best Plastic Pipe for Hot Water in Belgium
Choose plastic pipe for hot water by temperature rating, pressure class, and local code, so the pipe fits…
7 Pro Tips to Simplify Radiant Heater Installation
To simplify radiant heater installation, ensure you have the right tools, follow manufacturer guidelines, and consider professional help…
How Weather Impacts Infrared Heater Installation: Key Factors
You pick a warm, still day to mount your new infrared heater. The brackets go up easy, the…
