Installing Condensing Tankless Water Heater: About 4 to 6 Hours
On this page 7 sections
- Installing Condensing Tankless Water Heater
- Installing Locations for Condensing Water Heaters
- Venting Materials and Configurations for Condensing Units
- Managing and Neutralizing Condensate Drain
- Common Mistakes That Cause Damage or Leaks
- When Permits or a Licensed Pro Are Required
- Frequently Asked Questions
Condensing tankless water heaters offer high efficiency but need special installation steps that differ from standard tankless models. You’ll handle dual heat exchangers, condensate drains, and specific venting materials.
This guide walks you through the practical steps, highlights common pitfalls, and explains when to call a pro or get permits.
Installing Condensing Tankless Water Heater

Installing a condensing tankless water heater means securely mounting the unit, connecting gas or electric supply, fitting water lines with heat traps, setting up the condensate drain and neutralizer, configuring approved venting, adding a thermostatic mixing valve if needed, and finally testing the system. Whether gas or electric, this installation requires careful attention to venting and condensate management to prevent damage and ensure efficiency.

Start by choosing a solid mounting surface that can support the heater’s weight. Use the manufacturer’s template to mark and drill holes for the mounting brackets. The unit must be level and firmly anchored to avoid vibration and noise during operation. Check clearances for maintenance access and venting.
Next, connect the gas supply or electrical power according to the model. Gas models need a dedicated 1/2-inch gas line sized for the unit’s BTU rating, typically 114,000 BTU or more, with a shutoff valve nearby. Electric models require a 120V or 240V circuit as specified. Always follow local codes for gas piping and electrical work.
Water supply lines come next. Install 3/4-inch inlet and outlet pipes using flexible connectors if possible to reduce stress from vibration. Add heat traps on the cold and hot water lines to prevent unwanted convection heat loss. Include check valves to avoid backflow, especially if the unit integrates with recirculation systems.
Condensing units produce acidic condensate from their second heat exchanger, so install a condensate drain line routed to an appropriate drain. Use corrosion-resistant tubing and position a condensate neutralizer inline if required. The neutralizer contains calcite or magnesium oxide to raise the pH before discharge.
Venting for condensing models differs from standard tankless heaters. They can use PVC or polypropylene pipes instead of metal, thanks to cooler exhaust temperatures. Configure the venting system to maintain proper slope for condensate drainage and seal all joints with manufacturer-approved cement or gaskets.
If your system uses a thermostatic mixing valve, install it downstream from the heater. This valve blends hot and cold water to deliver a safe, consistent temperature, reducing scald risk. Some models include integrated mixing valves; others require separate installation.
Finally, test the entire system. Turn on water and gas or electric supply, check for leaks, and start the heater following the manual’s commissioning steps. Verify proper venting airflow and condensate drainage. Use the unit’s self-diagnostic display to monitor operation and confirm error-free startup.


Installing Locations for Condensing Water Heaters
A condensing tankless water heater can be installed indoors or outdoors, but each location affects installation details and compliance with safety codes.
Indoor installation is common because it protects the unit from weather and temperature extremes. Inside, you must allow enough clearance around the heater for maintenance and airflow—typically at least 12 inches from combustibles and clear access to vents and controls.
Condensing units produce acidic condensate that must be drained properly. Indoors, this means installing a dedicated condensate drain line with a neutralizer or routing to a suitable drain. The location should also be near a water line and a condensate disposal point to keep plumbing straightforward.
Outdoor installation is possible if the model is rated for it and the enclosure is weatherproof. Outdoor units need protection from freezing temperatures and direct water exposure, which can freeze or damage components. Venting outdoors is simpler since the exhaust vents directly to the open air, but condensation management remains essential.
Wherever you install, follow local building codes. Many jurisdictions require permits and inspections to confirm venting, clearances, and condensate disposal meet standards. Some codes restrict outdoor installation in cold climates unless the unit is specifically designed for it.
Ventilation needs vary by location. Indoor units require venting through PVC or polypropylene pipes designed to handle cool, moist exhaust. These pipes must be routed to the outside with proper slope to drain condensate safely. Outdoor units vent directly but still need a condensate drain, as water collects inside the heat exchanger.
Clearances for venting pipes and unit access are non-negotiable for safety and performance. For example, a flue pipe should have at least 6 inches clearance from combustibles unless otherwise specified by the manufacturer. These requirements also affect where you can place the heater inside a utility room or closet.
Condensing water heaters produce more condensate than non-condensing models, so the drain must handle this volume without risk of backup or freezing. Indoor installations often require a condensate neutralizer to prevent acidic water from damaging plumbing or the environment.
Outdoor units might need insulation or heat tracing on condensate lines if installed in climates below freezing. Without these precautions, condensate can freeze and block drainage, causing water damage or system shutdown.
You can install a condensing tankless water heater indoors or outdoors if you follow the unit’s specifications, venting requirements, condensate drainage, and local codes. The best location depends on your climate, available space, and plumbing and venting options.
For detailed guidance on venting options for condensing units, see venting materials and configurations.
Venting Materials and Configurations for Condensing Units
Installing a condensing tankless water heater means choosing venting materials that handle moisture without corroding—PVC and polypropylene are the go-to options, unlike the metal vents required for non-condensing units.
Condensing models produce exhaust gases cooler than those from non-condensing units, so their vent pipes collect acidic condensate. PVC or polypropylene resist this better than metal, which can corrode quickly under such conditions.
When installing the venting system, maintain a slight downward slope—about 1/4 inch per foot—toward the condensate drain. This slope prevents condensate from pooling inside the pipes and ensures it flows out safely, avoiding blockages or damage.
The vent termination must be outdoors, positioned according to local codes—away from windows, doors, and air intakes. Keep at least 12 inches clearance from combustible materials and ensure the vent cap directs exhaust away from the house to prevent re-entry of gases or moisture.
Avoid long horizontal runs without slope. Horizontal sections can trap condensate unless properly sloped and drained. If the layout requires long horizontal venting, install a condensate trap or drain tee at the lowest point to collect and divert the condensate.
Unlike non-condensing water heaters that use metal venting rated for high-temperature exhaust, condensing units operate with cooler exhaust and need vent materials compatible with acidic moisture. Using the wrong venting can cause leaks, corrosion, and premature failure.
Some installations use direct vent systems that draw combustion air from outside and exhaust directly outdoors. These systems reduce indoor air quality concerns and simplify venting but still require the same careful slope and termination rules.
 Water Heater Owner's ToolkitFix the common faults yourself, keep it running for years, and know when a repair is money wasted.No-hot-water flowcharts, gas and electricFlush, anode, relief valve and descaling stepsRepair-or-replace calculator (Excel)
Managing and Neutralizing Condensate Drain
Condensing tankless water heaters produce condensate because their second heat exchanger cools exhaust gases, turning water vapor into liquid. This condensate is acidic, typically with a pH between 3 and 5, due to dissolved combustion byproducts.
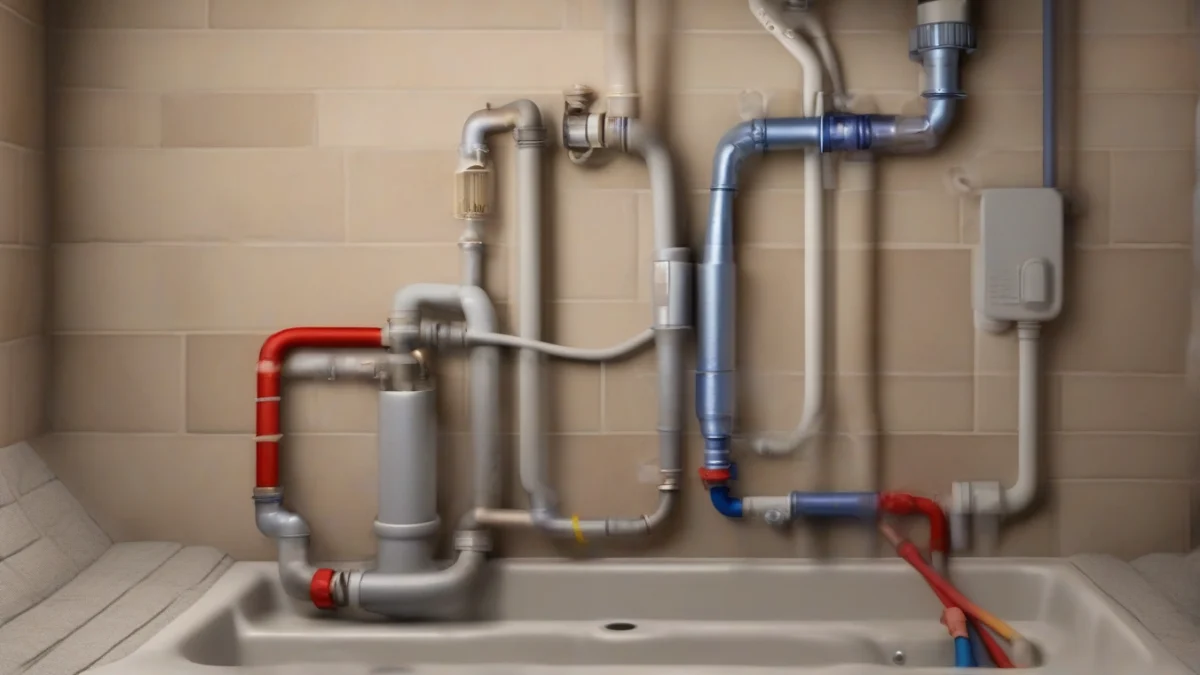
To handle this acidic condensate safely, you must install a dedicated drain line that slopes downward without traps or low points where water can collect. Use corrosion-resistant materials such as PVC or polypropylene for drain piping, as metal pipes corrode quickly from the acid.
Install a condensate neutralizer kit inline with the drain. These kits contain alkaline media like calcite or magnesium oxide that raises the pH of the condensate before it enters the household drain system or sewer. Position the neutralizer where it’s easy to service and replace the media annually to maintain effectiveness.
Local codes often require condensate neutralization and specify drain sizing and slope. Check with your municipality to ensure compliance. Improper condensate management risks damage to plumbing, drain clogs, or acidic runoff harming landscaping or concrete.
For installation, run the condensate drain line from the heater’s dedicated drain port directly to a suitable drain or outside, maintaining at least a 1/4 inch per foot slope. Avoid long horizontal runs without slope and never connect the condensate drain to a vent line or sewer cleanout.
To neutralize acidic condensate safely, install a neutralizer and use drain materials resistant to corrosion. Make sure the drain system allows for easy maintenance access. Keep PVC glue fumes away from the unit during installation, as they can shorten the neutralizer’s lifespan.
Common Mistakes That Cause Damage or Leaks
A frequent error is improper condensate drainage that leads to leaks. If the drain line dips or traps form, condensate pools inside the unit or piping, causing water damage or corrosion.
Incorrect venting materials or configurations also cause issues. Using metal venting on condensing models leads to corrosion from acidic condensate; conversely, poor vent sizing or routing can cause incomplete combustion, reducing efficiency and increasing carbon monoxide risks.
Skipping permits or ignoring local codes often leads to costly fixes or forced removal. Permits ensure the installation meets safety and plumbing standards, which protect your home and warranty.
Gas line sizing errors are another common problem. Condensing tankless heaters require adequate gas flow to operate their premix burners efficiently. Undersized gas lines cause flame failure, reduced hot water output, or system lockout.
Installation of a condensing tankless hot water heater demands attention to these details. Neglecting proper drain slope, venting with incompatible materials, or using undersized gas pipes can cause leaks, damage, and unsafe operation.
When Permits or a Licensed Pro Are Required
Local codes almost always require permits for installing a condensing tankless water heater, especially when it involves gas or electrical work.
Gas lines must meet strict safety standards; upgrading a gas line or installing a new gas control valve often requires a licensed professional. DIY gas work risks leaks and carbon monoxide hazards.
Electrical connections must follow the National Electrical Code and local amendments. This includes proper breaker sizing, grounding, and wiring methods. Unless you’re a qualified electrician, call a pro to avoid fire risk or code violations.
Changing venting pathways or materials usually triggers permit requirements. Vent pipes for condensing units use PVC or polypropylene, which must be installed per manufacturer specs and code to handle acidic condensate safely and prevent corrosion.
Condensate drainage modifications may also need permits. The acidic condensate must be neutralized or drained into appropriate plumbing, and improper handling can cause property damage or code failure.
Skipping permits or professional help can void warranties, fail inspections, and create safety hazards. Inspectors check gas tightness, venting integrity, electrical connections, and condensate management for compliance.
Obtaining permits and hiring licensed professionals ensures the installation meets safety standards and protects you from legal and financial risks. These steps help guarantee a durable installation that keeps your home safe.