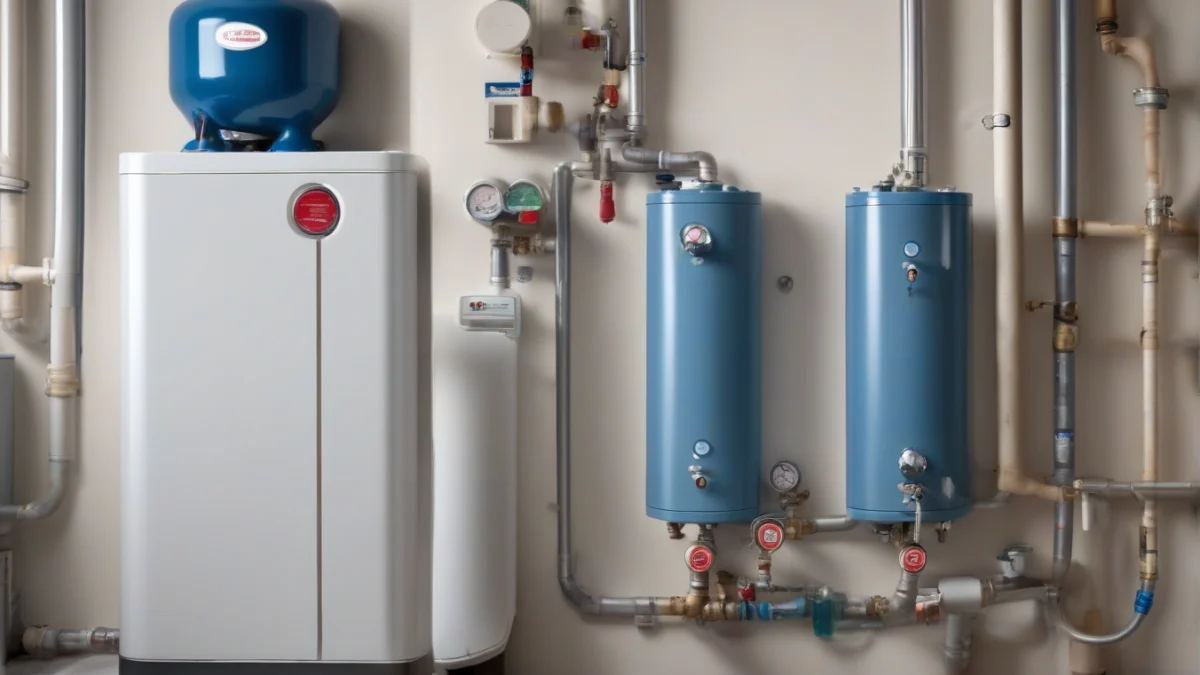
Installing a tankless water heater inside takes 6 to 10 hours for a pro, but most homeowners need a licensed plumber and electrician for gas, venting, or 240 V wiring. The job involves mounting, connecting water and power or gas, venting if required, and following code. Permits are almost always required.
A tankless water heater can go in a utility room, basement, or mounted on an inside wall, but the job is more than just swapping out a tank. You’ll need to connect water lines, electrical or gas supply, and possibly venting—each with its own risks and rules.
Indoor installation keeps the unit protected from weather and freezing, but it brings stricter code requirements. One clearance number matters more than most: a gas unit needs 12 to 24 inches from combustibles and must vent outside, while an electric model might need a dedicated 240 V circuit drawing up to 120 amps.
What to remember
Permits are required for nearly every indoor tankless water heater install.
A gas or 240 V electric model almost always needs a licensed pro for part of the job.
Missing venting, improper pipe sizing, or skipping leak checks are the mistakes that flood or damage homes.
Indoor tankless units need clearances and wall strength—never mount to drywall alone.
Check your local code before buying anything.
Installing Tankless Water Heater Inside: What It Takes
Installing a tankless water heater inside means mounting the unit to a solid wall, connecting the water lines and fuel or 240 V power, adding listed venting for a gas model, and meeting local code. You may install a tankless water heater yourself in some jurisdictions, but most jobs need a licensed plumber and an electrician for gas, venting, or 240 V work.
Ensure proper wall mounting for safe installation.
Installing a tankless hot water heater starts with choosing an indoor-rated model and checking the nameplate before touching a pipe. An electric unit may need a 240 V, 60- to 120-amp supply, while a gas unit needs a correctly sized gas line, shutoff, combustion air where required, and a listed vent through the wall or roof. An outdoor model isn’t automatically suitable indoors.
Confirm Before Work Starts
The wall has framing or solid backing for the heater and its service clearances.
The water lines, shutoff valves, service valves, relief protection, and drain arrangements match the manual.
The electric service can support the model’s 240 V, 60- to 120-amp demand, or the gas branch line can deliver the required flow and pressure.
A gas model has the vent material, termination, combustion-air provisions, and condensate drain required by its listing.
The local building, plumbing, gas, and electrical permits are identified before work begins.
How to install a tankless water heater depends on the model, but the indoor sequence is consistent: mount it, connect water, connect power or gas, install gas venting where required, flush the water circuit, test for leaks, and schedule inspection. Permits and inspections are required in most places, even when the old tank location already has water and power.
1
Electric model
A capable DIYer may handle some installations if local rules allow it and the person can safely work around high-amperage 240 V circuits. The breaker, conductors, disconnect, grounding, and connections must match the nameplate and code.
2
Gas model
Gas piping, combustion air, venting, and startup belong with a qualified professional in most homes. The vent carries combustion gases outdoors, so a loose joint or wrong vent material can put carbon monoxide into the room.
3
Final checks
The installer flushes debris from the water lines, checks every joint, verifies flow and temperature operation, and leaves access for future service. A heater buried behind finished walls or stored items is a repair bill waiting for a cold morning.
Never run a gas tankless heater without its required vent, never power an electric model from an undersized circuit, and never treat a drywall anchor as structural support. Gas connections, venting, and 240 V wiring can create fire, shock, or carbon monoxide hazards.
Mistakes That Cause Leaks or Damage
Follow the tankless water heater installation instructions and guidelines for the exact model, because common shortcuts cause leaks, fires, carbon monoxide exposure, failed inspections, and a unit that never heats correctly. Installing a tankless water heater is easier only when the existing water, gas, or electrical service already matches the nameplate and the unit is listed for indoor use.
1
Wrong vent or gas connection
For a gas tankless water heater, use only the vent material, joints, termination, gas fittings, and clearances named by the manufacturer. A loose gas connection can leak fuel and ignite; incorrect venting can spill combustion gases or carbon monoxide indoors. A condensing tankless water heater also needs its specified vent slope and condensate drain, because the unit produces liquid condensate.
2
Unsealed or wrongly sealed fittings
Threaded water or gas joints that require sealant can leak when the installer skips approved pipe dope or thread tape. Use a sealant rated for the service; don’t put tape or dope on flare or compression fittings unless the manual specifically calls for it.
3
No pressure test
Pressure-test the water piping and inspect every joint before energizing or firing the heater. Gas piping needs the test required by local code and must be checked by a qualified person; never use the appliance itself as a test shortcut.
4
Weak mounting or blocked clearance
Fasten the bracket to framing or solid backing, not drywall alone. Keep the manufacturer’s clearances around the cabinet, vent, controls, and service panels; a heater that can’t be serviced often fails inspection even if it runs.
5
Undersized supply
An undersized gas line can starve the burner, cause ignition errors, or prevent the unit from reaching its rated output. An undersized electric circuit can trip the breaker, fail inspection, or overheat wiring. Match the breaker, wire, gas pipe, pressure, and flow to the nameplate and local code.
Gas Work Needs A Real Test
Don’t turn on a gas tankless heater to see if a new connection holds. Gas piping must be tested, leak-checked, and approved before operation, and the vent must terminate where the manual and code require.
Myth
A tankless heater can hang anywhere the old tank stood.
Fact
The old tank location may lack the wall support, electrical capacity, gas flow, vent route, condensate drain, or service clearance the new unit needs. Measure the installation area and check the manual before buying fittings or cutting a hole.
When You Need a Permit or a Licensed Pro
Yes. Most cities and counties require a permit to install an electric tankless water heater, and gas models usually need one too. A licensed plumber handles the water and gas work; a licensed electrician handles the 240 V circuit. Those are the trades who install tankless water heaters when local law restricts the work.
Gas piping, venting, and 240 V electrical work are almost always restricted to licensed professionals by local law. An owner can sometimes install or reconnect the water lines, but only if the local code allows homeowner work and the permit office approves the job. Check before opening a wall or buying fittings.
Yes, two tankless water heaters can be installed in parallel, but the units must support that arrangement. A common manifold, isolation valves, controls, water-flow design, gas capacity or electrical load, and an inspection may all be required. Recirculation pumps also deserve a planned design because they can change flow through the heater and create cycling or temperature problems.
Part of the job
Typical requirement
Water connections
Plumbing permit; homeowner work only where local code allows
Gas supply
Licensed plumber or gas fitter, permit, and pressure test
Indoor gas vent
Listed vent system, permit, and inspection; often pro-only
240 V supply
Electrical permit and licensed electrician in many jurisdictions
Parallel units or recirculation
Manufacturer-approved design, permit, and inspection often required
Your building department and utility rules control the final answer.
Who to call
A plumber is the first call for a gas unit, water piping, or recirculation layout. Add an electrician for an electric model or any new 240 V circuit. A general handyman should not take on gas, venting, or panel work.
Ask before scheduling
Give the permit office the model number, fuel type, input rating, and installation address. Ask which permits, inspections, and license types apply, and keep the approved manual at the job.
From HeaterGuides · our own guideTankless? Page 8 is the descaling routine, page 15 checks the size.Water Heater Owner's ToolkitFix the common faults yourself, keep it running for years, and know when a repair is money wasted.No-hot-water flowcharts, gas and electricFlush, anode, relief valve and descaling stepsRepair-or-replace calculator (Excel)$14.99$9.99Get it for $9.99See what's inside and watch the 2-minute video →18-page printable PDF + Excel calculator · instant download · 30-day refund
Step-by-Step: How to Install an Indoor Tankless Water Heater
Follow the tankless water heater installation instructions for the exact clearances, water connections, wire size, breaker arrangement, gas pipe, and vent. A gas tankless heater and a tankless electric water heater don’t share one universal installation recipe.
Follow specific connection guidelines for safe operation.
If you’re asking how to install a tankless electric water heater yourself, the safe boundary is usually mounting and permitted water work; a new 240 V circuit belongs to an electrician in many jurisdictions. Installing a gas tankless water heater adds gas sizing, combustion air, venting, and carbon-monoxide checks, so use a licensed plumber or gas fitter.
Before work starts
Confirm the unit is listed for indoor installation and read its manual from start to finish.
Confirm the wall, clearances, service access, drain path, and required shutoffs.
Schedule the plumbing, electrical, or building inspection before covering any work.
For gas, install a working carbon-monoxide alarm nearby and keep gasoline and other combustibles away.
1
Shut down the old service
Turn off the water supply and open a hot faucet to relieve pressure. Shut off gas at the appliance or de-energize the electrical circuit, then verify that power is actually off with a tester.
2
Mount the heater
Fasten the unit to framing or solid backing with the listed hardware. Keep the clearances and service space shown in the manual; drywall anchors alone aren’t a suitable mount for a heavy appliance and its piping.
3
Connect the water
Match the cold inlet and hot outlet, install the required isolation or service valves, support the piping, and flush debris from the lines before opening the inlet. Keep the inlet filter accessible for cleaning.
4
Plan the electric supply
Run the dedicated 240 V circuit or circuits specified by the nameplate, manual, conductor ampacity, and local code. A 27 kW load at 240 V is 112.5 A; a 13 kW load is about 54.2 A. Breaker size isn’t chosen from wattage alone, and many high-output units split the load across circuits.
5
Connect the gas supply
For a gas unit, size the pipe from the heater’s input rating, gas pressure, pipe length, and fittings. Install the required shutoff and sediment trap, then have the licensed installer pressure-test the gas piping before the appliance is operated.
6
Install the vent
Use only the vent diameter, material, length, termination, and slope listed for that model. The manual may call for sealed direct vent, Category III stainless vent, or another listed system; those systems aren’t interchangeable. An electric unit has no combustion vent.
7
Pressure-check for leaks
With power and gas still off, open the water inlet and pressurize the water side to normal supply pressure. Inspect every joint and valve, wipe it dry, and check again for drips. Gas piping needs its approved pressure test before connection or startup; never test a gas leak with a flame.
8
Flush and start up
Purge air and debris as the manual directs, then turn on power or gas in the stated order. Run a hot fixture, confirm the flow sensor and display respond, check for error codes, and verify stable temperature. A gas installer should also verify venting, combustion, and carbon-monoxide levels.
Why the advertised flow rate can mislead
A 240 V unit advertised at a maximum 7.4 GPM still needs the manual’s temperature-rise and inlet-temperature limits. That number doesn’t tell you the breaker arrangement or promise 7.4 GPM of fully hot water in winter. For a Novieex 240V 3S or any similar model, use the exact wiring diagram and flow limits supplied with the unit.
27 kW at 240 V112.5 A before circuit rules
13 kW at 240 VAbout 54.2 A
Advertised maximum7.4 GPM is not a universal output
Stop before startup
Don’t energize an electric heater or open the gas valve while a water connection, gas test, vent joint, or inspection is unfinished. A dry-fired electric element can fail quickly, and a faulty gas vent can put carbon monoxide indoors.
What to Do Next: Who to Call and What to Check First
Your next call depends on the fuel: use a licensed plumber for water and gas, an electrician for 240 V work, and a qualified gas-appliance professional for listed venting. A Homewyse tankless water heater installation estimate is only a budgeting baseline; permits, panel upgrades, gas-pipe work and venting can change the quote. For trade-by-trade guidance, see who installs tankless water heaters expert guide.
Part of the job
Call
Water connections
Licensed plumber
Gas line and gas controls
Licensed plumber or gas fitter
240 V wiring and breakers
Licensed electrician
Gas venting
Qualified plumber or HVAC contractor allowed by local code
Local licensing rules control.
Check Before You Buy
Ask the building, plumbing and electrical offices if a homeowner may pull the permits and perform this work; confirm the required inspections.
Confirm your electric service and circuit arrangement, or your gas supply and pipe capacity, match the model manual.
Plan the listed vent route for a gas unit, and confirm wall strength, clearances and service access.
Check local code and the manufacturer’s indoor or outdoor listing.
How much does it cost to install a tankless water heater inside?
Installation cost varies with the fuel type, permit fees, access, and how much utility work your home needs. Ask for an itemized quote covering the unit connections, shutoff and service valves, venting, new 240 V circuit or gas piping, permits, inspection, and removal of the old heater. A panel upgrade or long vent run can change the total more than the heater itself.
Can I install a tankless water heater myself, or do I need a pro?
Most homeowners should hire a licensed plumber and electrician for this work. Local rules commonly reserve gas connections, venting, and 240 V wiring for licensed professionals, while an owner may be allowed to handle limited preparation or water-side work. Confirm the rules with your building department before buying materials or opening a permit.
What permits or inspections are required for tankless water heater installation?
Your local building department may require plumbing, electrical, gas, or mechanical permits, depending on the model and the work involved. Inspections can include the water connections, breaker and wiring, gas pipe, vent termination, combustion air, and leak checks. Ask which work must remain visible until inspection; covering a connection too early can mean opening the wall again.
How do I know if my wall and utilities are ready for a tankless water heater?
Check that the wall can support the unit and that the installation location leaves the manual’s service clearances. An electric model needs a suitable 240 V circuit and enough panel capacity; a gas model needs correctly sized gas piping, combustion air, and a permitted vent route. Confirm the incoming water flow, available pressure, and the unit’s required flow rate before sizing the heater.
What are the main mistakes to avoid when installing a tankless water heater?
The costly mistakes include using the wrong breaker or wire, undersizing the gas line, mixing vent parts from different systems, and skipping the manufacturer’s pipe-flushing procedure. Leave the pressure-relief valve and discharge line installed as specified, and add accessible isolation valves if the instructions call for them. A gas unit also needs a working carbon monoxide alarm and the required vent inspection.
Can a tankless water heater go in a closet, cabinet, or unheated space?
A closet or cabinet is acceptable only if the exact model permits it and the required clearances, service access, combustion air, and venting can be maintained. Electric units avoid combustion-air and flue requirements, but they still need heat-safe clearances and room for servicing. Unheated locations can freeze the heat exchanger and water lines, so use only a model and protection method approved for that location.
Before you go · a welcome giftGet the Water Heater Owner's Toolkit for $4.99Fix the common faults yourself, keep it running for years, and know when a repair is money wasted. Normally $14.99; your welcome price saves $10.00. We'll email your link right now.or buy it now for $9.99 without the gift →One email with your link now. We never share your address.

 Water Heater Owner's ToolkitFix the common faults yourself, keep it running for years, and know when a repair is money wasted.No-hot-water flowcharts, gas and electricFlush, anode, relief valve and descaling stepsRepair-or-replace calculator (Excel)