Skip to content

Expert home heating guides, reviews & repairs

Heater GuidesHeaterGuides
Wood

Wood Stove Safety Standards: The Modern Compliance Guide

You just loaded the stove, closed the door, and watched the flames catch. The room warms up. The house settles into that deep, dry heat only wood can give. Then you remember the article you skimmed last month about chimney fires, and you wonder: is my setup actually safe? How far should the stove really be from that wall? Is the pipe I used good enough?

Most wood stove owners learn the rules after something goes wrong — a scorched wall, an insurance denial, a near-miss with a chimney fire. The standards exist, but they’re scattered across building codes, manufacturer manuals, and insurance fine print. This guide pulls them together. You’ll learn the exact clearance numbers, the difference between stovepipe and chimney requirements, how to handle ash safely, and what your insurance policy actually demands. No fluff, just the specifics that keep your home standing.

Bonnlo

Bonnlo 134 Inches Wide Configurable Baby Gate,…

  • 2025 Upgrade: The open button on the baby gate has been upgraded. The new design is more durable and easier to use, ensuring long-…
  • 5-In-1 Multi-Functional Door: 1. Pet Gate: It can be used as a freestanding pet gate when you set it up as a circular enclosure; 2…
  • Sturdy Consruction: The steel frame construction provides strength and support that you can trust and depend on to keep your child…

If you have small children or pets, a physical barrier adds another layer beyond the stove’s own clearance. A product like the Bonnlo fireplace safety fence creates a 29-inch-tall steel boundary around the stove, with vertical slats that discourage climbing. It’s not a substitute for proper clearances — the stove still needs its rated space to combustible materials — but it keeps curious hands and wagging tails away from hot surfaces.

Why Wood Stove Safety Standards Matter More Than Ever

Wood heat is having a moment. Fuel prices fluctuate, power outages feel more common, and the appeal of heating with a renewable resource is strong. But the surge in stove installations brings a predictable side effect: more fires traced back to improper setup.

The National Fire Protection Association reports that heating equipment is a leading cause of home fires in the United States. Solid-fuel stoves — wood, pellet, and coal — account for a significant slice of those incidents. The common thread isn’t the stove itself. It’s how people install and maintain them.

Standards exist for a reason. They’re not bureaucratic hurdles. They’re the accumulated lessons from decades of structural fires, burn injuries, and carbon monoxide poisonings. When you follow them, you protect your home, your family, and your insurance coverage.

The Core Standards: Clearance, Floor Protection, and Wall Shields

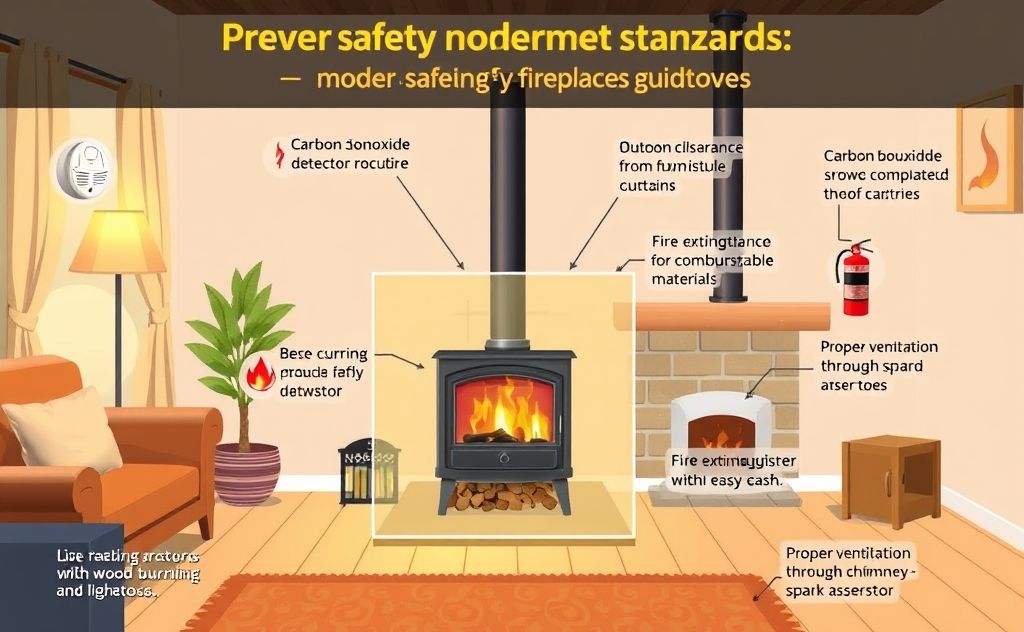
Every wood stove comes with a nameplate that lists its minimum clearances to combustible surfaces. That plate is the law, essentially. Building codes reference it, inspectors check it, and insurance adjusters look for it after a fire.

Clearance to Combustible Walls

For a standard single-wall stovepipe, the typical clearance to an unprotected combustible wall is 36 inches. That’s a lot of empty space. Most rooms can’t spare it.

You have options. A properly constructed wall shield reduces that clearance significantly. The rules for a code-compliant shield are specific:

  • The shield must be non-combustible — sheet metal, masonry, or approved ceramic board.
  • It must be spaced at least 1 inch off the wall using non-combustible spacers, allowing air to flow behind it.
  • The shield must extend at least 18 inches beyond the stove on all sides.
  • Openings at the top and bottom of the shield promote convection, which carries heat away.

With a code-compliant shield, you can often reduce clearance to 24 inches or less. Check your stove’s manual — many manufacturers list reduced clearances for shielded installations.

The Double-Wall Pipe Advantage

Modern double-wall stovepipe changes the math entirely. These pipes have an insulated inner wall that keeps flue gases hot while the outer surface stays cooler. Clearances drop to around 6 inches for a listed double-wall pipe. That’s a massive difference.

If you’re installing a new stove or replacing old pipe, double-wall is worth the extra cost. You gain usable floor space and reduce the risk of accidental contact burns. Just verify the pipe is UL listed and matches your stove’s connector requirements.

Floor Protection

The floor beneath the stove needs protection, but not just anywhere. The rule is straightforward: the floor protector must extend a specific distance beyond the stove on each side.

Standard requirements call for 18 inches of protection in front of the loading door and ash removal door. That’s where embers fall when you open the stove. The sides and rear typically need 6 to 8 inches of extension, though some stoves require more. Check your manual.

The protector itself must be non-combustible. Common choices include:

  • 4-inch-thick masonry (brick, stone, or concrete block)
  • Listed floor protectors made of cement board topped with tile or metal
  • Approved hearth pads that carry a UL listing

One mistake people make is placing a thin sheet of metal over a wooden floor. That’s not adequate. Heat transfers through the metal and chars the wood underneath over time. You need thermal mass — thickness or insulation — to stop that transfer.

Stovepipe vs. Chimney: Understanding the Difference in Standards

People use the words interchangeably, but they’re different systems with different rules. Mixing them up causes real problems.

Stovepipe (Connector Pipe)

Stovepipe runs from the stove’s flue collar to the chimney or wall thimble. It’s the visible horizontal or slightly sloped section. It’s single-wall or double-wall, and it’s not designed to pass through walls or attic spaces.

Standards for stovepipe:

  • Minimum 24-gauge steel for single-wall pipe
  • Maximum 6 feet of unsupported horizontal run
  • Pitch upward toward the chimney at a rate of at least 1/4 inch per foot
  • All joints secured with at least three sheet metal screws
  • Maintain the manufacturer’s listed clearance to combustibles

Chimney

The chimney is the vertical structure that carries flue gases out of the house. It’s either masonry or a factory-built insulated metal system. Factory-built chimneys are labeled with a UL 103 HT rating for wood-burning appliances.

Chimney standards are stricter:

  • Must extend at least 3 feet above the roof penetration point
  • Must be at least 2 feet higher than any part of the roof within 10 feet
  • Masonry chimneys need a flue liner — clay tile, stainless steel, or cast-in-place
  • Factory-built chimneys require the listed clearance to framing, usually 2 inches

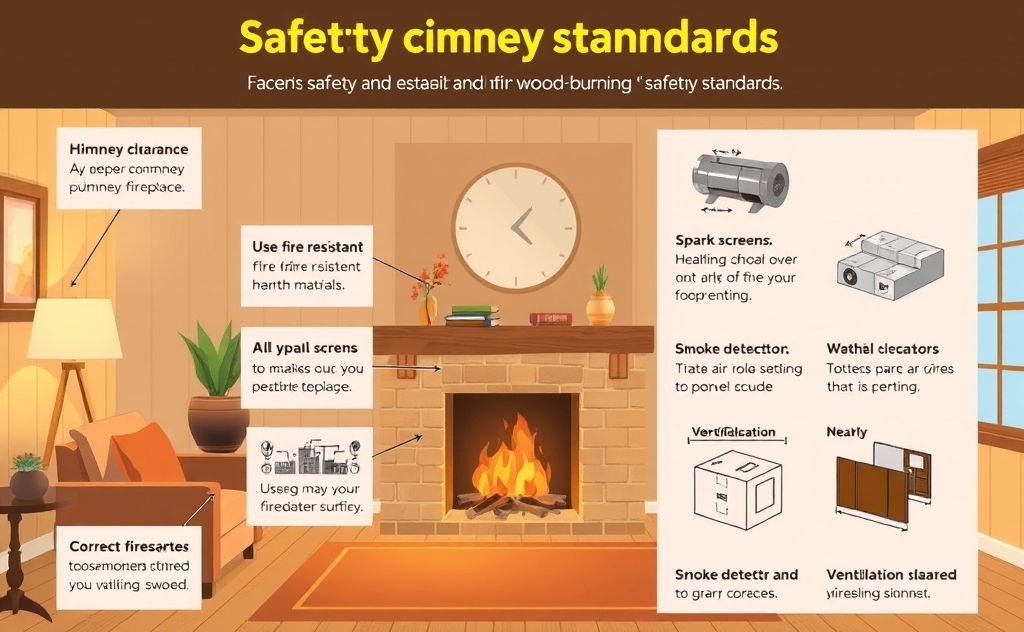
A chimney cap with a spark arrestor is strongly recommended. It keeps rain out, prevents animals from nesting, and catches embers that might otherwise land on the roof. Check the mesh size — 1/2-inch is typical for spark arrestors.

The critical rule: never run a single-wall stovepipe through a wall or ceiling. It’s not rated for that. You need a listed chimney system or a masonry chimney for any penetration of building structure.

The Creosote Threat: How to Prevent the #1 Cause of Chimney Fires

Creosote is the dark, tar-like substance that coats the inside of your chimney. It’s a byproduct of incomplete combustion. When wood burns at low temperatures or with restricted oxygen, the smoke condenses on the cool chimney walls and forms creosote.

There are three stages of creosote:

  1. Stage 1: Flaky, sooty deposit that brushes off easily.
  2. Stage 2: Hard, shiny, tar-like coating that resists brushing.
  3. Stage 3: Thick, glazed, gummy layer that’s extremely difficult to remove.

Stage 3 creosote is a serious fire hazard. It can ignite and burn at temperatures high enough to warp steel and crack masonry. A chimney fire sounds like a freight train inside your wall. It’s loud, violent, and often causes structural damage even if the house survives.

How to Prevent Creosote Buildup

The prevention is simple in theory: burn hot, dry wood. The execution takes discipline.

  • Use seasoned wood — split, stacked, and dried for at least 6 to 12 months. Moisture content should be below 20%. A moisture meter costs less than $20 and removes the guesswork.
  • Burn hot fires. A smoldering, low-temperature fire produces the most creosote. Let the stove run at a vigorous burn for 15 to 20 minutes after loading fresh wood.
  • Don’t choke down the air supply too much. A slow burn extends heat output but dramatically increases creosote formation.
  • Keep the damper fully open during startup and reloading.

Inspect the chimney at least once a month during burning season. Look for shiny deposits on the pipe or at the top of the chimney. If you see more than 1/8 inch of buildup, schedule a cleaning.

Professional chimney sweeps use rotary brushes and vacuums that handle stage 1 and 2 creosote. Stage 3 often requires chemical treatments or specialized tools. Don’t attempt a stage 3 cleaning yourself unless you have experience.

Smart Tech Upgrades: Sensors and Monitors That Exceed Basic Standards

The minimum standards keep you safe, but modern technology takes it further. A few hundred dollars in sensors can catch problems early.

Flue Temperature Monitors

A magnetic or probe thermometer on the stovepipe tells you the flue gas temperature. That’s your window into the burn quality. Ideal temps vary by stove, but a common target is 250°F to 500°F at the stovepipe. Below 250°F, creosote forms rapidly. Above 600°F, you risk overfiring and damaging the stove or pipe.

Wireless smart thermometers now transmit this data to your phone. Some send alerts if the temperature spikes — a sign of a chimney fire — or drops too low during a smolder. The wood stove fan reviews on this site cover accessories that improve heat distribution, but a temperature monitor is the one safety upgrade I’d prioritize first.

Carbon Monoxide Detectors

Wood stoves produce carbon monoxide (CO) during combustion. Most of it goes up the chimney, but leaks happen. A cracked heat exchanger, a blocked flue, or a backdraft can push CO into your living space.

Install a CO detector on every level of the home, especially near bedrooms. Choose one with a digital readout so you can see the current ppm level, not just hear an alarm. Some smart models connect to Wi-Fi and send alerts to your phone when levels rise. That’s useful if you’re away and the stove malfunctions.

Placement matters. Mount the detector at least 15 feet from the stove to avoid nuisance alarms from brief temperature changes. Follow the manufacturer’s placement guidelines.

Smoke Alarms and Heat Sensors

Standard smoke alarms are essential, but they’re not enough near a wood stove. A heat sensor in the ceiling above the stove area can detect rapid temperature rises that indicate a chimney fire before smoke reaches the ceiling. Some systems integrate with smart home hubs and can shut down ventilation or notify emergency services automatically.

The 72-Hour Ash Disposal Rule (And Why It Saves Homes)

Ash disposal seems mundane. You scoop it out, put it in a bucket, and forget about it. That forgetfulness is how houses burn down.

Wood ash can retain enough heat to ignite combustibles for up to 72 hours after the fire goes out. The center of a large ash pile stays warm for days. A single hot coal buried in the pile can start a fire when exposed to oxygen and paper.

Here’s the protocol that prevents ash-related fires:

  1. Use a metal bucket with a tight-fitting metal lid. Plastic trash cans are not acceptable — heat melts plastic.
  2. Place the bucket on a non-combustible surface, like concrete or brick. Not on a wooden deck or garage floor.
  3. Move the bucket outside, at least 10 feet from any structure, deck, or combustible material.
  4. Leave it there for a minimum of 72 hours before disposing of the ash in a regular trash container.
  5. Never mix ash with other trash, especially paper, cardboard, or yard waste.

Some municipalities have specific rules for ash disposal. Check with your local waste management authority. Some require ash to be soaked with water before disposal, though that creates a messy sludge. The 72-hour wait is the safest universal approach.

One more note: don’t store the ash bucket in the garage or near a propane tank. The heat plus potential gas leak is a recipe for disaster.

Seasonal Maintenance Checklist: Fall Startup and Spring Shutdown

Wood stoves need seasonal care. A 15-minute checklist at the start and end of the season prevents most problems.

Fall Startup

  1. Inspect the chimney and stovepipe for creosote, cracks, or loose joints. If buildup exceeds 1/8 inch, clean it or call a sweep.
  2. Check the door gasket. Close the door on a piece of paper — if you can pull it out with resistance, the seal is good. If it slides out easily, replace the gasket.
  3. Verify the firebrick or refractory panels inside the stove are intact. Replace any cracked or missing pieces.
  4. Test the damper and air controls. They should move freely and close fully.
  5. Check the floor protector for damage or gaps.
  6. Test your smoke alarms and CO detectors. Replace batteries.
  7. Confirm your wood supply is seasoned. Test a few splits with a moisture meter — aim for under 20%.

Spring Shutdown

  1. Remove all ash from the firebox and dispose of it using the 72-hour rule.
  2. Clean the chimney thoroughly. A spring cleaning removes creosote that accumulated during the winter.
  3. Close the damper and air inlets to prevent birds or animals from nesting.
  4. Apply a light coat of oil to bare metal surfaces to prevent rust.
  5. Inspect the exterior of the chimney for loose mortar or damaged flashing.

If you’re not comfortable with heights or chimney work, hire a certified chimney sweep. Look for credentials from the Chimney Safety Institute of America (CSIA). A proper sweep costs $150 to $400 and includes a full inspection, not just a brushing.

Insurance and Local Building Codes: What Your Policy Requires

Your homeowner’s insurance policy has a section on wood stoves, and it’s not optional reading. Most policies require the stove to be installed in accordance with manufacturer instructions and local building codes. If it’s not, a fire claim gets denied.

The denial happens more often than you’d think. An adjuster investigates a fire, finds the stove was installed with a 12-inch clearance to a combustible wall when the manual required 36 inches, and declares the installation negligent. The claim is voided. You’re left with a burned house and no payout.

The Insurance Information Institute advises homeowners to notify their insurer before installing a wood stove. Some companies require a professional inspection and documentation. Others may raise rates or exclude wood stove coverage entirely.

Here’s what to do before installation:

  • Call your insurance agent and ask about wood stove coverage requirements.
  • Get a building permit if your local jurisdiction requires one. Most do for new stove installations.
  • Hire a licensed installer, or if you do it yourself, have a certified inspector sign off on the work.
  • Keep all documentation — the stove manual, the inspection report, the permit — in a fireproof safe.

Local building codes vary widely. Some jurisdictions adopt the International Residential Code (IRC), which has specific chapters on solid-fuel appliances. Others have stricter local amendments. The wood stove safety guidelines from major insurers align closely with the IRC, so following the code is usually sufficient.

In Case of Fire: Immediate Action Steps

Even with perfect maintenance, fires happen. Knowing what to do in the first minutes makes the difference between a contained incident and a total loss.

If You Suspect a Chimney Fire

A chimney fire sounds like a low rumble or a jet engine. You may see flames shooting from the top of the chimney or smoke backing into the room.

  1. Call 911 immediately. Do not wait to confirm the fire.
  2. Close the stove’s air inlets and damper to reduce oxygen supply.
  3. Move combustible materials away from the stove and chimney area.
  4. Evacuate the house. Chimney fires can spread to walls and ceilings within minutes.
  5. Do not throw water on the fire. The thermal shock can crack the chimney and cause more damage.

After the fire department leaves, do not use the stove again until a professional inspects the entire chimney system. A chimney fire can damage the flue liner or masonry even if the structure looks intact.

If the Wall Near the Stove Feels Hot

A warm wall is normal. A hot wall is a warning sign. If you can’t hold your hand on the wall for more than a few seconds, the clearance is insufficient.

  1. Stop the fire. Let it burn out naturally.
  2. Inspect the wall for discoloration or charring.
  3. Check the stove’s clearance to that wall against the manual’s specifications.
  4. Do not relight until the clearance issue is resolved.

Final Checklist: Quick Reference for Safe Operation

Here’s the condensed version. Print it, stick it near the stove, and review it monthly.

  • Maintain at least 36 inches of clearance to unprotected combustible walls, or follow the reduced clearances listed on your stove’s nameplate.
  • Use double-wall stovepipe where possible to reduce clearances and improve safety.
  • Extend floor protection 18 inches in front of the loading door and 6 to 8 inches on the sides and rear.
  • Burn only seasoned wood with moisture content below 20%.
  • Inspect the chimney monthly for creosote. Clean when buildup exceeds 1/8 inch.
  • Install CO detectors with digital readouts on every level, plus a flue temperature monitor.
  • Dispose of ash in a metal bucket with a lid, stored outside at least 10 feet from the house for 72 hours.
  • Complete the fall startup and spring shutdown checklists every year.
  • Notify your insurance company before installation and keep all inspection records.
  • If a chimney fire occurs, call 911, close the air inlets, and evacuate. Don’t use water.

Wood heat is one of the most reliable, satisfying ways to warm a home. The standards aren’t obstacles — they’re the difference between a cozy evening and a catastrophe. Follow them, and you’ll get decades of safe, efficient heat. Ignore them, and you’re gambling with everything you own.

For those considering a pellet stove as an alternative, the pellet stove safety review covers similar standards for that fuel type. Each system has its own quirks, but the core principles of clearance, ventilation, and maintenance apply across the board.

Share
Written by Joye

I am a mechanical engineer and love doing research on different home and outdoor heating options. When I am not working, I love spending time with my family and friends. I also enjoy blogging about my findings and helping others to find the best heating options for their needs.

Keep reading

Related guides

Free newsletter

Heater deals and guides, worth opening

Price drops, new guides and safety recalls. One email, only when it matters.

No spam. Unsubscribe in one click. Privacy policy.