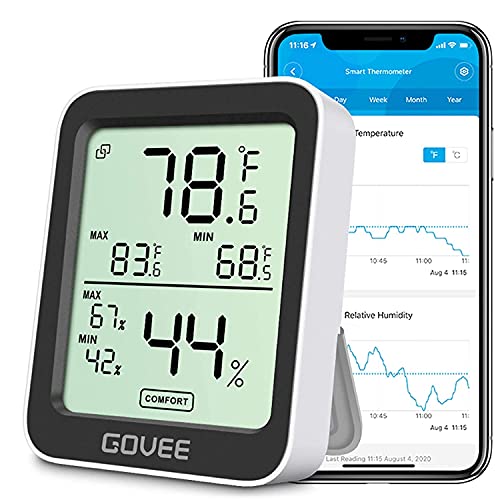
You know the drill. You walk into the living room and it’s freezing, so you crank the thermostat to 74. Two hours later, the bedroom feels like a sauna, and the furnace is still running because the hallway sensor hasn’t caught up. The monthly bill arrives, and you wince. That’s the old way of doing things.
Smart temperature control changes the equation. It’s not just about a shiny wall gadget. It’s about matching heating and cooling to when you’re actually home, where you actually are, and what each room actually needs. Done right, a smart system trims 10–15% off typical heating and cooling costs, according to the U.S. Department of Energy’s figures for programmable thermostats. Done wrong, it’s an expensive way to make your house less comfortable.
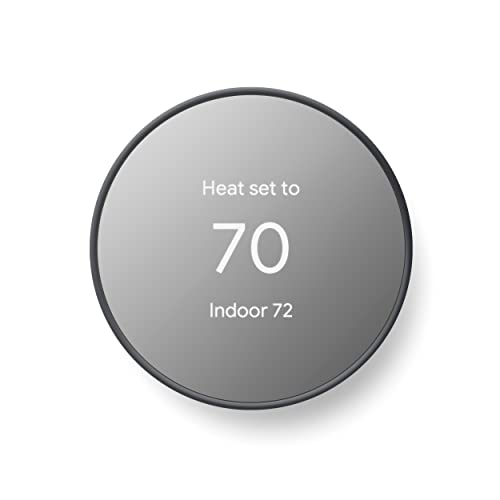
Google Nest Thermostat - Smart Thermostat for…
- ENERGY STAR certified smart thermostat for home that helps you save energy and stay comfortable.Connectivity : Wi-Fi - 802.11b/g/n…
- The Nest Thermostat is designed to work without a C wire in most homes, but for some systems, including heating only, cooling only…
- Nest Thermostat turns itself down when you leave, so you don’t waste energy heating or cooling an empty home. Lock feature: No
This guide walks through the real numbers, the compatibility traps, the features that matter, and the ones that are just marketing. You’ll learn how to check if your HVAC system works with a smart thermostat, how to use remote sensors to fix uneven rooms, and what renters can do without touching a single wire. By the end, you’ll know whether a smart thermostat is a smart investment for your specific home—and how to set it up so it actually pays off.
If you’re starting from scratch, the Google Nest Thermostat is a solid reference point. It’s ENERGY STAR certified, learns your schedule, and lets you adjust temperature from your phone. We’ll use it as an example throughout, but the principles apply to any decent smart thermostat.
The True Cost of Comfort: Is a Smart Thermostat Worth It?

Let’s talk money first. A smart thermostat costs anywhere from $80 to $250 for the unit itself. Installation adds another $100–$200 if you hire an electrician or HVAC tech. So you’re looking at $180–$450 upfront.
What do you get back? The typical household spends about $1,000–$1,500 per year on heating and cooling. A smart thermostat that saves 10–15% puts $100–$225 back in your pocket annually. That’s a payback period of one to three years. After that, it’s pure savings.
But those savings aren’t automatic. They depend on two things: your habits and your system. If you already manually adjust the thermostat every time you leave the house, a smart thermostat won’t save you much. If you leave it at 72 degrees around the clock, you’ll see bigger gains.
Here’s a rough formula to estimate your own payback:
- Find your annual heating and cooling cost (look at your utility bills, add up the months where you used heat or AC).
- Multiply by 0.12 (a conservative 12% savings estimate).
- That’s your yearly savings. Divide the total installed cost by that number to get your payback period in years.
Example: Your annual HVAC cost is $1,200. Savings = $144/year. Installed cost of $300. Payback = 2.1 years.
One caveat: these savings assume the thermostat actually changes your setpoints. If you override it constantly, the savings evaporate. The thermostat is a tool, not a magic wand.
Before You Buy: The 5-Minute HVAC Compatibility Check
Nothing’s worse than buying a smart thermostat and discovering your system doesn’t have a C wire. Here’s how to check before you spend a dime.
First, find your current thermostat. Pop off the faceplate. You’ll see a bundle of thin wires. Look at the letters printed on the terminals: R, W, G, Y, C, and sometimes O/B, E, AUX. Take a photo with your phone.
Count the wires. If you see five wires, including one connected to a terminal labeled C, you’re almost certainly good to go. That C wire provides constant power to the thermostat, which smart models need for their Wi-Fi radios and displays.
If you don’t have a C wire, don’t panic. Most smart thermostats, including the Google Nest Thermostat, can work without one in many homes. They use a trick called power stealing—they sip a tiny bit of current through the heating or cooling circuit when it’s off. It’s not perfect. Some systems, especially heat pumps or zone-controlled setups, may still need a C wire or an add-on power adapter.
Here’s a quick compatibility rundown by system type:
- Gas or electric furnace (standard 24V): Almost always compatible. Check for a C wire.
- Heat pump with auxiliary heat: Needs O/B and AUX terminals. Most smart thermostats handle these, but you’ll need a C wire.
- Millivolt systems (wall heaters, old floor furnaces): Not compatible. These use low-voltage thermostats that don’t provide enough power.
- Two-wire heating-only systems: Often compatible with a power adapter, but check the manufacturer’s list first.
- High-voltage (line-voltage) systems, like baseboard heaters: Not compatible. You need a line-voltage smart thermostat instead.
If you’re unsure, most manufacturers have an online compatibility checker. Google has one for Nest. It takes two minutes and asks about your system type, wiring, and heating source. Use it.
Top Features That Actually Save Energy (and Which Are Gimmicks)
Smart thermostats come with a lot of bells and whistles. Some save real money. Some are just fun to show your friends. Here’s the breakdown.
Scheduling vs. Geofencing: Which Saves More?
Scheduling is the old-school approach. You tell the thermostat to drop to 62 degrees at 10 PM, warm to 68 at 6 AM, and so on. It works, but it’s static. If you come home early or stay out late, the schedule doesn’t adapt.
Geofencing uses your phone’s location. When you leave a radius around your home, the thermostat switches to an energy-saving mode. When you cross back in, it starts heating or cooling to your preferred temperature.
Which saves more? It depends on your routine. If you have a predictable 9-to-5 schedule, a good schedule beats geofencing. The thermostat can preheat or precool before you wake up, and it doesn’t rely on your phone’s battery or GPS accuracy.
If your schedule is erratic—shift work, frequent travel, kids with different school times—geofencing wins. It eliminates the biggest waste: heating an empty house all day because you forgot to adjust the schedule.
The best approach is a hybrid. Set a baseline schedule for weekdays, then enable geofencing as an override. That way, you get the best of both. Most modern thermostats do this automatically.
One honest caveat: geofencing can be annoying. If your phone loses GPS signal in a big box store, the thermostat might think you left and drop the temperature. Then you come home to a cold house. It took me a week to get used to the lag. The savings are real, but the convenience isn’t perfect.
The Power of Remote Sensors for Multi-Room Comfort
Here’s the problem with a single thermostat: it measures temperature in one spot. If that spot is a hallway, your bedrooms could be five degrees off. Remote sensors fix this.
You place small wireless sensors in different rooms. Then you tell the thermostat which sensor to prioritize at different times of day. For example, use the living room sensor during the day, the bedroom sensor at night.
The result is genuinely better comfort. No more waking up in a hot bedroom because the thermostat in the hallway thinks it’s fine. No more freezing home office because the sun heats the living room.
But there’s a catch. The thermostat can only control the whole HVAC system. If you have one furnace and one AC unit, it can’t heat one room while cooling another. It just uses the sensor to decide when to turn the system on or off. This means one room gets what it wants, and the others might be less comfortable.
If you have a zoned system—multiple thermostats controlling different areas—then remote sensors become even more powerful. Each zone can have its own sensor, and the system can truly balance temperatures across the house.
For most people, a couple of sensors in the rooms you use most is the sweet spot. You don’t need one in every room. Start with the bedroom and the main living area.
Smart Thermostats for Renters: No-Wiring Solutions
Renters have a legitimate problem: you can’t replace the thermostat. It’s either against the lease or you don’t want to deal with re-installing the old one when you move. But you still want the benefits of smart temperature control.
The first option is a smart AC controller. These plug into the wall and connect to your existing mini-split or window AC unit via infrared. You get phone control, scheduling, and even geofencing—without touching any wires. They cost $30–$80 and install in five minutes.
For window units, a smart plug works too. You plug the AC into a smart plug, then set rules like “turn off when I leave” or “turn on 30 minutes before I get home.” The downside is you can’t change the temperature setting, only turn the unit on or off. It’s a blunt tool, but it saves energy.
If you have baseboard heaters with line-voltage thermostats, there are line-voltage smart thermostats that are often easier to install—but they still require wiring. As a renter, your best bet is to ask your landlord. Many are open to installing a smart thermostat if you offer to cover the cost, because it adds value to the property. Just get written permission first.
Portable space heaters and fans can also be controlled with smart plugs, giving you room-level control without any permanent changes. Check out our guide on space heater temperature control if you’re going that route.
Installation: DIY vs. Professional—What You Need to Know
Installing a smart thermostat is a legitimate DIY project for most people. It’s not like rewiring a house. But it’s not zero-risk either.
Here’s what the job involves: turn off the power to your HVAC system at the breaker, remove the old thermostat, label the wires, connect them to the new base plate, snap on the display, and power everything back up. Most people finish in 30–60 minutes.
The tricky parts are the ones you can’t predict. The old wiring might be brittle. The labels might be faded. You might discover a missing C wire after you’ve already bought the new unit. That’s where the compatibility checker saves you.
If you’re comfortable with basic electrical work and you’ve verified compatibility, DIY is fine. You’ll save $100–$200 in installation fees.
When should you call a pro? If you have a heat pump with auxiliary heat, multiple zones, or an older system with non-standard wiring, pay an HVAC tech. They’ll also check that your system’s voltage is correct and that the new thermostat won’t cause short cycling. The $150 it costs is cheap insurance against a fried control board.
One more thing: take a photo of the old wiring before you disconnect anything. Future-you will be grateful.
Setting It Up for Maximum Efficiency: A Step-by-Step Guide
Once it’s installed, the real work begins. Here’s how to configure your smart thermostat for both comfort and savings.
Step 1: Set your baseline schedule. For a typical weekday, try 68°F when you’re awake and home, 62°F while sleeping, and 60°F during work hours. For cooling season, reverse it: 76°F when home, 82°F when away, 78°F at night. These are starting points—adjust to what feels right.
Step 2: Enable geofencing. Set the away mode to your away temperature (60°F in winter, 82°F in summer). Don’t make it too extreme, or you’ll wait forever for the house to recover.
Step 3: Set your recovery time. Most smart thermostats have a “preheat” or “precool” feature. It learns how long your system takes to change the temperature. Give it a week to learn, then check if it’s starting early enough.
Step 4: Place remote sensors. Put one in the bedroom and one in the main living area. Configure the schedule to prioritize the bedroom sensor at night and the living area during the day.
Step 5: Turn off the auto-away if you have pets. If you have a dog or cat at home during the day, an extreme setback will make them uncomfortable. Set the away temperature to something reasonable, like 65°F in winter and 80°F in summer.
Step 6: Check your energy reports monthly. Most smart thermostats show you how many hours your system ran and compare it to previous months. Use that data to adjust your schedule. If you see a spike, figure out what changed.
That’s it. The system will handle the rest. Review the settings once a season, especially when daylight saving time changes your routine.
Troubleshooting Common Issues (Wi-Fi Drops, Short Cycling, etc.)
No system is flawless. Here are the most common complaints and what to do about them.
Wi-Fi keeps dropping. The thermostat is usually far from your router, and its antenna is small. Solutions: move the router closer, add a Wi-Fi extender, or use a mesh network. Also check that the thermostat’s firmware is up to date.
Short cycling. This means your furnace or AC turns on and off every few minutes. It’s inefficient and wears out equipment. Causes include a thermostat setpoint too close to the current temperature, or a system that’s oversized for your home. Check your temperature differential setting—most smart thermostats let you set it to 1°F or 0.5°F. A larger differential reduces cycling.
The display is blank. Check the breaker and the C wire. If you’re using power stealing, the thermostat might not get enough power to run the display constantly. A C wire adapter often fixes this.
It’s not following the schedule. Check if geofencing is overriding your schedule. If your phone’s location is off, the thermostat might think you’re home when you’re not. Also, some thermostats have a “hold” mode that pauses the schedule until you manually cancel it.
The temperature reading is wrong. The thermostat might be near a heat source, like a window or a lamp. Move the thermostat or use a remote sensor in a better location.
HVAC system won’t turn on at all. Double-check your wiring connections. A loose wire is the most common cause. If you used the compatibility checker and the wiring looks right, call an HVAC tech.
The Verdict: Our Top Picks for Every Budget (and Home)
After all that, you want a recommendation. Here’s how I’d break it down.
For most homeowners, the Google Nest Thermostat is a strong choice. It’s ENERGY STAR certified, works without a C wire in many homes, and its learning features are genuinely useful. The app is straightforward, and it integrates with Google Assistant and Alexa. It’s not the cheapest option, but it’s not the most expensive either. Check the current price on Amazon.
If you have a heat pump or a zoned system, look for a thermostat that explicitly supports those configurations. Some models handle multi-stage heating and cooling better than others. Read the spec sheet carefully.
For renters, skip the hardwired thermostat entirely. A smart AC controller or a smart plug is the way to go.
Here’s a comparison table to help you decide between the main approaches:
| Approach | Upfront Cost | Installation | Best For | Energy Savings Potential |
|---|---|---|---|---|
| Smart thermostat (DIY install) | $80–$250 | 30–60 minutes, easy | Homeowners with standard 24V systems | 10–15% |
| Smart thermostat (pro install) | $200–$450 | 1–2 hours, professional | Heat pumps, zoned systems, older wiring | 10–15% |
| Smart AC controller | $30–$80 | 5 minutes, no wiring | Renters with mini-splits or window ACs | 5–10% |
| Smart plug + window AC | $15–$30 | 2 minutes | Renters, simple on/off control | 5–10% |
| Line-voltage smart thermostat | $50–$120 | Moderate, requires wiring | Baseboard heaters, electric radiant | 10–15% |
The common thread: any system that reduces runtime when you’re away or asleep will save money. The key is consistency. A smart thermostat that you override every day is just an expensive manual thermostat.
If you’re dealing with a single room that’s always too hot or too cold, a smart vent or a portable sensor might be a better investment than a whole-house system. For more on that, see our piece on smart systems for different rooms.
Frequently Asked Questions
Will a smart thermostat work with my old 2-wire heating system?
Maybe. Two-wire systems (just R and W) are common in older homes with simple gas furnaces. Most smart thermostats can handle this, but they need power. Without a C wire, they rely on power stealing, which can be unreliable. A common solution is a C-wire adapter that plugs into a nearby outlet. Check the manufacturer’s compatibility list before buying.
How much can I really save on my energy bills?
Most studies and ENERGY STAR data point to 10–15% savings on heating and cooling costs. For a typical home spending $1,200 a year, that’s $120–$180 annually. Your actual savings depend on how much you let the thermostat setback temperatures when you’re away or asleep.
Can I control a smart thermostat with my voice?
Yes, most major models work with Google Assistant or Amazon Alexa. You can say “set the temperature to 70” or “turn on eco mode.” It’s convenient, but voice control alone doesn’t save energy—it’s the scheduling and geofencing that do the heavy lifting.
What’s the difference between a smart thermostat and a programmable thermostat?
A programmable thermostat lets you set a fixed schedule. A smart thermostat adds connectivity: you can change settings from your phone, it learns your habits, it uses geofencing, and it gives you energy reports. The smart features make it easier to actually stick to a schedule, which is where the savings come from.
Do I need a C wire, and what happens if I don’t have one?
A C wire provides constant 24V power. Without it, a smart thermostat may struggle to power its Wi-Fi radio and display. Many models work without it in basic systems, but heat pumps and multi-zone systems often require it. If you don’t have a C wire, you can buy a C-wire adapter kit, which costs about $20–$30 and is a simple add-on.
What to Do Next: Your Action Plan
You’ve read the details. Here’s the short version to act on:
- Check your current thermostat’s wiring and system type before buying anything. Use the manufacturer’s online compatibility checker.
- Calculate your payback period using the formula above. If it’s under three years, a smart thermostat is a solid investment.
- Set a baseline schedule first, then enable geofencing. Don’t rely on just one or the other.
- Buy one or two remote sensors for the rooms that matter most—bedroom and living area.
- If you rent, use a smart AC controller or smart plug instead of a hardwired thermostat.
- Install it yourself if you’re comfortable; hire a pro for heat pumps, zoned systems, or unusual wiring.
- Review your energy reports monthly and tweak the schedule. Small adjustments add up.
Smart temperature control isn’t about buying the most expensive gadget. It’s about putting a few smart features to work consistently. Do that, and you’ll be more comfortable and spend less on energy. That’s the whole game.

HeaterGuides covers home heating, water heating and HVAC: how the equipment works, what it costs to run, and how to use it safely.