You know the drill. The thermostat in the hallway says 72°F, but your home office feels like a sauna and the bedroom is freezing. You fiddle with the dial, the furnace kicks on, and now the office is even hotter. Sound familiar?
This isn’t a quirk of your house. It’s a fundamental flaw in how most homes are heated and cooled. A single thermostat measures one spot and assumes the rest of the house matches. It rarely does. Sun exposure, window drafts, appliance heat, and room usage all create microclimates. Fixing this means moving from a single-point thermostat to a system that manages multiple zones or rooms independently.
This article walks through exactly how to do that. You’ll learn the three core components of a smart room control setup, how to choose between whole-home and single-room systems, what it actually costs, and how to install everything without calling an electrician. We’ll cover retrofitting older homes, renter-friendly tricks, and troubleshooting the common problems that drive people crazy. By the end, you’ll have a concrete plan to balance your home’s temperature room by room.
One of the easiest entry points into this world is the Amazon Smart Thermostat. It’s a straightforward swap for your existing thermostat, works with Alexa and Ring, and requires a C-wire. It won’t solve every room imbalance on its own, but it’s a solid foundation for building a smarter temperature control network.

Why One Thermostat Isn’t Enough for Your Home
Let’s get specific about why a single thermostat fails. Imagine a two-story house. Warm air rises, so the upstairs bedrooms are naturally warmer than the downstairs living room. Your thermostat sits in a hallway on the first floor. It reads 70°F and shuts off the furnace. Upstairs, it’s 76°F. You’re sleeping in a sweatbox while the furnace does nothing.
The reverse happens in summer. The upstairs gets direct afternoon sun. The AC runs until the downstairs hallway hits 72°F, but the bedrooms remain stuffy at 80°F. You crank the AC, the downstairs becomes an icebox, and the upstairs still isn’t comfortable.
This isn’t just a comfort issue. It’s a waste of energy. According to the U.S. Department of Energy, heating and cooling account for roughly 48% of the energy use in a typical American home. Every degree you overheat or overcool a room costs money. A single thermostat forces the entire HVAC system to run based on one room’s needs, which means it runs longer and harder than necessary.
Smart room temperature control systems solve this by distributing sensors and control points throughout the house. Instead of one thermometer, you have several. Instead of one on/off switch for the whole system, you can direct conditioned air where it’s needed most.
The 3 Core Components of a Smart Room Control System
Think of this as a nervous system for your home’s climate. You need a brain to make decisions, eyes to gather information, and muscles to take action. Here’s how that maps to hardware.
Smart Thermostats (The Brain)
The smart thermostat is the central hub. It receives data from sensors, runs your schedule, and controls the HVAC equipment. Modern units like the Amazon Smart Thermostat or models from Ecobee and Nest learn your habits, respond to voice commands, and provide energy reports.
Key features to look for:
- Geofencing: Uses your phone’s location to switch to away mode when you leave and resume heating or cooling when you’re close to home. This alone can cut energy use significantly.
- Scheduling: Set different temperatures for wake, sleep, and away times. A programmable thermostat does this, but a smart one makes it easier to adjust on the fly.
- Voice control: Works with Alexa, Google Assistant, or Siri. “Alexa, set the living room to 70 degrees” is genuinely useful when your hands are full.
- Energy reports: Monthly summaries show how long your system ran and compare it to previous months. This data helps you spot problems before they cost you.
One thing to check before buying: HVAC compatibility. Most smart thermostats work with conventional gas, electric, and heat pump systems, but some require a common wire (C-wire) for power. The Amazon Smart Thermostat requires one, so check your existing thermostat wiring first. If you only have two wires, you’ll need an adapter or a different model.
Remote Sensors (The Eyes)
Remote sensors are small wireless devices that measure temperature and sometimes occupancy in individual rooms. They report back to the thermostat, which uses that data to decide when to run the system.
Ecobee popularized this with its room sensors. You place one in the bedroom, one in the office, and one in the living room. The thermostat can average their readings or prioritize a specific sensor based on the time of day. For example, it uses the bedroom sensor at night and the office sensor during work hours.
Placement matters more than people think. A sensor on a windowsill in direct sunlight will read 10°F higher than the actual room temperature. A sensor behind a couch gets no airflow and reads stale air. Put sensors on interior walls, about five feet off the floor, away from vents, doors, and electronics. That’s the sweet spot for accurate readings.
Some systems, like the Amazon Smart Thermostat, use Alexa-enabled devices as temperature sensors. If you have an Echo Dot in a room, it can report the temperature and presence. That’s a clever way to add sensors without buying dedicated hardware.
Smart Vents and Boosters (The Muscles)
Here’s where the system actually changes airflow. Smart vents replace your existing floor or wall registers and contain a motorized damper plus a temperature sensor. They open and close based on commands from the thermostat or their own local readings.
Suppose your living room is roasting while the bedroom is cold. You close the living room vent and open the bedroom vent. The same HVAC system now pushes air where it’s needed. Over time, the system learns which vents to open for each time of day.
Vent boosters are a different tool. They’re inline fans that attach to a duct or sit in a register to increase airflow to a specific room. They’re useful for rooms at the end of long duct runs that never get enough air. The downside is noise. Some boosters sound like a small jet engine. Look for models with multiple speed settings and read reviews about sound levels.
A word of caution: don’t close too many vents at once. Closing more than 20-30% of your registers can increase static pressure in the ductwork, which reduces efficiency and can damage the blower motor. Smart vent systems track this and prevent you from over-closing, but if you’re manually adjusting, keep it moderate.
How to Choose Between Whole-Home vs. Single-Room Systems
You don’t need to automate every room. In fact, doing so is often overkill. The right approach depends on your home’s layout, your HVAC setup, and which rooms actually bother you.
Whole-home systems are for people with uneven temperatures throughout the house. They include a smart thermostat, multiple remote sensors, and smart vents on most registers. This gives you true room-by-room control. The thermostat averages all sensors or prioritizes specific ones, and the vents open and close to balance airflow.
This works best in homes with forced air heating and cooling. If you have radiators or baseboard heaters, smart vents won’t help. You’d need individual thermostatic radiator valves (TRVs) instead, which are a separate category.
Single-room solutions are for targeting one problem area. Maybe the nursery is always too cold, or your home office overheats in the afternoon. You can fix that with one smart vent or a portable sensor without overhauling the whole system.
Here’s a quick way to decide:
- If 2-3 rooms are consistently uncomfortable, start with a smart thermostat plus sensors in those rooms. See if that’s enough.
- If you have one room that’s dramatically different from the rest, try a single smart vent or booster first.
- If every room has a different problem, go whole-home from the start. Piecemeal fixes will cost more in the long run.
One more consideration: homes with zoned HVAC already have motorized dampers in the ductwork. If you have that, you don’t need smart vents. You just need a thermostat that can control multiple zones. Many smart thermostats support this, but you’ll need one per zone.
The Real Cost: Upfront Price vs. Monthly Energy Savings
Let’s talk money. A smart thermostat costs anywhere from $60 to $250. Remote sensors run $30 to $80 each. Smart vents are the expensive part, at $80 to $150 per vent. A full setup for a 2,000 square foot house with eight vents could easily run $800 to $1,500.
That’s a real investment. The question is whether it pays off.
According to the EPA, ENERGY STAR certified thermostats save an average of $90 per year on energy bills. That’s about 8% of typical heating and cooling costs. The Amazon Smart Thermostat is ENERGY STAR certified, so that figure applies. At that rate, a $100 thermostat pays for itself in just over a year.
Smart vents and sensors add more savings, but the math gets murkier. By closing vents in unused rooms, you can reduce the volume of conditioned air, which means the system runs less. Real-world reports suggest an additional 10-15% savings on top of the thermostat alone. But that depends heavily on your habits and home layout.
Consider the payback period. If your full system costs $1,200 and saves $200 per year, that’s a six-year payback. That’s a long time. But the comfort improvement is immediate. You’re not just saving money; you’re eliminating the cold bedroom and the hot office.
One hidden cost: installation. If you’re not comfortable with basic electrical work, hiring a pro to install a thermostat runs $100 to $200. Smart vent installation is usually DIY-friendly, since they just replace existing registers.
Also check for rebates. Many utility companies offer rebates for installing smart thermostats. The Amazon Smart Thermostat includes information about rebates from energy providers in your area after purchase. Those rebates can knock $25 to $100 off the upfront cost.
Installation Guide: DIY for Renters vs. Hardwired for Homeowners
Installation is where many people get stuck. You don’t want to mess with high-voltage wiring or risk damaging your HVAC system. Here’s how to approach it based on your situation.
For Renters: Non-Permanent Options
You can still get room-by-room control without touching the existing thermostat. Here are your options:
- Portable smart heaters and AC units: Plug-in units with their own thermostats and Wi-Fi. Place one in the problem room and set it to maintain the temperature you want. This is the simplest rental-friendly fix.
- Smart plugs for window units: If you have a window AC or space heater, plug it into a smart plug. Use the app to schedule on/off times. It’s crude but effective.
- Battery-powered smart vents: Some smart vents are battery-operated and don’t require wiring. They replace your existing register and just work. The downside is battery life; expect to change batteries every few months.
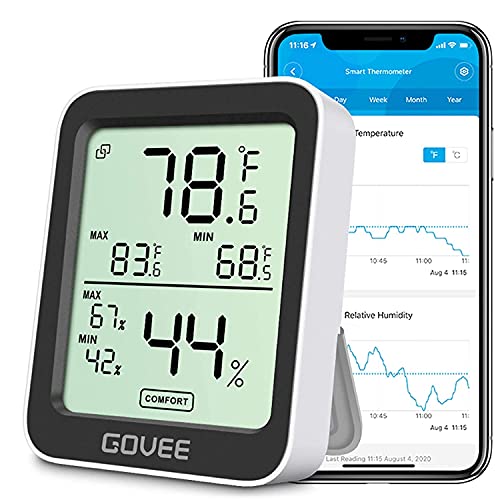
- Portable temperature sensors: Devices like the SensorPush or Govee WiFi thermometer can monitor a room and send alerts to your phone. They don’t control anything directly, but they tell you when to adjust a plug-in heater.
The key is avoiding anything that requires rewiring. You can return the apartment to its original state when you move out.
For Homeowners: Hardwired Installation
If you own your home, you have more freedom. Here’s the step-by-step for a typical thermostat swap:
- Turn off power to your HVAC system at the breaker. This is non-negotiable. You’re working with 24V wiring, but it’s better to be safe.
- Remove the old thermostat faceplate and take a photo of the wiring. Label each wire with the terminal letter (R, W, Y, G, C).
- Check for a C-wire. If you don’t have one, you’ll need to use the included adapter or purchase a C-wire kit. The Amazon Smart Thermostat requires a C-wire, so this step is critical.
- Mount the new base plate and connect the wires to the matching terminals. Follow the manufacturer’s diagram exactly.
- Attach the faceplate, restore power, and run the setup wizard on the thermostat or in the app.
If you see wires that don’t match any terminal or you’re unsure about anything, stop and call an HVAC technician. A miswired thermostat can short out your system’s control board, which is a costly repair.
Smart vent installation is easier. Unscrew the old register, slide the smart vent into place, and secure it. Most connect to Wi-Fi and pair with the manufacturer’s app. No electrical work needed.
Troubleshooting: Fixing Sensor Placement and Connectivity Issues
Smart systems aren’t perfect. You’ll run into issues, and most of them are fixable without a technician. Here are the common ones and how to solve them.
Problem: Sensor reads the wrong temperature.
Check placement first. Is it near a heat source, in direct sunlight, or behind furniture? Move it to an interior wall, away from vents and electronics. Wait an hour and compare readings. A sensor in a drafty spot will swing wildly.
Problem: Thermostat and sensor don’t communicate.
Range is the usual culprit. Most sensors use Zigbee or proprietary RF and have a range of 50-100 feet. Walls and metal ducts block signals. Try moving the sensor closer to the thermostat. If that works, you may need a range extender or a mesh network like Zigbee.
Problem: Wi-Fi dead zones.
Smart thermostats need solid Wi-Fi. If yours is far from the router, the connection drops and you lose remote control. Options: move the router, add a Wi-Fi extender, or use a mesh Wi-Fi system. Some thermostats also support Ethernet via a separate adapter, but that’s rare.
Problem: System runs too long or short-cycles.
This is often a sensor issue. If the thermostat is averaging sensors and one is in a hot room, the system will run longer to cool that room, freezing others. Reconfigure which sensors are active at different times of day. Use the bedroom sensor at night and the living room sensor during the day.
Problem: Smart vents make noise.
Some buzzing or clicking is normal when dampers open and close. But a constant hum usually means the vent is struggling against high static pressure. Check if the vent is partially blocked or if the filter is dirty. A clean filter fixes many airflow issues.
Problem: The app says “offline.”
Power-cycle the thermostat by removing it from the base plate for 30 seconds, then reattaching it. If that doesn’t work, check your router’s device list to see if the thermostat is connected. You may need to re-enter your Wi-Fi password.
One general tip: keep your HVAC filters clean. A clogged filter restricts airflow, which makes the system run longer and confuses the sensors. Change filters every 1-3 months depending on usage and pets.
Top 5 Systems Ranked by Room Control Accuracy
Not all systems are created equal when it comes to room-by-room control. Here’s a comparison of the main approaches, ranked by how accurately they control individual room temperatures.
| System | Room Control Accuracy | Best For | Key Limitation |
|---|---|---|---|
| Ecobee + Room Sensors | High | Homes with forced air; balancing temps across floors | Only controls the main HVAC, not individual vents |
| Flair + Smart Vents | Very High | Room-by-room damper control with existing HVAC | Expensive; requires many vents for full coverage |
| Amazon Smart Thermostat + Alexa Sensors | Medium-High | Alexa households; using Echo devices as sensors | Requires C-wire; limited to Alexa ecosystem |
| Nest + Temperature Sensors | Medium | Simple scheduling and learning; single sensor priority | Only one sensor active at a time, no averaging |
| Smart Vents Only (e.g., Keen) | Variable | Targeting one or two problem rooms | No central brain; each vent acts independently |
The Flair system gets the top spot because it combines a smart thermostat with vent control, giving you actual airflow management. Ecobee is a close second for its sophisticated sensor averaging and occupancy detection. The Amazon Smart Thermostat is a great value, but its room control depends on having Echo devices in the right places.
For most people, I’d recommend starting with a smart thermostat plus sensors before investing in smart vents. You might find that averaging the sensors is enough to fix your comfort issues. Vents add complexity and cost.
Future-Proofing: Integrating with Alexa, Google Home, and HomeKit
Your smart thermostat shouldn’t be an island. It should work with the rest of your smart home. The big three ecosystems are Alexa, Google Home, and Apple HomeKit.
Alexa: The Amazon Smart Thermostat is native to this ecosystem. It works with Echo devices as temperature sensors and presence detectors. You can create routines like “Alexa, good night” to lower the temperature and lock the doors. Ring integration means your security cameras can trigger temperature changes when you arrive or leave.
Google Home: Nest thermostats are the obvious choice here. They integrate with Google Assistant for voice control and can be part of broader routines. Google Home also supports some third-party sensors, but the ecosystem is less seamless than Alexa’s.
HomeKit: Ecobee is the standard for HomeKit users. It supports Siri voice commands, HomeKit automations, and secure video for the camera-equipped models. HomeKit’s greatest strength is local control; your thermostat still works if the internet goes down.
When choosing a system, pick your ecosystem first, then choose compatible hardware. Mixing ecosystems is possible using something like Home Assistant or IFTTT, but it adds complexity. Most people are better off staying within one ecosystem.
One integration that’s genuinely useful: geofencing. Both Alexa and Google Home can use your phone’s location to trigger away mode. This saves energy without you thinking about it. Just remember to enable location permissions for the app, or it won’t work.
Another future-proofing tip: look for Matter support. Matter is a new smart home standard that promises cross-ecosystem compatibility. The Amazon Smart Thermostat supports Matter, which means it can work with Google Home and Apple HomeKit through a Matter controller. This is still rolling out, but it’s the direction the industry is heading.
Final Verdict: The Best Setup for Your Budget and Home Size
Let’s cut through the options and give you a concrete recommendation based on your situation.
Budget-conscious, single problem room: Buy a smart vent for that room and call it done. You’ll spend around $100 and fix the immediate issue. No thermostat swap needed.
Renter, want whole-home balance: Use a smart thermostat that you can swap back out, plus portable sensors and smart plugs for space heaters or AC units. You won’t have perfect control, but you’ll get 80% of the benefit.
Homeowner, forced air, 1-2 problem rooms: Start with a smart thermostat like the Amazon Smart Thermostat and add remote sensors to the problem rooms. Set the schedule to prioritize those rooms at the right times. This is the sweet spot of cost and effectiveness.
Homeowner, multiple problem rooms: Go with a full system: smart thermostat, sensors in every major room, and smart vents on at least 50% of your registers. Expect to spend $800-$1,500, but the comfort improvement is dramatic.
Older home with radiators or baseboard heat: Smart thermostats won’t help with room control. Look for smart thermostatic radiator valves (TRVs) instead. These replace the manual valve on each radiator and allow individual room temperature control.
The common thread: start small, measure results, and expand. You don’t need to automate everything at once. Buy one smart vent or one sensor, see how it changes your comfort, and build from there.
For most people, the best first step is replacing your old thermostat with a smart one. It’s the foundation for everything else. The Amazon Smart Thermostat is a solid choice if you’re in the Alexa ecosystem. Check the current price on Amazon and see if it qualifies for a rebate in your area.
Frequently Asked Questions
Will smart room controls work with my heat pump?
Yes, most smart thermostats support heat pumps, including the Amazon Smart Thermostat. You’ll need to set the thermostat to the correct configuration during setup. Heat pumps require a special terminal (O/B) for the reversing valve. Some systems also need auxiliary heat control. Check the compatibility list before buying. If you have a heat pump with a backup furnace, look for a thermostat that handles dual-fuel setups.
Can I use smart vents with a ductless mini-split system?
No. Smart vents are designed for central forced-air systems with ductwork. Mini-splits are ductless by design, so there are no registers to replace. Instead, each mini-split head unit has its own thermostat and controls. You can use smart thermostats made specifically for mini-splits, or use a smart IR remote to control the units. It’s a different approach, but you can still schedule and control each room independently.
How many remote sensors do I actually need?
You need one per room you want to control, plus one for the main living area. Most thermostats support up to 32 sensors, but you don’t need that many. Start with the rooms that are most uncomfortable. If you have a two-story house, put one upstairs and one downstairs. If only the bedroom and office are issues, just get two. Adding sensors to rooms that are already comfortable adds complexity without benefit.
Will closing smart vents damage my HVAC system?
Closing too many vents can increase static pressure and reduce airflow, which stresses the blower motor. Smart vent systems monitor this and prevent you from closing more than a safe percentage. If you’re using manual vents, keep at least 70% of them open. Never close vents in rooms with return air grilles, as that can starve the system of return air. Modern smart systems handle this automatically, so it’s less of a concern if you buy a complete kit.
Do smart thermostats work without a C-wire?
Some do, some don’t. The Amazon Smart Thermostat requires a C-wire for power. Other models, like the Nest Thermostat, can draw power from the existing wires using a trickle charge, but this doesn’t work with all systems. If you don’t have a C-wire, you have three options: run a new wire, use a power extender kit, or choose a thermostat that doesn’t require one. Check your existing wiring before buying to avoid disappointment.
What to Do Next
- Check your current thermostat wiring to see if you have a C-wire. This determines which smart thermostats you can buy.
- Identify your 2-3 most uncomfortable rooms. Focus your sensor and vent purchases there first.
- Pick your smart home ecosystem (Alexa, Google, or HomeKit) before buying hardware. Stay within one ecosystem for simplicity.
- Look up rebates from your utility company for smart thermostats. They can offset 20-50% of the cost.
- Start with a smart thermostat and one or two sensors. Measure the impact for a month before adding smart vents.
- Keep your HVAC filters clean. A dirty filter undermines every smart control you add.
- If you’re a renter, stick to plug-in devices and battery-powered vents. Save the hardwired upgrades for a home you own.
Smart room temperature control isn’t about gadgets. It’s about making your home comfortable without wasting energy. The technology has matured to the point where it’s affordable and reliable. Start with one change this week, and you’ll notice the difference by next month.
For more depth on building a complete system, check out this guide on multi-zone temperature control and how to integrate smart systems into your existing setup.

I am a mechanical engineer and love doing research on different home and outdoor heating options. When I am not working, I love spending time with my family and friends. I also enjoy blogging about my findings and helping others to find the best heating options for their needs.
Related guides

Smart Home Systems: Ultimate Guide to Temperature Device Compatibility
Smart systems like Amazon Alexa and Google Assistant seamlessly integrate with various home temperature devices for optimal climate…
How Smart Temperature Systems Work Remotely (And Why You Need One)
Smart systems manage temperature remotely using IoT sensors and algorithms to optimize heating and cooling for energy efficiency…
Smart Systems Revolutionize Automated Temperature Control
Smart systems with automated temperature adjustment enhance energy efficiency, comfort, and convenience by intelligently managing heating and cooling…