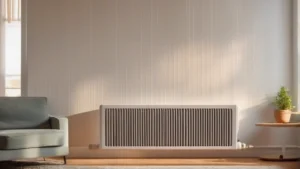
Installing Baseboard Heaters With Thermostat
On this page 6 sections
People often think baseboard heat is just a matter of screwing a long box to the wall. That’s only half true: the cabinet is simple, but the breaker size, wire gauge and clearance rules decide whether the job is safe.
Basements add one more wrinkle. Concrete floors, damp walls and short ceiling runs leave less room for sloppy placement, so the layout has to be right before the first screw goes in.
Installing Baseboard Heating In A Basement
Baseboard heating installation in a basement is usually a 4–8 hour DIY job when you’re replacing one heater and the existing wiring is suitable; a new circuit or thermostat wiring can change the scope. Installing electric baseboard heat means mounting the heater to solid framing, following its clearance and wiring instructions, then testing it—if you’re unsure about the circuit, stop and call an electrician.
For how to install an electric baseboard heater, start by checking the heater’s manual and nameplate against the existing circuit. The heater can mount to wood studs or approved blocking; installing a baseboard heater on plywood alone is acceptable only if the manual allows it and the fasteners still reach solid framing. The installation guide for baseboard heaters can help you check the mounting sequence for your model.
A replacement cover may help if the old front is rusty or bent, but measure the heater opening and confirm the cover dimensions match before ordering.

Installing Baseboard Heaters With Thermostat

Installing baseboard heaters with a thermostat means choosing between a heater-mounted control and a wall thermostat, then matching the control and wiring to the heater. A wall thermostat gives you better room control when the layout is uneven or furniture blocks the heater’s built-in sensor.
For installing a thermostat for electric baseboard heat, placement matters: put the wall control where it can sense the room’s normal temperature, not behind a door, curtain or furniture. Line-voltage thermostat wiring must follow the heater’s voltage, so a 240 V heater needs a matching 240 V control path. Use the control and heater diagrams; don’t guess at wire connections.
Reusing the same connection point is sensible only if the old cable, breaker and circuit load all meet the new heater’s nameplate requirements. A heater that fits the old spot can still draw more current than the existing circuit can safely supply; have an electrician verify the circuit if you can’t confirm the ratings.
| Choice | What to check |
|---|---|
| Factory-installed thermostat | Simpler wiring; less independent control of a colder basement zone. |
| Wall thermostat | Better room control; verify thermostat voltage, wiring path and placement. |
| Same connection point | Reuse only when the cable, breaker and circuit load match the new heater’s nameplate. |
If you’re comparing control types before buying, the guide to electric baseboard heaters with thermostat can help you narrow down the options. For wiring details, use a thermostat-specific installation guide for your exact model rather than adapting a diagram from a different heater.
Baseboard Heater Installation Mistakes That Cause Damage
Good electric baseboard installation tips start with the heater’s listed clearances, a dry mounting surface and room for air to move. Proper baseboard heat register installation means keeping the heater unobstructed and accessible; the manual’s required distance from flooring and trim is the rule, not a guess.
Check the baseboard heater installation surface for moisture before drilling: a damp wall can rust the cover and corrode fasteners faster than an upstairs room. Mounting too close to flooring or trim can restrict airflow or cause scorching; screws that miss framing may leave the unit loose.
| Check | Correct install | Bad install |
|---|---|---|
| Clearance | Meets the manual’s floor and trim distances | Crowded by flooring or trim |
| Airflow | Front and top remain open | Storage blocks the heater |
| Wiring access | Cable is routed without pinching | Cable is trapped behind the cabinet |
| Service access | Cover and connections can be reached | Heater is boxed in or obstructed |
Can electric baseboard heats be installed vertically? Usually, no: vertical mounting isn’t the default for a baseboard unit. Use only orientations the manufacturer explicitly allows in the manual.
If the existing cover is rusty, measure the heater and backplate before choosing a replacement; a cover won’t fix a damp wall or unsafe mounting.
 Winter Heating Bill CutterSee what every heater in your home really costs, heat the rooms you use, and cut the waste in 30 days.Cost-per-hour tables for every heaterThermostat schedule and draft-proofing planRunning-cost and bill calculator (Excel)
Permits And Licensed Pros For Basement Heat
A licensed electrician usually installs baseboard heaters when the job needs a new circuit, panel work, load calculations or hardwired thermostat wiring. Call one if the existing breaker doesn’t already match the heater; many places require a permit for new 240 V fixed heat, and local code may require an inspection.
How hard is it to install a baseboard heater? A like-for-like replacement on an existing branch circuit can be manageable for a homeowner who knows how to disconnect power, confirm wire size and follow the heater listing exactly. Can you self install baseboard heaters? Often, yes, for that limited replacement—but electric baseboard heaters DIY install is a poor fit if you’re unsure about any electrical connection or local permit rules.
Before You Buy Or Call A Technician
Before buying parts for baseboard heater installation and removal, confirm the existing unit’s dimensions and electrical details; electric baseboard heater installation can be DIY only when the replacement matches a suitable existing setup. An installation diagram can help you identify the heater, backplate and wiring, but it doesn’t confirm that your circuit is safe.
If the front is rusty or bent, a replacement cover may save you from replacing the heating element—but a 6-foot cover only fits when the element and backplate measurements match the product dimensions. Product 1 includes two 3-foot sections and end caps; its listed fit requires 7½–9½ inches from floor to backboard top and 5–6¾ inches from the element bottom to backplate top.
Stop and call a licensed electrician if the breaker, wire gauge or circuit purpose is unclear; don’t guess from the old heater’s appearance.