To troubleshoot a faulty thermometer, first check the battery if it’s digital, ensure the probe is clean and properly inserted for accurate readings, and test it against a known temperature source for calibration, adjusting as necessary or replacing it if it consistently provides incorrect readings.
A faulty thermometer can lead to inaccurate readings, safety risks, and equipment damage. Whether you’re using a digital probe, mercury thermometer, or industrial sensor, these troubleshooting steps will help you diagnose and fix common issues.
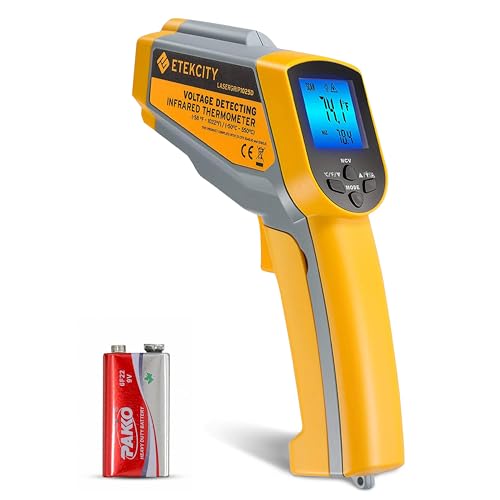
Etekcity
Etekcity Infrared Thermometer 1025D (Not for Human)…
NOT FOR HUMAN: Temperature readings from this device are inanimate objects. The measured temperature for humans or animals will not be correct, 9V battery included. Class 2 laser, optical power 0.3-0.49Mw
See on Amazon
1. Check for Physical Damage
Before attempting any repairs, inspect your thermometer for visible damage:
- Cracks in glass mercury thermometers
- Bent or corroded probe tips
- Loose connections in digital models
- Foggy or broken display screens
For mercury thermometers with separated columns, try these fixes:
Freezer Method
Place the thermometer in a freezer until the mercury returns to the bulb. This works best for minor separations.
Controlled Heating
Use a hair dryer on warm setting to gently heat the bulb until mercury rejoins. Cool gradually to room temperature.

2. Verify Power Sources
Digital thermometers often fail due to power issues:
| Issue | Solution |
|---|---|
| Dead batteries | Replace with fresh batteries of correct type |
| Corroded contacts | Clean with isopropyl alcohol and cotton swab |
| Loose wiring | Check connections in probe cables and terminals |
For industrial applications, ensure proper voltage supply to infrared heating systems and other equipment using temperature sensors.
3. Calibrate the Thermometer
Calibration fixes most accuracy issues. Follow these steps:
- Prepare ice water (32°F/0°C) and boiling water (212°F/100°C at sea level)
- Test thermometer in both environments
- Adjust calibration screw or use digital offset function
- Repeat until readings match reference temperatures
For industrial sensors, consult manufacturer guidelines on proper calibration procedures specific to your equipment.
4. Test Probe Placement
Incorrect placement causes false readings:
- Ensure full immersion in liquids (minimum 2 inches for most probes)
- Avoid contact with container walls or bottoms
- Keep away from heat sources in air measurements
- Allow sufficient stabilization time (30+ seconds for digital)
5. Diagnose Sensor Failures
Industrial temperature sensors show specific failure patterns:
Thermocouples
Check for open circuits and proper polarity. Incorrect wiring causes negative readings.
RTDs (Resistance Temperature Detectors)
Measure resistance at known temperatures. Significant deviations indicate sensor failure.
Thermistors
Test resistance curve against manufacturer specifications. Non-linear responses signal degradation.
For complex heating systems, reference our guide on troubleshooting propane heaters which often incorporate multiple temperature sensors.
When to Replace Your Thermometer
Consider replacement if:
- Calibration fails repeatedly
- Readings fluctuate unpredictably
- Physical damage affects operation
- Repair costs exceed 50% of new unit price
For critical applications, maintain backup thermometers and follow manufacturer-recommended replacement schedules. The National Institute of Standards and Technology provides calibration standards for reference.
Proper maintenance extends thermometer life. Store in protective cases, avoid extreme temperatures when not in use, and clean probes according to manufacturer instructions. For specialized applications like medical or food service, follow industry-specific maintenance protocols.
Related pick: Check today's price on Amazon

