Skip to content

Expert home heating guides, reviews & repairs

Heater GuidesHeaterGuides
Underfloor Heating

How To Install Hydronic Heating Under Floor In A Renovation

You’ve gutted the bathroom, ripped up the old carpet, and now you’re staring at exposed floor joists. The thought crosses your mind: this is the perfect time to put in radiant heat. But then the doubt creeps in. Won’t it be a nightmare to thread tubing through existing wiring, plumbing, and ductwork? Isn’t it expensive? Will my old floors even work?

The good news is that retrofitting hydronic radiant heat is very doable, even in a finished house. It’s not the same as new construction, though. You can’t just pour a slab. You have to work with what’s there, and that means making smart choices about which installation method fits your situation. This article walks you through the two main retrofit approaches, gives you a step-by-step install guide for each, and covers the real-world problems you’ll hit along the way.

By the end, you’ll know exactly how to install hydronic heating under floor in a renovation, what tools and materials you need, and how to avoid the costly mistakes that plague first-timers.

how to install hydronic heating under floor in a renovation

Assessing Your Renovation: Is Hydronic Retrofit Right for You?

Before you buy a single fitting, take a hard look at your floor assembly and your heating source. Hydronic radiant heat runs on warm water, typically 110-130°F for retrofit systems, not the 180°F that standard boilers push out. That means you need a mixing valve or a condensing boiler to temper the water. If you’re keeping an old cast-iron boiler, factor in the cost of a mixing station.

Next, check your joist bays. Are they open and accessible from below? Are they deep enough? You need at least 6 inches of depth for staple-up installations, and ideally more. For the plywood plate method, you work from above, so joist depth matters less, but you lose a little ceiling height below.

Finally, consider your floor covering. Tile and stone are excellent conductors. Hardwood works if the water temperature stays under 120°F. Thick carpet with padding is a thermal nightmare and will make the system sluggish and inefficient. If you have carpet, rip it out or plan to run the heat at higher temps with poor results.

One more thing: slab-on-grade homes with no basement or crawlspace are a different beast. You can install hydronic heating under floor in a renovation directly over the concrete using a floating floor system with aluminum plates, but that’s a separate topic. This guide assumes you have joist-framed floors with access from below or above.

The Two Main Retrofit Methods: Staple-Up vs Plywood Plates

Every retrofit job boils down to one of two approaches. You either attach the PEX tubing to the underside of the subfloor (staple-up), or you sandwich it between layers of plywood with aluminum heat transfer plates (plywood method). Each has trade-offs, and the right choice depends on your access and your flooring.

Staple-Up: Best for Open Joists and High Thermal Mass

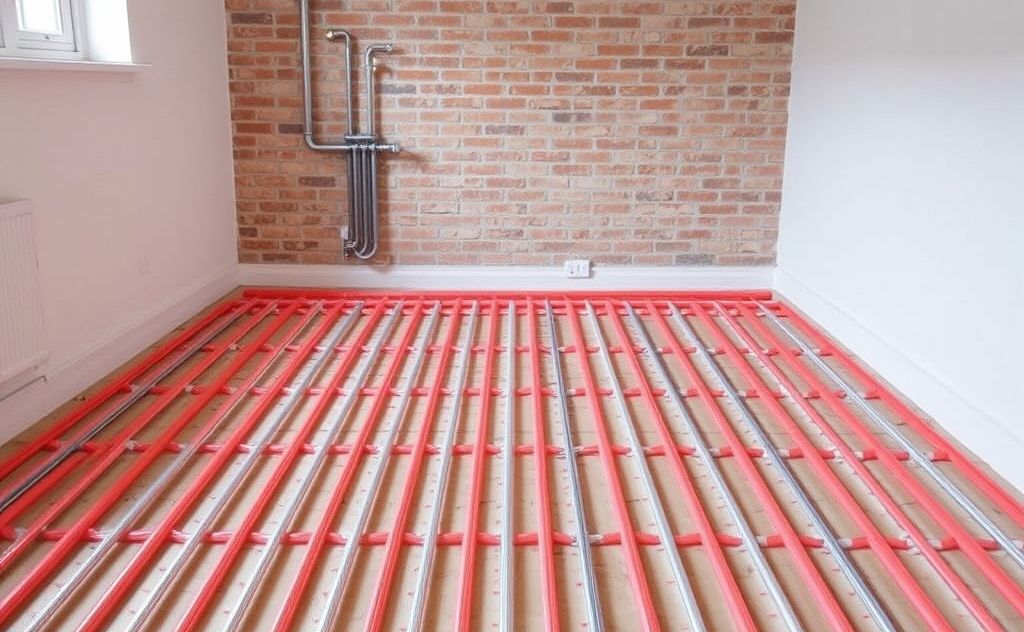
Staple-up is the classic retrofit. You work from the basement or crawlspace, running 1/2-inch PEX tubing across the joist bays and stapling it directly to the underside of the subfloor. Aluminum heat transfer plates are installed over the tubing to spread heat across the floor surface.

This method shines when you have full access to the joists and don’t mind crawling around. It’s also the least expensive option in terms of materials. You’re just buying tubing, plates, staples, and insulation.

The downside is thermal response time. With no thermal mass above the tubing, the floor heats up slowly and cools down slowly. You’ll wait an hour or more for a room to feel warm. It’s fine for a whole-home system that runs constantly, but it’s not great for a bathroom you want to heat up quickly in the morning.

Plywood and Plates: The Superior Choice for Tight Spaces

The plywood method involves cutting channels in a layer of plywood, laying aluminum plates in those channels, and then running PEX through the plates. You screw this assembly to the top of the joists, then put your finished floor on top.

This approach gives you better heat output because the plates are in direct contact with the finished floor. It also works when you have no access from below. You can install it from above in a second-story renovation without touching the ceiling below.

It costs more and takes more labor. You’re buying plywood, plates, and spending hours cutting channels. But the thermal performance is noticeably better, and it’s the go-to choice for tile floors where heat transfer is critical.

Factor Staple-Up Plywood Plate
Access needed Below (basement/crawlspace) Above (floor level)
Joist depth required 6 inches minimum None (works on any depth)
Heat output Moderate (slower response) High (faster response)
Material cost per sq ft $1.50 – $3.00 $3.00 – $5.00
Labor intensity Low to moderate High
Best for Open joists, low budget Tile, tight spaces, no below access
Floor height added None 3/4 inch

Here’s a quick decision rule. If you have open joists and a basement you’re willing to spend time in, staple-up is hard to beat. If you’re renovating a second floor, have a low crawlspace, or are putting down tile, go with the plywood method.

Step-by-Step Installation: From Below (Staple-Up Method)

This is the method most people picture when they think about retrofitting. It’s messy, dusty, and requires patience, but the result is a warm floor that runs efficiently.

Pre-Planning the PEX Loop Layout

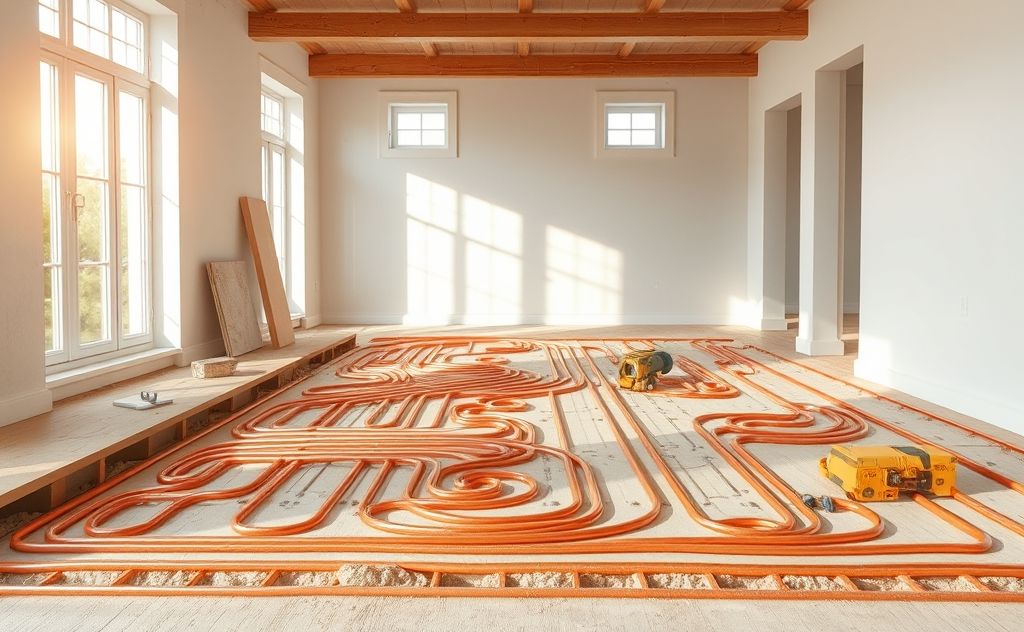
Start by measuring each room and drawing a loop layout. Keep each loop under 300 feet for 1/2-inch PEX. Longer loops create excessive pressure drop and uneven heat. Figure out how many loops you need based on the room size. A 12×12 room needs about 100 feet of tubing, running back and forth across the joists.

Use a serpentine pattern that runs perpendicular to the joists. This means you’ll be drilling holes through the joists to pass the tubing from bay to bay. Mark the center of each bay and drill 3/4-inch holes for 1/2-inch PEX. That gives you enough clearance for expansion and contraction.

Drilling and Navigating Obstructions

Here’s where the real work starts. Every joist bay will have something in the way: electrical wires, plumbing pipes, or ductwork. You have to work around these, not through them.

For wires, you can usually push them to one side of the bay with a fish tape. For pipes, you’ll need to route the PEX below them or drill a separate hole above. Ductwork is the worst. If a duct runs through the middle of a bay, you may need to split your loop and run it in two sections, rejoining them with a coupling.

Pro tip: use a right-angle drill attachment for drilling joists in tight crawlspaces. It saves your wrists and lets you work in spots where a standard drill won’t fit.

Securing Tubing and Installing Heat Transfer Plates

Once the holes are drilled, unroll the PEX and feed it through. Don’t kink it. If you do, cut out the kink and use a coupling to join the sections. Kinked PEX is a permanent restriction and will cause uneven flow.

Staple the tubing to the underside of the subfloor every 12-16 inches using plastic staples designed for PEX. Then snap in the aluminum heat transfer plates over the tubing. These plates are the key to getting heat into the floor. Without them, the heat just warms the air in the joist bay and does nothing useful.

After the plates are in, install fiberglass insulation batts below the tubing. The insulation should be at least R-11, and it must be held in place with wire or twine. This keeps the heat going up into the floor instead of down into your basement.

Step-by-Step Installation: From Above (Plywood Method)

This method is more involved but gives superior results. It’s the right choice when you’re already tearing up the subfloor or when you have no access below.

Laying the Plywood Subfloor Layer

Start by removing the old subfloor down to the joists. Screw down a layer of 3/4-inch plywood, leaving a 1/8-inch gap between sheets for expansion. This becomes your new subfloor.

On top of that, lay a second layer of 1/2-inch plywood. Use a router with a 3/4-inch straight bit to cut channels in this top layer, spaced 6-8 inches apart. The channels should be deep enough to seat the aluminum plates flush with the plywood surface.

Routing Tubing and Ensuring Proper Contact

Set the aluminum plates into the channels, then lay the PEX tubing into the plates. The plates have a groove that grips the tubing and holds it in place. Make sure the tubing is fully seated in the plate. A poor fit means poor heat transfer, and you’ll get cold spots.

Run the tubing in a serpentine pattern, keeping loops under 300 feet. After all the tubing is laid, connect the loops to the manifold at the wall. Then you can install your finished floor directly on top. Tile thinset bonds well to the plywood and plates. Hardwood can be nailed or glued, but check the manufacturer’s recommendations for floor temperature limits.

Critical Retrofit Considerations: Insulation, Zoning, and Flooring

Three things make or break a retrofit system. First, insulation. Without R-11 or better below the tubing, you’re heating your crawlspace, not your floor. This is non-negotiable.

Second, zoning. A single manifold with multiple loops is fine for one room, but if you’re heating multiple rooms, you want zone valves or multiple manifolds. Each room gets its own thermostat. This lets you heat only the rooms you’re using, which saves energy and money. Check your local utility for rebates on zoned systems; many offer $100-300 per zone.

Third, flooring. Tile is the best conductor. Stone is even better but expensive. Engineered hardwood works if you keep the water temperature under 120°F. Solid hardwood is risky due to moisture and temperature swings. Carpet is the enemy. If you must have carpet, use a low-pile carpet with a thermal pad rated for radiant heat.

Calculating Heat Loss and Water Temperature

You can’t just guess how many loops you need. You have to do a heat loss calculation. For a retrofit, this is simpler than for new construction, but it’s still essential. Measure each room’s square footage, window area, and insulation levels. Use an online heat loss calculator or a simple rule of thumb: 10-15 BTU per square foot for a well-insulated room, 20-25 for an older, drafty one.

Multiply the room’s square footage by the BTU factor to get total heat load. Divide that by 10,000 BTU/hr, which is roughly what a 300-foot loop of 1/2-inch PEX delivers at 120°F water temperature. That gives you the number of loops you need.

For example, a 200 sq ft living room with good insulation needs about 2,500 BTU/hr. That’s one loop. A 400 sq ft great room with old windows needs 8,000 BTU/hr, so you’d run three loops.

Water temperature matters. Lower water temps (110-120°F) are more efficient and safer for hardwood floors. Higher temps (130-140°F) give faster heat-up times but waste energy. Always use a mixing valve to keep the supply temperature within your floor’s limits. For more on sizing, see this sizing guide.

Troubleshooting Common Retrofit Problems

Even careful installers hit snags. Here are the most common issues and how to fix them.

Air locks. After filling the system, air gets trapped in the highest points of the loops. This causes gurgling and cold spots. Fix it by purging each loop individually with a purge pump. Open one loop at a time and force water through until no bubbles come out. This is the single most important step after filling. A proper purge procedure will save you hours of frustration.

Thermal lag. The floor takes forever to warm up. This usually means the water temperature is too low or the tubing is too far apart. Check your mixing valve setting. If it’s at 110°F, bump it to 120°F. If the tubing is spaced at 12 inches, you could add more loops to reduce spacing to 6 inches, but that’s a big job. Usually, a water temp increase solves it.

Uneven heat. Some spots are warm, others cold. This is almost always poor contact between the tubing and the subfloor or plates. In staple-up systems, check that the plates are fully seated over the tubing. In plywood systems, verify the tubing is sitting in the plate groove, not on top of it.

Boiler short-cycling. The boiler turns on and off rapidly. This happens when the system has too little water volume. Add a buffer tank or increase the system’s water volume by adding more tubing. A simpler fix is to adjust the boiler’s differential setting.

Cost Breakdown and Rebates

Let’s talk dollars. For a staple-up system, expect to pay $1.50-3.00 per square foot for materials. That includes PEX, plates, staples, insulation, and manifold. Labor, if you hire someone, adds another $2-4 per square foot. A DIY install is very feasible, so you can save the labor cost.

The plywood method runs $3-5 per square foot for materials, plus more labor. The extra plywood and router time add up. But you get better performance, so it’s worth it in the right situation.

Don’t forget the boiler and mixing valve. If you already have a boiler, you’ll need a mixing valve kit, which costs $200-400. If you need a new boiler, budget $3,000-6,000 for a condensing model. That’s the biggest cost in the whole project.

Check for rebates. Many utilities and state energy programs offer incentives for hydronic radiant heat, especially if you’re upgrading from electric resistance heat. Some offer $500-1,500 per system. Search your local utility’s website or the DSIRE database.

Safety and Purging Basics

Working under a floor means drilling, cutting, and crawling. Wear safety glasses and a dust mask. Use a stud finder to avoid drilling into wires or pipes. If you’re working in a crawlspace, make sure it’s dry and well-ventilated. A headlamp is worth its weight in gold.

When you’re done installing, you must purge the system before turning on the boiler. This is not optional. Air in the lines causes corrosion, noise, and uneven heat. Follow a step-by-step safety guide to avoid common pitfalls. Then purge each loop until a steady stream of water flows without bubbles.

What to Do Next

  • Measure your joist depth and access before choosing a method.
  • Do a heat loss calculation for each room. Don’t skip this.
  • Buy quality PEX (PEX-A or PEX-B) and aluminum plates. Cheap plates waste heat.
  • Insulate below the tubing with at least R-11. This is not optional.
  • Install a mixing valve to protect your floor and improve efficiency.
  • Purge every loop after filling. Air locks are the #1 cause of poor performance.
  • Check for rebates before you buy materials. It’s free money.

Retrofitting hydronic heat is a weekend project if you’re handy, or a week if you’re not. The payoff is a warm, quiet, efficient floor that beats forced air in comfort and running costs. Start with the right method, take your time with the layout, and don’t cut corners on insulation or purging. Do it right once, and you’ll never think about it again.

Can I install hydronic heating over an existing concrete slab?

Yes, but it’s a different process. You can’t staple up or use the plywood method directly on concrete. You’d need to install a floating floor system with aluminum plates on top of the slab, or pour a new thin-set layer over the tubing. It’s more involved and adds height to the floor.

How long does it take for a retrofit radiant floor to heat up?

Staple-up systems typically take 1-2 hours to reach temperature. Plywood plate systems are faster, around 30-60 minutes, because the plates transfer heat more efficiently. If yours takes longer, check your water temperature and tubing spacing.

Can I use existing baseboard radiators with the same boiler?

Yes, but you’ll need a mixing valve. Baseboard systems run at 180°F, while radiant floors need 110-130°F. The mixing valve blends hot boiler water with cooler return water to supply the floor loops at the right temperature. You’ll also need a separate zone for the radiant loops.

What’s the maximum loop length for 1/2-inch PEX?

Keep each loop under 300 feet. Longer loops create too much pressure drop, which means the pump has to work harder and the heat output drops. If a room needs more than 300 feet, split it into two loops.

Is it worth doing a retrofit if I have carpet?

Probably not. Carpet and padding act as insulation, blocking heat from reaching the room. You’d have to run the water at a higher temperature, which wastes energy and can damage the carpet over time. If you can’t remove the carpet, consider a different heating method.

Share
Written by Joye

I am a mechanical engineer and love doing research on different home and outdoor heating options. When I am not working, I love spending time with my family and friends. I also enjoy blogging about my findings and helping others to find the best heating options for their needs.

Keep reading

Related guides

Free newsletter

Heater deals and guides, worth opening

Price drops, new guides and safety recalls. One email, only when it matters.

No spam. Unsubscribe in one click. Privacy policy.