To flush an A.O. Smith tankless water heater, turn off the power, connect a hose to the service valve, and run a descaling solution through the system.
Flushing your AO Smith tankless water heater is crucial for maintaining efficiency and preventing mineral buildup. Unlike traditional tank heaters, tankless models require descaling rather than full flushing. This guide provides detailed instructions to properly maintain your unit.
6699
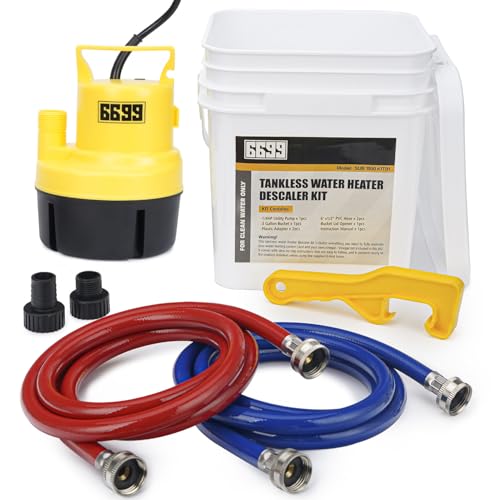
6699 Tankless Water Heater Flushing Kit Includes…
【Tankless Heater Clean Kit】This cleaning kit comes with everything you need to maintain your water heating system. Helps maintain the performance and extend the life of your tankless hot water heater. Easy to follow and quickly connects to your tankless isolation valves using the supplied hoses. All you need to do is mix 1 gallon of vinegar or biodegradable cleaner with 1 gallon of water to flush the tankless water heater. ( The vinegar and biodegradable cleaning agent are not included)
See on AmazonAs an Amazon Associate I earn from qualifying purchases.

Why Descaling Your AO Smith Tankless Heater Matters
Mineral deposits from hard water can reduce heating efficiency by up to 25% in tankless water heaters. Descaling removes these deposits, ensuring:
- Consistent hot water flow
- Lower energy bills
- Extended unit lifespan
- Prevention of costly repairs
For homes with hard water, consider installing a water filter for your tankless system to reduce mineral accumulation.

How Often to Descale Your Unit
AO Smith recommends descaling frequency based on water hardness:
| Water Hardness | Descaling Frequency |
|---|---|
| Soft (0-3 gpg) | Every 2 years |
| Moderate (4-7 gpg) | Annually |
| Hard (8+ gpg) | Every 6 months |
Step-by-Step Descaling Process
1. Prepare Your Work Area
Gather these supplies:
- Descaling solution (white vinegar or commercial descaler)
- Submersible pump
- 2 buckets
- Hose kit
- Adjustable wrench
- Gloves and goggles
2. Enter Service Mode
To initiate the descaling cycle:
- Press and hold the Power and ▲ buttons for 5 seconds
- Display will show “SVC” indicating service mode
- Unit will automatically begin the pump sequence
3. Connect the Flushing Kit
Follow these connection steps:
- Turn off cold water supply valve
- Attach hoses to service ports
- Place pump in bucket with descaling solution
- Connect outlet hose to drain bucket
4. Run the Descaling Solution
Allow the solution to circulate for 45-60 minutes. The process:
- Removes limescale deposits
- Cleans heat exchanger surfaces
- Improves heat transfer efficiency
5. Rinse and Restart
Complete the process by:
- Flushing with clean water for 5 minutes
- Disconnecting hoses
- Restoring water supply
- Pressing Power to exit service mode
Maintenance Tips Between Descaling
Extend time between descaling with these practices:
- Install a whole-house water softener
- Use a point-of-use water filter
- Monitor water pressure (should be 20-80 psi)
- Check for error codes monthly
When to Call a Professional
Contact an AO Smith certified technician if you experience:
- Persistent error codes after descaling
- Noticeable drop in water temperature
- Unusual noises during operation
- Visible leaks around connections
For complex HVAC maintenance, consider AO Smith’s professional service options or consult our guide on essential HVAC tools if you’re performing your own maintenance.
Related pick: Check today's price on Amazon

