Skip to content

Expert home heating guides, reviews & repairs

Heater GuidesHeaterGuides
Water Heater

AO Smith Water Heater Status Light Won’t Come On? Fix It Fast

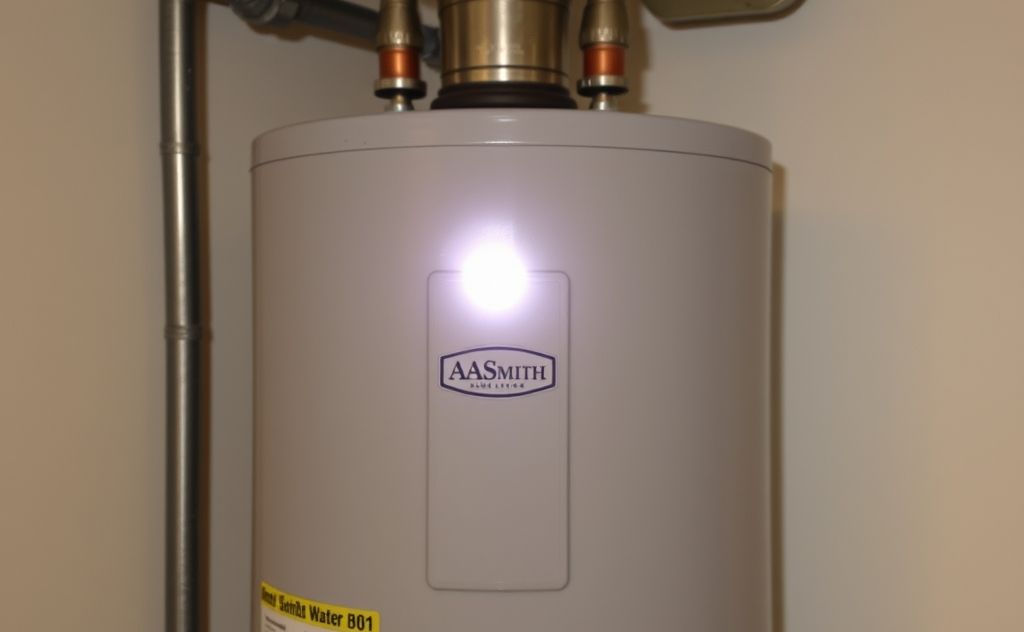
The morning shower turns cold. You walk to the utility closet, open the panel, and see nothing. The status light on your A.O. Smith gas water heater is completely dark. No blinking. No glow. Just a black window where a small red or green light should be.

Most people panic and assume the whole tank is shot. It usually isn’t. A totally dark status light almost always means one of four things: no power reaching the control board, the high-temperature cutoff tripped, a failed thermocouple, or a dead gas control valve. This article walks you through each step in order, from the cheapest fix to the most expensive part. You’ll learn exactly what to check, what the absence of light means electrically, and when to stop DIY and call a pro.

Yufull

WT8840A1000 Upgraded Water Heater Gas Standing Pilot…

  • 【Widely compatible】WT8840A1000 gas water heater standing pilot control valve is WV8840A1000, WV8840A1001, compatible with Bradford…
  • 【Precise Temperature Control】 The WT8840A1000 utilizes an advanced thermistor. This electronic sensor is extremely sensitive to ch…
  • 【Automatic Shutoff】When the water tank overheats, the internal TCO system automatically shuts off the gas supply. Unlike older, si…

If the diagnostic ladder points to a faulty gas valve, the WT8840A1000 upgraded control valve is a direct replacement for many A.O. Smith models. It uses a sensitive thermistor that detects temperature changes as small as 0.1°F and includes a resettable ECO, which saves you from buying a new valve after an overheat event.

ao smith water heater status light wont come on fix it fast

Why Your A.O. Smith Status Light Is Off (The Root Causes)

The status light on an A.O. Smith water heater is not decorative. It’s the diagnostic interface between the gas control valve and you. When it’s off, the valve is not receiving power. Full stop.

On electronic ignition models, the valve runs on 120V AC from a standard outlet or hardwired connection. On standing pilot models with a piezo igniter, the light still requires household power for the thermostat and safety circuits. No power, no light, no hot water.

The four root causes break down like this:

  • Tripped GFCI or circuit breaker – the outlet feeding the heater lost power
  • High-temperature cutoff (ECO) tripped – the tank overheated and the safety switch opened
  • Failed thermocouple – the safety device that proves the pilot flame is lit
  • Dead gas control valve – the brain of the heater has failed internally

Here’s the thing most guides miss: a blinking status light means the valve has power and is trying to tell you something. A completely dead light means the valve has no power at all. Those are two completely different diagnostic paths. This guide focuses on the dead light scenario.

Safety First: Shut Off Gas and Power Immediately

Before you touch anything, kill the gas supply. The gas shut-off valve is on the cold water inlet pipe, usually a small lever or knob. Turn it so the handle is perpendicular to the pipe. That’s the closed position.

Next, unplug the water heater from the wall outlet or trip the dedicated circuit breaker. Even though you’re working with gas components, you’ll be touching electrical connections. Water and electricity don’t mix, and neither do live wires and a wet basement floor.

One more thing: if you smell gas at any point, stop what you’re doing. Don’t flip any switches, don’t light anything, and get everyone out of the house. Call your gas company or a licensed plumber from outside. A gas leak is not a DIY repair.

Step 1: Check Power Supply and Circuit Breaker

This sounds too simple, but you’d be surprised how many service calls start with a tripped breaker. The status light on an electronic A.O. Smith heater needs 120V AC to operate. If the outlet is dead, the light is dead.

Grab a multimeter or a simple plug-in tester. Check the outlet the heater is plugged into. If you don’t have a tester, plug in a lamp or phone charger. If that doesn’t work, check the GFCI outlet. These are common in garages and basements where water heaters live. A GFCI can trip without tripping the main breaker. Press the reset button on the outlet itself.

If the outlet is fine but the heater still has no light, check the circuit breaker panel. Look for a breaker that’s in the middle position or tripped to off. Reset it by pushing it fully to off, then firmly back to on.

Here’s a real-world example: a homeowner called me once saying their status light was dead. The GFCI in their garage had tripped because a power tool shorted out the same circuit. The water heater was plugged into the load side of that GFCI. Reset the outlet, light came back on, pilot relit, done in under five minutes.

If power checks out, move to the next step.

Step 2: Locate and Reset the High-Temperature Cutoff (ECO) Switch

The ECO is a safety device built into the gas control valve. It’s a bimetallic switch that opens if the water inside the tank exceeds roughly 180°F. When it opens, it cuts power to the gas valve, which shuts off the gas. The status light goes dark because the valve has no power.

Why would the tank overheat? Usually a failed thermostat, but sometimes a homeowner accidentally set the temperature too high. Either way, the ECO did its job.

On most A.O. Smith models, the ECO reset is a small red button on the gas control valve, near the temperature dial. You’ll need to remove the outer access panel and the insulation to see it. Some models have a separate ECO reset behind a small plastic cover.

Press the red button firmly. You should feel a click. If the button is already popped out, that confirms the ECO tripped. If it won’t press in, the ECO may be permanently damaged, and the valve needs replacement.

Important caveat: don’t just reset the ECO and walk away. If the tank overheated once, it can overheat again. Turn the temperature dial down to 120°F and monitor the heater for a few days. If the ECO trips again, the thermostat is faulty, and you need a new control valve.

Step 3: Inspect the Thermocouple and Pilot Assembly

If the ECO is fine and you have power, the next suspect is the thermocouple. This is a copper tube that runs from the gas valve up to the pilot burner assembly. It generates a small millivolt signal when heated by the pilot flame. That signal tells the gas valve it’s safe to open the main burner.

A failed thermocouple means the gas valve thinks the pilot is out, so it closes the gas supply. The status light may go dark or blink depending on the model.

Here’s how to test it without specialized tools. First, remove the access panel and find the pilot assembly. You’ll see the thermocouple tip sitting in the pilot flame path. Look for soot, corrosion, or a bent tip. Clean the tip with fine sandpaper if it’s dirty.

Next, check the connection at the gas valve. The thermocouple nut should be hand-tight plus a quarter turn. Loose connections cause intermittent failures. Tighten it gently with a wrench, but don’t crank it — you’ll strip the threads.

To truly test a thermocouple, you need a multimeter. Disconnect it from the valve, light the pilot manually, and hold the thermocouple tip in the flame. Measure the voltage between the tip and the copper sheath. A good thermocouple produces 25 to 30 millivolts. Below 10 millivolts, it’s weak and needs replacement.

Thermocouples are cheap, usually $10 to $20, and take about 15 minutes to replace. It’s worth doing just to rule it out before spending money on a control valve.

Step 4: Test the Gas Control Valve (Thermostat)

If you have power to the valve, the ECO is reset, and the thermocouple tests fine, the problem is the gas control valve itself. This is the most expensive component, so you want to be sure before replacing it.

Here’s a quick test. With the power on and the thermostat set to hot, listen closely. You should hear a faint click when the valve opens the gas flow. No click means the internal solenoid or thermostat is dead.

Another test: check for 120V AC at the valve’s electrical terminals. If you have voltage coming in but the status light is still dark, the valve’s internal board is fried. Replacement is the only option.

When you buy a replacement valve, make sure it matches your model number. The WT8840A1000 replacement valve is widely compatible with A.O. Smith, State, and Reliance tanks. It’s a plug-and-play swap that doesn’t require modifying your existing gas lines or brackets. The heavy-duty cast aluminum body resists deformation, and the solenoid is rated for 150,000 cycles, which is a solid upgrade over the original.

Step 5: Relight the Pilot Light (Manual and Electronic Models)

Once you’ve restored power and reset the ECO, you still need to relight the pilot. Here’s how to do it safely on both types of systems.

Lighting a Standing Pilot (Older Models)

Older A.O. Smith heaters have a standing pilot that burns continuously. The procedure is straightforward:

  1. Turn the gas control knob to the PILOT position.
  2. Press and hold the knob down. This opens the gas flow to the pilot.
  3. While holding the knob, press the igniter button repeatedly. You should see a small blue flame at the pilot assembly.
  4. Keep holding the knob for 30 to 60 seconds. This lets the thermocouple heat up and generate enough voltage to hold the gas valve open.
  5. Release the knob. If the pilot stays lit, turn the knob to ON.

If the pilot goes out when you release the knob, the thermocouple isn’t generating enough voltage. That confirms the diagnosis from Step 3.

Resetting an Electronic Igniter (Newer Models)

Newer models use a hot surface igniter or spark igniter. There’s no standing pilot. The process is simpler:

  1. Turn the temperature dial to the lowest setting.
  2. Turn the gas control knob to OFF. Wait five minutes for any gas to dissipate.
  3. Turn the knob to ON.
  4. Set the temperature dial to your desired setting.
  5. The control board will automatically ignite the burner. You’ll hear a series of clicks, then the burner will light.

The status light should turn on within a few seconds of power being restored. If it doesn’t, you’re back to the valve replacement path.

Decoding the Status Light: Off vs. Blinking Codes

Understanding what the light is telling you saves time and money. Here’s a quick reference table for common A.O. Smith status light conditions.

Status Light Condition What It Means Likely Fix
Completely off No power to the gas control valve Check GFCI, breaker, ECO, or valve
Single blink, repeating Ignition failure Clean pilot assembly, check gas supply
Two blinks, repeating Thermocouple or flame sensor fault Replace thermocouple
Three blinks, repeating Overheat or ECO trip Reset ECO, check thermostat
Four blinks, repeating Gas valve internal fault Replace gas control valve
Steady on Normal operation No action needed

These codes vary slightly by model year. Check your owner’s manual for the exact chart, but this covers the vast majority of units. If you’re seeing a pattern not listed here, the manual is your best friend.

When to Call a Professional (Gas Leak Warning Signs)

Some repairs are beyond the average homeowner. Gas work is one of them. If you hit any of these situations, stop and call a licensed plumber or your gas utility:

  • You smell gas at any point during the process
  • You hear a hissing sound near the gas valve or lines
  • You need to replace the gas control valve and aren’t comfortable with pipe dope and gas fittings
  • Your local code requires a permit for gas water heater work
  • The tank itself is leaking water

Replacing a gas valve involves disconnecting and reconnecting gas lines. One bad joint creates a leak. A plumber has the tools to pressure-test the system and the knowledge to pass inspection. The $150 to $300 labor cost is worth the peace of mind.

Also, if your water heater is over 10 years old and the valve fails, consider replacing the whole tank. A new valve costs $100 to $200 plus labor. A new tank costs $800 to $1,500 installed. If the tank is near the end of its life, the valve is a Band-Aid.

Preventative Maintenance to Keep the Status Light On

The best fix is the one you never need. A few habits keep your A.O. Smith heater running reliably for years.

Flush the tank annually. Sediment buildup at the bottom of the tank causes overheating, which trips the ECO. Attach a garden hose to the drain valve, open it, and let the water run until it’s clear. Do this every spring.

Check the anode rod every two years. This sacrificial rod prevents rust inside the tank. When it’s consumed, the tank starts corroding. Replacing a $40 rod is far cheaper than replacing a $1,000 tank.

Test the T&P valve (temperature and pressure relief valve) every six months. Lift the lever and let it snap back. If water doesn’t flow out, the valve is stuck and needs replacement.

Keep the area around the heater clear. Don’t store boxes, paint cans, or cleaning supplies near the unit. Good airflow helps the combustion process and prevents carbon monoxide buildup.

Finally, know your heater’s age. Check the serial number for the manufacture date. If it’s over 12 years old, start budgeting for a replacement. No amount of maintenance will make a tank last forever.

For more on keeping your system efficient, read this A.O. Smith vs Rheem comparison to see how the brands stack up. And if you’re dealing with a Honeywell valve, this red blinking light guide covers similar ground.

Final Checklist for a Dead Status Light

Here’s what to remember when your A.O. Smith status light won’t come on:

  • Dead light means no power. Blinking light means an error code. Don’t confuse the two.
  • Check the GFCI outlet and circuit breaker first. It’s the cheapest fix and the most common.
  • Press the red ECO reset button on the gas valve. A popped button confirms an overheat trip.
  • Test the thermocouple with a multimeter. Anything under 10 millivolts is a fail.
  • Listen for a click from the gas valve when the thermostat calls for heat. No click, no valve.
  • Replace the gas control valve last. It’s the most expensive part and requires gas line work.
  • Call a pro if you smell gas, hear hissing, or your local code requires a permit.

Work through these steps in order, and you’ll either fix the problem fast or know exactly what to tell the plumber when they arrive.

Share
Written by Joye

I am a mechanical engineer and love doing research on different home and outdoor heating options. When I am not working, I love spending time with my family and friends. I also enjoy blogging about my findings and helping others to find the best heating options for their needs.

Keep reading

Related guides

Free newsletter

Heater deals and guides, worth opening

Price drops, new guides and safety recalls. One email, only when it matters.

No spam. Unsubscribe in one click. Privacy policy.