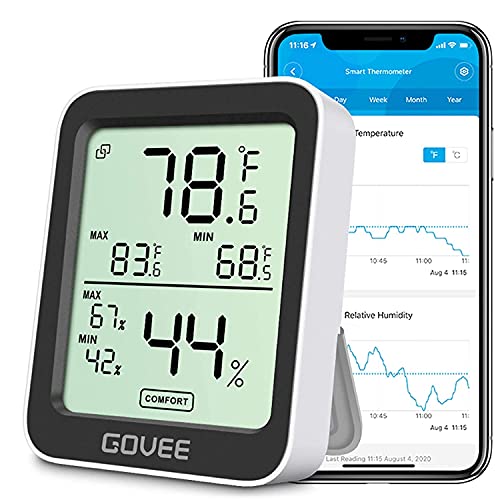
You set the thermostat to 72°F, but the living room feels like a sauna while the bedroom is freezing. So you nudge the thermostat down a degree. Then another. The HVAC runs longer, the compressor cycles harder, and your utility bill creeps up every month. The problem isn’t your equipment. It’s that your thermostat measures air temperature at one spot on one wall, and that spot rarely reflects what the rest of the house feels like.
Smart temperature sensors fix that by giving your thermostat eyes and ears in multiple rooms. They report live temperature and occupancy data so the system heats or cools only where you actually are. The claimed result is a 30% reduction in energy bills. That number gets tossed around a lot, but the real story is more nuanced. This article walks through the engineering behind the savings, the exact conditions where they materialize, and where the claim falls apart. You’ll also get a payback calculation you can run with your own numbers, plus sensor placement rules that most installers get wrong.
One product that handles this well is the ecobee SmartSensor 2-Pack. It pairs with ecobee thermostats to detect room occupancy and temperature from up to 60 feet away, through walls and floors. The thermostat then adjusts heating or cooling based on the rooms you’re using, not the hallway where the thermostat sits. It’s a practical way to get zoned control without ductwork modifications.
The Real Math Behind the 30% Energy-Savings Claim
The 30% figure comes from a 2026 EPA study on programmable thermostats. ENERGY STAR reported that homeowners could save about $180 per year by using a programmable thermostat properly. That study predates smart sensors entirely. The 30% applies to the thermostat’s ability to set back temperatures when you’re asleep or away, not to the sensors themselves.
Here’s what the research actually shows. A Nest study found average savings of 10-12% on heating and 15% on cooling. Ecobee claims up to 23% savings on HVAC energy. The 30% number assumes perfect behavior: consistent setbacks, no manual overrides, and a home where occupancy patterns are predictable. Real-world savings land between 10% and 25% for most households.
Climate matters more than the hardware. A home in Phoenix running AC eight months a year will see bigger absolute savings than a mild-weather home in San Diego. A poorly insulated house loses the savings through the walls regardless of how smart the thermostat is. The 30% figure is a ceiling, not an average.
What the sensors add is the occupancy piece. A standard programmable thermostat works on a fixed schedule. If you come home early or stay late, it’s wrong. Sensors detect that you’re in the kitchen at 6 PM instead of the living room, and shift the heating or cooling accordingly. That behavioral correction is where the extra savings come from, and it’s why the 30% number is achievable for some homes but not all.
How Smart Temperature Sensors Differ from Standard Smart Thermostats
A smart thermostat alone has one temperature probe built into the unit. It sits on a wall in a hallway or main room, often in direct sunlight or near a kitchen vent. That single reading drives the entire HVAC system. The rest of the house can be 5-8°F different and the thermostat doesn’t know.
Remote sensors change the control logic. Instead of “keep the thermostat at 72°F,” the system averages readings from multiple rooms, or prioritizes the room where someone is present. The ecobee SmartSensor measures both temperature and occupancy. When the bedroom sensor detects someone at 10 PM, the thermostat stops conditioning the empty living room and focuses on the occupied space.
The difference shows up in runtime. A single-sensor thermostat runs the HVAC until the hallway hits the setpoint. A multi-sensor system runs until the occupied room hits the setpoint. In a typical home, the hallway reaches temperature faster than the bedroom because it has fewer external walls. That means the single-sensor system undershoots the bedroom and the occupant bumps the thermostat up, wasting energy. The multi-sensor system targets the harder room and lets the hallway drift a few degrees.
There’s a trade-off. Multi-sensor systems require more configuration. You have to decide which sensor takes priority and when. Most people set it and forget it, which works, but you lose some savings if you don’t review the schedule monthly.
The 5 Mechanisms That Drive Savings (Not Just Scheduling)
Geofencing and Occupancy Detection
Geofencing uses your phone’s location to tell the thermostat when you’re leaving and returning. The system drops to an eco temperature when you’re more than a quarter-mile away, then starts conditioning when you head home. This beats a fixed schedule because it adapts to early departures, late nights, and weekend changes.
Occupancy sensors add room-level detection. The ecobee SmartSensor uses a passive infrared sensor to detect motion. If the living room sensor sees no movement for 30 minutes, the thermostat can let that room drift toward the outdoor temperature while conditioning the occupied bedroom. This works best in homes where people cluster in one or two rooms at a time.
Adaptive Learning Algorithms
Modern thermostats learn how long your home takes to heat or cool. They start the system early so the setpoint arrives on time without overshooting. A house that takes 20 minutes to drop 2°F in the afternoon sun gets a different start time than a shaded home that does it in 8 minutes. This “smart recovery” prevents the system from running full blast at the last minute, which wastes energy and shortens equipment life.
The learning isn’t perfect. It takes about two weeks to build a reliable model, and it gets confused by unusual weather or guests. But over a season, it trims 5-8% off runtime compared to a simple schedule.
Zoned Temperature Control via Remote Sensors
True zoning requires motorized dampers in the ductwork, which costs thousands to retrofit. Remote sensors fake it by shifting the thermostat’s setpoint based on which room is occupied. If the upstairs sensor reads 76°F and the downstairs is 70°F, the system cools until the upstairs hits the target, even if the downstairs gets chilly. This is less efficient than real zoning but costs a fraction of the price.
The limitation is that the HVAC still conditions the whole house. You’re not closing off ducts, so some conditioned air leaks into unoccupied rooms. The savings come from not overcooling or overheating the occupied space, not from eliminating waste entirely.
Humidity and Weather Integration
Temperature sensors that also read humidity let the thermostat make smarter decisions. High humidity makes 75°F feel like 80°F. The system can run the AC longer to dehumidify, or switch to a higher fan speed to evaporate moisture. Some thermostats pull local weather data to anticipate heat gain from sun exposure or cold snaps, pre-conditioning the home during off-peak hours.
This matters most in humid climates like the Southeast. A sensor that reads 72°F and 65% humidity tells the thermostat to keep cooling even though the temperature target is met, because the moisture will make you uncomfortable anyway. That’s a different energy profile than a dry climate where the same temperature feels fine.
Where to Place Sensors for Maximum Accuracy (And Where Not To)
Sensor placement is the difference between 5% and 20% savings. Get it wrong and the thermostat makes decisions on garbage data.
Place sensors:
- In rooms you occupy most: bedrooms, home offices, living rooms.
- 5-6 feet above the floor, on an interior wall. This matches the breathing zone where your body actually feels temperature.
- Away from direct sunlight, which adds 5-10°F of false heat.
- Away from supply vents, return grilles, and baseboard heaters. These create microclimates that don’t represent the room.
- In open areas, not behind furniture or curtains that block airflow.
Avoid:
- Kitchens, where cooking heat spikes readings for hours.
- Bathrooms, where shower steam and humidity confuse the occupancy sensor.
- Exterior walls, which are colder in winter and hotter in summer than the room’s core.
- Near electronics, which emit their own heat. A TV or computer can add 3-4°F to a sensor reading.
- Below 5 feet, where pets trigger occupancy and floor drafts skew temperature.
For the ecobee SmartSensor, the magnetic stand lets you set it on a metal shelf or use the adhesive bracket for walls. The manual recommends at least 5 feet off the ground. Follow that. A sensor on a nightstand reads the floor’s cold air and makes the thermostat overheat the room.
Test your placement by comparing the sensor reading to a standalone thermometer after the HVAC has run for 30 minutes. If they differ by more than 2°F, move the sensor.
Sensor Performance by HVAC Type: Heat Pumps, Furnaces, and Mini-Splits
Your HVAC type changes how much benefit you get from remote sensors.
Heat pumps benefit the most. They’re slow to change temperature and work best when left at a steady setpoint. Remote sensors let the system maintain comfort in occupied rooms without wild swings. The downside: heat pumps blow cooler air than furnaces, so a sensor in a far room might not see the temperature rise for 10-15 minutes. The thermostat compensates by running longer, which is fine for efficiency but feels drafty.
Gas furnaces respond quickly. A remote sensor can trigger a short heating cycle in the morning without overshooting. The trade-off is that furnaces create more temperature stratification. The upstairs bedroom sensor might read 70°F while the downstairs is 74°F. The system cycles based on the bedroom, and the downstairs runs slightly warm. That’s acceptable for most people.
Ductless mini-splits are the tricky case. Each indoor unit has its own sensor and its own compressor control. Adding a separate smart sensor doesn’t directly control the mini-split unless the unit supports external sensors. Some high-end mini-splits do, but most don’t. The workaround is to use the mini-split’s built-in occupancy detection and set the fan to circulate air so the built-in sensor reads the whole room, not just the spot under the unit.
If you have a mini-split without external sensor support, a smart sensor system won’t help much. You’re better off using the unit’s timer and remote control apps.
The Hidden Cost Trap: Compatibility, Wi-Fi, and Battery Failures
Smart sensors are wireless, which means they need power and connectivity. The ecobee SmartSensor runs on a coin-cell battery that lasts about 5 years. When it dies, the thermostat silently reverts to its internal sensor. You won’t get an alert until the battery is critically low, and by then you’ve lost days of optimized control.
Wi-Fi failures are more common. A sensor that drops off the network doesn’t report occupancy, so the thermostat falls back to its schedule. If you’re not home, the system might heat an empty house because the occupancy sensor is offline. Check the sensor status in the app weekly. Most apps show a signal strength indicator.
Compatibility is another trap. The ecobee SmartSensor only works with ecobee thermostats. Nest, Honeywell, and other brands have their own sensors that don’t interoperate. Before buying, verify that your thermostat supports remote sensors. Some budget smart thermostats don’t.
There’s also the matter of placement range. The 60-foot range is through walls and floors in a typical home, but thick plaster, metal ductwork, and brick walls can cut that in half. If a sensor is too far from the thermostat, it will connect intermittently. The app usually shows a weak signal warning, but not always.
Pairing Sensors with Solar Panels and Time-of-Use Electricity Rates
If you have solar panels or a time-of-use electricity plan, sensors become a load-shifting tool. Time-of-use rates charge more during peak afternoon hours and less at night. A smart thermostat with occupancy data can pre-cool your home before peak rates kick in, then let the temperature drift during the expensive window.
Here’s a concrete example. Your utility charges $0.28/kWh from 4-9 PM and $0.12/kWh overnight. On a 95°F day, you pre-cool the house to 72°F at 3 PM. The AC runs hard for 20 minutes at the lower rate. From 4-9 PM, the thermostat lets the temperature rise to 78°F. The sensors tell it which rooms are occupied, so it targets the home office where you’re working and lets the bedrooms drift. That’s 5 hours of avoided peak-rate cooling.
With solar, the logic flips. You want to use excess solar generation during the day, even if it’s not peak rate. Sensors tell the thermostat when the house is empty, so it can run the AC hard at noon to store coolth in the thermal mass of the walls and floors. The house stays comfortable until evening without drawing grid power.
The savings here are separate from the 30% thermostat claim. Load shifting can cut your bill another 10-20% depending on your rate structure. It requires a thermostat that supports time-of-use scheduling and occupancy-based setbacks. Most ecobee models do, and the renewable energy integration guide covers this in more depth.
Payback Period Calculator: Is It Worth It for Your Home?
Let’s run the numbers with realistic assumptions.
Start with your annual HVAC cost. The average US household spends about $1,200 per year on heating and cooling. Let’s use that.
Assume a smart thermostat with two sensors saves 15% of that, which is the middle of the range from real-world studies. That’s $180 per year. The thermostat costs $200-250, and a two-pack of sensors costs $80-100. Total investment: $300-350.
Payback period: $350 divided by $180 = 1.9 years.
Now the pessimistic case. Your home is well-insulated, you already use a programmable schedule, and your climate is mild. Savings drop to 8%. That’s $96 per year. Payback stretches to 3.6 years. Still positive, but not exciting.
Here’s the table comparing scenarios:
| Scenario | Annual HVAC Cost | Savings Rate | Annual Savings | Payback Period |
|---|---|---|---|---|
| Poor insulation, fixed thermostat | $1,800 | 22% | $396 | 0.9 years |
| Average home, manual adjustments | $1,200 | 15% | $180 | 1.9 years |
| Well-insulated, already efficient | $900 | 8% | $72 | 4.9 years |
| Heat pump, extreme climate | $1,500 | 18% | $270 | 1.3 years |
These numbers assume you actually configure the sensors and leave them alone. The biggest killer of savings is manual override. Every time you bump the thermostat because a room feels off, you lose a chunk of the efficiency gain. Set it once, trust the system for two weeks, then adjust only if the comfort issue persists.
If you’re handy, check your local utility for rebates. Many offer $50-100 for smart thermostat installation, which cuts the payback period in half. Some states have income-qualified programs that cover the full cost.
Final Verdict: How to Guarantee You Hit the 30% Mark
The 30% figure is real, but it’s conditional. You’ll hit it if you have a poorly insulated home, a manual thermostat, and a predictable schedule. You’ll see 10-15% if your home is already efficient. The sensors alone don’t save energy. They enable the thermostat to make better decisions, and those decisions compound over a season.
Here’s the playbook that gets you closest to 30%:
- Install sensors in the two rooms you occupy most, at 5-6 feet on interior walls, away from vents and sunlight.
- Set the occupancy-based mode so the thermostat prioritizes occupied rooms over unoccupied ones.
- Use a setback schedule that matches your actual routine, not the default. Review it after two weeks and adjust.
- Enable eco mode for the hours you’re away, and let geofencing handle the transition.
- Check sensor battery and Wi-Fi status monthly. A dead sensor silently costs you savings.
- If you have time-of-use rates, pre-condition before peak hours and let the house drift during expensive windows.
- Don’t touch the thermostat for the first two weeks. Let the learning algorithm build its model.
One more thing: the sensors work best when you have a compatible thermostat. The smart thermostat savings guide explains the mechanics in more detail. And if you’re setting up a new system, the temperature sensor installation guide covers the wiring and placement steps.
Smart temperature sensors aren’t magic. They’re a data correction. Your thermostat was flying blind; now it has eyes. Use the data properly and you’ll cut your bill. Ignore placement and configuration and you’ll get a gadget that does nothing. The difference is in the setup, and now you know exactly what to do.
Frequently Asked Questions
Do smart temperature sensors work with any thermostat?
No. Most brands lock their sensors to their own thermostats. ecobee sensors work with ecobee thermostats only. Nest has its own Temperature Sensors. Honeywell has its own line. Before buying, check the compatibility list. Some third-party sensors like the Ambient Weather WS-2902 work with multiple systems, but they’re less integrated and require more setup.
How much can I actually save with a smart temperature sensor?
Realistic savings are 10-25% on your HVAC bill, depending on your home’s insulation, climate, and how much you currently waste. The 30% figure is the upper bound from ENERGY STAR’s thermostat study. A typical home with average habits sees 15%. If you have a heat pump and live in a cold climate, you’ll see more. If you already use setbacks diligently, you’ll see less.
Where should I not put a temperature sensor?
Avoid places with direct sunlight, near supply vents, behind furniture, in kitchens, in bathrooms, and on exterior walls. Sunlight adds 5-10°F of false heat. Vents create local drafts. Kitchens have cooking heat spikes. Bathrooms have steam that confuses humidity readings. Exterior walls are colder in winter and hotter in summer than the room’s core. Place sensors at 5-6 feet on interior walls in rooms you actually use.
What happens when the sensor battery dies?
The thermostat falls back to its internal sensor. You lose occupancy detection and the multi-room averaging. The system still works, but it’s back to single-point measurement. Most apps send a low-battery notification, but not always. Check the sensor status in the app monthly and replace batteries preemptively. The ecobee SmartSensor uses a coin-cell battery rated for about 5 years.
Do I need one sensor per room?
No. You need sensors in the rooms where you spend the most time, not every room. A two-pack covers a bedroom and a living room, which is enough for most homes. Adding more than three or four sensors creates conflicting data that the thermostat has to average, which can reduce efficiency. Start with two, see how the comfort feels, and add more only if specific rooms are problematic.

I am a mechanical engineer and love doing research on different home and outdoor heating options. When I am not working, I love spending time with my family and friends. I also enjoy blogging about my findings and helping others to find the best heating options for their needs.
Related guides

How to Test Temperature Sensor Performance Accurately: A Practical, Deep-Dive Guide
You suspect a temperature reading is off, but you have no proof. Maybe the furnace is cycling too…
What Are Temperature Sensors Used For? Key Applications
You probably interact with temperature sensors dozens of times a day without even thinking about it. They're the…

Temperature Sensors for Climate Research: Precision Tools for a Warming Planet
Temperature sensors for climate research are essential tools that measure atmospheric temperatures, enabling accurate data collection for climate…