

An E1 error code on an infrared heater signals a safety issue, often related to overheating or sensor faults. This code appears to warn you the heater has detected a condition that could risk damage or trigger a shutdown.
Infrared heaters rely on proper airflow and accurate temperature sensing to operate safely. When these fail, the heater responds with an E1 code to protect itself and you. This article guides you through the quick checks and fixes you can do at home, when to stop and call a pro, and which parts might need replacing. No jargon, just practical steps you can trust.
What Causes an E1 Error on Infrared Heaters and How to Fix It
An E1 error in an infrared heater usually means the safety system detected overheating or a temperature-sensor fault. Unplug the heater, let it cool, then check its position and airflow before you consider a sensor, tilt switch, or other internal failure.
The same basic approach applies to an Allen electric infrared heater error code E1, although the exact code definition can vary by model. E1 commonly appears when dust, furniture, a wall, or pet hair restricts airflow; a failed temperature sensor can also report unsafe heat, while a tilted heater may activate its safety shutoff.
- Disconnect the heater from the wall outlet. Don’t use the power button as your only shutdown step, because the cord still carries power while the plug is connected.
- Let the heater cool fully. A hot sensor may keep the E1 warning active until the unit reaches a safe temperature.
- Set the heater on a firm, level floor with the front and rear grilles clear. Move curtains, bedding, furniture, boxes, and other combustibles away from the heater; keep the required clearance stated in its manual, with 3 feet as the basic safety distance for an electric space heater.
- Look through the intake and outlet grilles for lint, hair, or a visible obstruction. Clean only from the outside at first, and don’t force an object through the grille.
- Reconnect it directly to a wall outlet and try one normal heat cycle while you remain nearby. If E1 returns with clear vents and level placement, stop using the heater rather than repeatedly resetting it.
A tilt switch is designed to shut the heater down if it isn’t sitting correctly, while the sensor watches for excessive internal temperature. Those parts need model-specific testing, so a recurring E1 after the basic checks belongs in the sensor and tilt-switch diagnosis section, not in a guessing game with replacement parts.
For a broader starting checklist, see infrared heater not working quick fixes solutions; its checks apply to loss of heat and shutdowns beyond an E1 display.
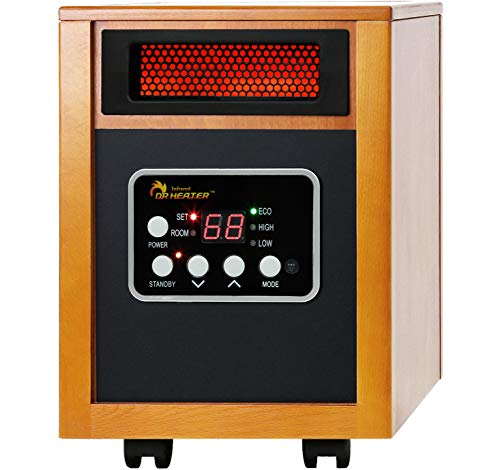
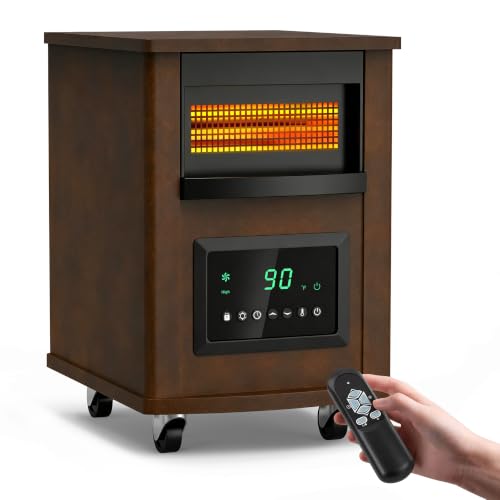

Check and Clean Airflow to Clear Overheating Triggers
Clear dust, furniture, and pet hair from every intake and outlet grille before blaming the E1 code; restricted airflow traps heat inside the cabinet and can trigger the overheat protection.

Start with the heater unplugged and cold. Use a soft brush or a vacuum’s brush attachment on the external grilles, working gently so you don’t push lint deeper into the cabinet. Wipe the cabinet with a dry or barely damp cloth, keep moisture away from the controls and plug, and let any damp surface dry completely before reconnecting it.
- Check the rear and side intakes, not only the grille where warm air exits. Pet hair often mats against the intake where you can’t see it from across the room.
- Remove curtains, clothing, baskets, and furniture that sit in front of or behind the heater. A clear-looking front doesn’t help if the rear intake is pressed against a sofa.
- Place the heater upright on a hard, level floor, with open space around its grilles and the clearance listed in the manual. Don’t run it inside a cabinet, beneath a desk, or beside a wall where warm air can collect.
- If the model has a removable filter, take it out only as the manual directs. Vacuum or wash it only if the manual permits washing; reinstall it fully dry and seated correctly.
- Reconnect the heater directly to a wall outlet and monitor one heating cycle. A repeated E1 with clean, open airflow points toward a sensor, tilt switch, control fault, or another issue that cleaning won’t solve.
Test the Tilt Switch and Temperature Sensor for Faults
An E1 error in an infrared heater can come from a failed tilt switch or temperature sensor, and an Allen Electric infrared heater error code E1 is model-specific, so confirm the meaning in that heater’s manual before ordering parts. The checks below can show whether a safety component is open or out of range, but they don’t replace the manufacturer’s resistance values.
Check the Tilt Switch
The tilt switch cuts power when the heater is knocked over or sits at the wrong angle; on many heaters, the control board reads that interruption as a fault. Unplug the heater, let it cool, and keep the power cord out of the outlet while you inspect it.
Measure the Temperature Sensor
A temperature sensor, often a thermistor, changes resistance as its temperature changes; the control board uses that change to decide whether the heater is overheating. With the heater unplugged and cool, disconnect the sensor connector and measure across the sensor’s two terminals, then compare the reading with the service manual at the stated room temperature.
A reading of zero ohms, infinite resistance, or a value far outside the manual’s range points to a damaged sensor, connector, or wire. If the resistance changes sharply when you gently warm the sensor between your fingers, that shows the sensor responds, but it still must match the specified room-temperature value. Never measure resistance on a live circuit.
When to Call a Licensed Technician or Replace the Heater
An E1 error in an infrared heater needs professional inspection when the code returns after airflow and sensor checks, or when the heater shows electrical or heat damage. Unusual buzzing, a burning odor, melted plastic, scorch marks, a hot plug, a damaged cord, repeated breaker trips, or visible loose wiring are good reasons to unplug it and stop troubleshooting.

Call a licensed technician for live-voltage testing, control-board diagnosis, damaged wiring, heating-element replacement, or any repair that requires altering the cabinet or wiring. A technician can also verify that the replacement sensor or tilt switch matches the heater’s listed design rather than merely fitting the connector.
Repair makes less sense when the estimate includes diagnosis, labor, and several parts that approach the cost of a comparable new heater, especially if the old unit has a damaged cord, cracked housing, corroded terminals, or repeated E1 faults. Don’t use a repair that requires bypassing a safety device or installing a non-listed part to keep an aging heater running.
Local electrical codes and the heater’s safety listing affect what can be repaired, so use manufacturer-approved parts and follow the manual’s clearance and grounding instructions. A new plug-in model should have tip-over and overheat protection, a UL, ETL, or CSA listing, and a wall outlet rated for its load; a 1,500-watt heater draws about 12.5 amps on a 120-volt circuit. Choose a model sized for the room and plug it directly into the wall, never a power strip or extension cord.
Final 60-Second Checks Before Buying Parts or Calling for Service
An E1 error in an infrared heater is worth checking against four basics before you buy a sensor: airflow, power, placement, and visible sensor condition. Unplug the heater, let it cool completely, then inspect it without powering it back up.
Before calling, write down the heater’s model number, the exact E1 display, when the code appears, how long it runs first, and what you already checked. Tell the technician whether the fan runs, whether the heater was moved recently, and whether the code returns immediately after cooling.
More Questions, Answered
What exactly does the E1 error code mean on my infrared heater?
Why does blocked airflow cause an E1 error?
How do I test the temperature sensor on an infrared heater?
Is it safe to bypass the tilt switch to fix an E1 error?
What are the signs I should call a professional for E1 error issues?
Can I fix an E1 error by just cleaning the heater?
How long should I wait before resetting my heater after an E1 error?

HeaterGuides covers home heating, water heating and HVAC: how the equipment works, what it costs to run, and how to use it safely.