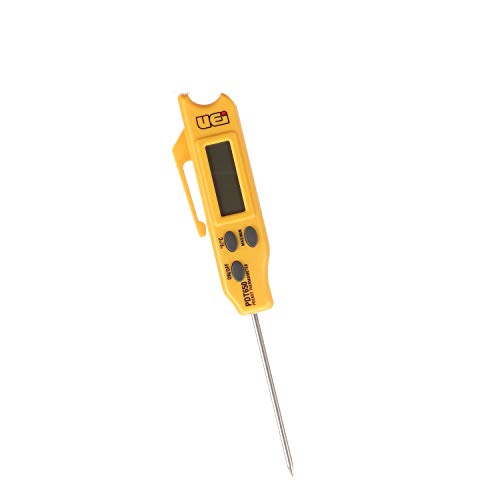
You pull a brisket off the smoker at 203°F, rest it, slice into it—and the center looks raw. Or you’re candying sugar and the thermometer reads 240°F, but the syrup never reaches the hard-ball stage. The thermometer lied. It happens more often than people think, and it’s not always a cheap probe failing. Even expensive units drift out of spec after a few hard months of use.
This guide walks you through a repeatable, lab-style protocol for verifying thermometer accuracy at home. You’ll learn the two reference points that matter, how to read your results as a tolerance rather than a pass/fail, and exactly what to do when a thermometer fails—including the ones you can’t adjust. You’ll also pick up a method for testing response time, which most guides skip entirely.

Rattleware
Rattleware Thermometer Calibration Tool, Set of 6,…
- PRECISE CALIBRATION: Ensure accurate temperature readings with this precise thermometer calibration tool, a must-have for professi…
- CONVENIENT ADDITION: Conveniently add this tool to your toolkit for easy calibration of thermometers, simplifying temperature accu…
- PERFECT TEMPERATURES: Perfect for ensuring temperature accuracy, this tool helps maintain precise readings for various application…
If you want a quick way to keep several probes honest, the Rattleware Precise Thermometer Calibration Tool packs six units so you can run parallel checks without juggling gear. It’s a simple addition to a routine that should happen weekly if you cook professionally or compete in BBQ.

Why Accuracy Testing Matters More Than You Think
Thermometers drift. The internal sensor, the wire connections, the calibration nut—they all shift with thermal cycling, drops, and moisture. A probe that’s off by 4°F doesn’t sound like much, but in sous vide it’s the difference between a perfect medium-rare and a gray strip. In candy making, 4°F changes the texture completely. In food safety, it’s a gamble you don’t want to take.
Most home cooks test once when they buy a thermometer, then trust it forever. That’s the wrong approach. Professional kitchens verify daily. You don’t need that frequency, but weekly checks for gear used in competition or monthly for home use is reasonable. The test takes five minutes once you have a routine.
The other reason to test: you can’t always tell a bad thermometer by looking at it. A dial thermometer can sit at 70°F on the counter and look fine, then read 10°F high at 200°F. That’s a non-linear error, and it’s common in cheap units. Single-point checks catch only part of the problem.
The Two Essential Reference Points: Ice Bath and Boiling Water
You need two known temperatures to map a thermometer’s error curve. The ice bath gives you 32°F (0°C). Boiling water gives you 212°F (100°C) at sea level. Together, they bracket the range where most cooking happens.
The Perfect Ice Bath Setup (Step-by-Step)
Most people make a sloppy ice bath and get a sloppy result. Here’s the correct way.
- Fill a tall container with crushed ice, not cubes. Cubes leave air gaps. Crushed ice packs tight.
- Add cold water until the ice is just submerged. Don’t drown it—you want a thick slurry, not a swimming pool.
- Stir vigorously for 30 seconds. This is the step everyone skips. The water must be uniform at 32°F, and that takes active mixing.
- Insert the probe at least 2 inches deep. Keep it away from the sides and bottom of the container—those surfaces conduct heat and skew the reading.
- Wait for the reading to stabilize. For a thermocouple, that’s 10-15 seconds. For a dial thermometer, give it a full minute.
- Stir again gently while you read. A stagnant bath can develop warm micro-layers near the probe.
Use distilled water if you want to be pedantic. Tap water has dissolved minerals that depress the freezing point by a fraction of a degree—not enough to matter for cooking, but enough to show up on a lab-grade reference thermometer.
The Boiling Water Test (Altitude Adjustments Included)
Boiling water is trickier because altitude changes the boiling point. At sea level, it’s 212°F. For every 500 feet above sea level, subtract about 1°F. So in Denver (5,280 feet), water boils at roughly 202°F. If you test at altitude and expect 212°F, you’ll wrongly condemn a perfectly good thermometer.
Here’s the procedure:
- Use a deep pot—at least 4 inches of water. The probe tip must sit in the rolling boil, not in bubbles or near the pot wall.
- Bring the water to a full, rolling boil. Bubbles should be breaking the surface steadily.
- Insert the probe 2-3 inches into the water, keeping it off the bottom.
- Wait for stabilization. Boiling water holds temperature well, so this is fast.
- Record the reading and compare it to the theoretical boiling point for your altitude.
One caveat: if you’re testing a thermometer that reads in whole degrees, the boiling test is less precise than the ice bath. A 1°F error is within the rounding margin. The ice bath is your better diagnostic tool.
How to Read Your Results: Tolerance, Offset, and Drift
You’ve run both tests. Now what? You need to know three terms.
- Tolerance is the acceptable error range. For most cooking, ±2°F is fine. For candy or sous vide, you want ±1°F. For lab work, ±0.5°F.
- Offset is a consistent error. If the thermometer reads 2°F high at both 32°F and 212°F, that’s a simple offset. You can often correct it.
- Drift is a change in accuracy over time. A thermometer that was spot-on last month and now reads 4°F high at freezing has drifted. Drift is a red flag—it means the sensor or mechanical linkage is degrading.
Run both tests and record both readings. If the errors match (both high or both low by the same amount), that’s a linear offset. If the errors differ wildly (accurate at freezing, 6°F off at boiling), the thermometer has a non-linear error. Non-linear errors are almost impossible to fix by calibration—they point to a damaged sensor.
Here’s a comparison of test methods and what they tell you:
| Test | Reference Temp | Best For | Limitations |
|---|---|---|---|
| Ice Bath | 32°F (0°C) | Detecting offsets, verifying freezing-range accuracy | Requires proper ice-to-water ratio and stirring |
| Boiling Water | 212°F (100°C) at sea level | Verifying high-range accuracy | Altitude adjustment needed; less precise with whole-degree displays |
| Reference Thermometer Comparison | Any temperature | Checking mid-range accuracy, non-linear errors | Requires a trusted reference unit |
| Freezer Test | 0°F (-18°C) typical freezer | Cold-range verification | Freezer thermostats vary; use a reference probe |
The Decision Tree: Recalibrate, Adjust, or Replace?
You have your results. Here’s how to act on them.
Adjusting Dial vs. Digital Thermometers
Dial thermometers usually have a hex nut on the back. Hold the stem in a wrench, turn the nut with pliers, and the needle moves. For a digital thermometer, look for a calibration mode in the manual. Many units let you set the offset directly—you enter the known reference temperature and it adjusts itself. Some budget digitals have no adjustment at all; you just have to know the offset and add or subtract it mentally.
If you adjust a dial thermometer, do it in the ice bath. The freezing point is more stable than boiling water, so you get a more reliable adjustment. After adjusting, re-test in boiling water to confirm the high end didn’t shift.
When Your Thermometer Cannot Be Adjusted
Fixed-tip probes and cheap digitals often have no adjustment mechanism. If the error is small and consistent (within 2°F), you can keep using it if you remember the offset. Write it on a piece of tape and stick it to the probe handle. That’s a practical workaround.
If the error is large (over 4°F) or non-linear, replace it. The cost of a ruined brisket or a botched custard exceeds the price of a new thermometer. For commercial use, don’t mess around—a failing probe is a food safety liability. If the thermometer has been dropped, hit hard, or exposed to thermal shock (sudden temperature swings over 300°F), replace it even if it passes the tests. Internal damage can be intermittent.
Beyond the Basics: Testing in Extreme Temperatures and Response Time
The ice bath and boiling water cover the cooking range, but what about a deep fryer at 375°F or a freezer at -10°F? You can test those with a reference thermometer—a second unit you trust, ideally one calibrated recently. Place both probes side by side in the same medium, wait for stabilization, and compare. This method works at any temperature, but it’s only as good as your reference.
Response time is a separate metric from accuracy. A thermometer can be accurate but slow, which matters when you’re temping a steak that’s still on the heat. Here’s how to measure it:
- Set up your ice bath and a cup of warm water at about 100°F.
- Insert the probe into the warm water and let it stabilize.
- Move it to the ice bath and start a timer.
- Record the time it takes to reach 33°F (within 1°F of the reference).
- For a good thermocouple, that’s under 5 seconds. For a dial thermometer, 15-20 seconds is normal. If it takes over 30 seconds, the probe is sluggish—useful to know before you rely on it for quick reads.
Common Mistakes That Ruin Your Accuracy Test (And How to Avoid Them)
You’d be surprised how often a “failed” thermometer test is actually a bad test. Here are the usual culprits.
- Probe depth too shallow. The sensing element is usually at the tip, but not always. Insert at least 2 inches to be safe. A shallow insertion reads the ambient air, not the water.
- Not stirring the ice bath. A stagnant bath develops temperature gradients. Stir, then stir again.
- Using warm water for the ice bath. The ice needs time to pull the water down to 32°F. Wait a few minutes after adding water before testing.
- Testing in a pot that’s too small. A tiny pot of boiling water loses heat through the walls faster than a big one. Use a pot that’s at least 6 inches in diameter.
- Reading too early. Dial thermometers especially take time to settle. Wait until the needle stops moving for at least 10 seconds.
One more: don’t test a thermometer that’s just been washed in hot water. Thermal shock can give a false reading. Let it reach room temperature first.
How Often Should You Test? A Practical Schedule
Frequency depends on use. A home cook who uses a thermometer twice a week can test monthly. A BBQ competitor or a line cook should test weekly. If you drop a thermometer, test it immediately—drops are the leading cause of calibration loss. The Rattleware tool makes weekly checks painless because you have six calibration references on hand, so you can batch-test all your probes at once.
Seasonal changes matter too. If your thermometer sits in a hot car or a freezing garage, temperature extremes can cause drift. Test after any significant storage temperature change.
For a deeper look at maintaining accuracy over the long haul, check out this guide on thermometer accuracy over time. And if you’re working with thermocouples specifically, the thermocouple thermometer guide covers their quirks and proper handling.
Final Checklist: Test Like a Pro Every Time
- Run the ice bath test first—it’s the most reliable reference point you have.
- Run the boiling water test with altitude adjustment if you’re above 1,000 feet.
- Record both readings. Compare the errors to determine if it’s a simple offset or non-linear drift.
- Adjust if you can. Dial nut for analog, calibration mode for digital.
- If you can’t adjust and the error is over 4°F, replace the thermometer. Don’t gamble on a bad probe.
- Measure response time separately—a slow probe is a hidden problem.
- Test weekly for professional use, monthly for home. Always after a drop.
Accuracy testing is a skill, not a chore. Once you’ve done it a few times, it takes five minutes and saves you from ruined meals and wasted ingredients. Your thermometer is a tool—treat it like one, and it’ll treat you right.

I am a mechanical engineer and love doing research on different home and outdoor heating options. When I am not working, I love spending time with my family and friends. I also enjoy blogging about my findings and helping others to find the best heating options for their needs.
Related guides

How Thermometers Power Precision Climate Control Systems
Thermometers play a crucial role in climate control by providing accurate temperature readings essential for monitoring and regulating…

Smart Thermometer Features That Transform Health Monitoring
At 3 AM, your child's forehead feels warm. You stumble to the bathroom, fumble with a plastic cover,…
How to Calibrate a Thermometer for Perfect Accuracy
To calibrate a thermometer for accuracy, immerse it in ice water for 3 minutes; it should read 32°F…