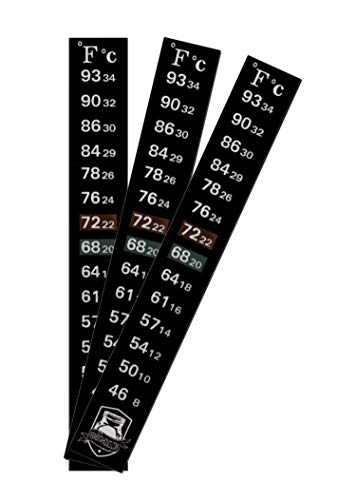
You pitched a perfect pale ale recipe, hit your numbers, and then the finished beer tasted like green apples and nail polish remover. The grain bill was right. The hops were fresh. The yeast was healthy. The one thing that went wrong? Fermentation temperature. It’s the most common reason homebrewers produce beer that tastes “homebrewed” — and it’s also the easiest problem to fix once you understand what’s actually happening inside the fermenter.
This guide covers the science behind temperature’s effect on yeast, the difference between ambient and beer temperature, and three methods to control it — from a $20 swamp cooler to a full temperature-controlled chamber. You’ll also learn advanced tactics like pressure fermentation and diacetyl rests. By the end, you’ll know exactly how to keep your fermentations in the sweet spot, no matter your budget or setup.

Inkbird
Inkbird ITC-308 Digital Temperature Controller Thermostat
- 【Easy to use】 Supports °C/°F display.
- 【Dual relay】able to power refrigeration and heating equipment as conditions change.
- 【Dual Display Window】Displays measured temperature and set temperature at the same time.
If you’re ready to move past guessing and start controlling, a simple temperature controller like the Inkbird ITC-308 plugs into any mini fridge or heat wrap and cycles power based on a probe reading. It’s the backbone of most homebrew fermentation chambers and costs a fraction of a dedicated brewing system.
Why Fermentation Temperature is the #1 Flavor Dial
Your recipe sets the potential flavor. Yeast decides what actually ends up in the glass. Temperature is the single biggest lever you pull to influence yeast behavior, and it’s the one variable most new brewers ignore.
Think about it this way: you can spend $60 on specialty grains and cryo hops, but if your fermenter sits in a 78°F (26°C) kitchen, the yeast will produce more esters and fusel alcohols than the recipe intended. The beer may be technically drinkable, but it won’t taste like the style you brewed. It’ll taste like the temperature.
Professional breweries control fermentation temperature within a degree or two. They do this for every batch, not just lagers. The reason is simple: consistency. If you want your house pale ale to taste the same next month as it does today, you need the same fermentation profile. That requires active control, not ambient luck.
The Science: What Heat Does to Yeast (and Your Beer)
Yeast is a living organism, and temperature directly affects its metabolism. At lower temperatures, yeast works slower, producing fewer byproducts. At higher temperatures, metabolism speeds up, and the yeast starts producing compounds that can ruin a batch.
The two most important byproducts are esters and fusel alcohols. Esters are fruity compounds — think banana, pear, or bubblegum. Some esters are desirable in certain styles, like Hefeweizen or Belgian ales. But in a clean American IPA, they’re a flaw. Fusel alcohols are harsher; they taste solvent-like, hot, or alcoholic, and they can cause headaches. Both increase exponentially as temperature rises.
Esters vs. Fusel Alcohols: The Good, The Bad, The Ugly
Esters form when yeast produces alcohol and fatty acids. At temperatures above 68°F (20°C), ester production ramps up noticeably. For clean ale strains, keeping fermentation below 68°F (20°C) minimizes fruity character. For Belgian or wheat beer strains, you might intentionally push to 75°F (24°C) to encourage esters — but that’s a stylistic choice, not an accident.
Fusel alcohols are worse. They form at high temperatures, typically above 72°F (22°C) for most ale strains, and they taste like harsh, rubbing-alcohol heat. They also take months to mellow, if they ever do. Unlike esters, there’s no style where fusel alcohols are desirable.
The takeaway: know your yeast strain’s preferred range and stay within it. Most ale strains want 62–68°F (17–20°C). Lager strains want 48–55°F (9–13°C). Kveik yeast is the exception — it happily ferments at 80–100°F (27–38°C) and produces clean beer. But unless you’re using kveik, treat the upper end of the range as a warning zone, not a target.
The Critical Difference: Ambient vs. Beer Temperature
Here’s the mistake almost every beginner makes: they measure the room temperature, not the beer temperature. Fermentation is exothermic — it generates heat. A vigorously fermenting beer can run 5–10°F (3–6°C) hotter than the surrounding air.
If your basement sits at 68°F (20°C), your beer might actually be at 75°F (24°C) during the peak of fermentation. That’s a full 7°F above the ideal range for most ales. The result is a beer that tastes hotter and fruitier than intended, even though you “controlled” the room.
You need to measure the beer itself. A thermowell — a stainless steel tube that fits into the fermenter — lets you insert a temperature probe directly into the liquid. This gives you the true fermentation temperature, not a guess. If you can’t use a thermowell, tape the probe to the side of the fermenter and insulate it with a folded towel or foam pad. That gets you close, but it’s not as accurate as a thermowell.
Managing the Exothermic Spike
The first 48–72 hours of fermentation are the most active, and that’s when the beer gets hottest. This is also when esters and fusels form most aggressively. If you’re using a temperature controller, set it to the low end of your yeast’s range during this period. The controller will kick in cooling as the beer’s temperature rises, keeping it in check.
For example, if you’re brewing a California Common with Wyeast 2112, target 60°F (16°C). Set your controller to 60°F and let it cycle the fridge or freezer as needed. The beer will rise a degree or two above the set point before cooling kicks in, which is normal. Don’t panic if you see a 1–2°F overshoot during the peak.
After the first three days, the exothermic spike subsides. You can let the temperature rise a few degrees to encourage the yeast to finish up and clean up after itself. This is called a free rise, and it’s a standard technique in professional breweries.
Ideal Temperature Ranges by Style (and Yeast Strain)
Every yeast strain has a published temperature range, but the ideal range for clean beer is usually narrower than the full range. Here’s a practical reference:
| Style / Yeast | Ideal Range | Notes |
|---|---|---|
| American Ale (Wyeast 1056, US-05) | 62–68°F (17–20°C) | Clean, neutral. Above 68°F produces noticeable esters. |
| English Ale (London Ale III, S-04) | 64–70°F (18–21°C) | Some fruitiness is expected, but keep it under 70°F. |
| Belgian Ale (Wyeast 1214, Trappist) | 65–75°F (18–24°C) | Esters are desirable. Let it rise naturally. |
| Lager (Wyeast 2124, W-34/70) | 48–55°F (9–13°C) | Cleaner at the low end. Needs a diacetyl rest. |
| Kveik (Voss, Hornindal) | 80–100°F (27–38°C) | Exceptionally clean at high temps. No cooling needed. |
| Wheat Beer (Hefeweizen) | 62–70°F (17–21°C) | Banana esters from higher temps; clove from lower. |
These are starting points, not laws. Your specific strain’s datasheet is the final authority. But if you’re unsure, err on the low side. You can always raise the temperature later to finish fermentation, but you can’t remove esters once they’re formed.
Method 1: The Budget-Friendly Swamp Cooler
The swamp cooler is the classic no-cost solution. It’s a plastic tub filled with water, your fermenter sits in the water, and a t-shirt or towel draped over the fermenter wicks moisture up. A fan blowing across the wet fabric evaporates water, which cools the fermenter.
This method can keep your beer 5–10°F (3–6°C) below ambient, depending on humidity. In a dry climate, it works surprisingly well. In a humid one, less so. It’s also fiddly — you’ll be swapping frozen water bottles in and out twice a day to maintain a steady temperature, and you’ll still see swings of 3–4°F (1.5–2°C).
For a beginner on a tight budget, a swamp cooler is a genuine improvement over nothing. But it’s not set-and-forget. If you’re brewing regularly, you’ll quickly outgrow it. The temperature swings are too wide for lagers, and the daily maintenance gets old.
Method 2: The Ultimate Solution – Building a Temperature-Controlled Chamber
A fermentation chamber is a dedicated space — usually a chest freezer or mini fridge — controlled by a temperature controller. It’s the standard solution for serious homebrewers, and it’s not as expensive or complicated as you might think.
You need three things: a fridge or freezer, a temperature controller, and a heat source. The controller monitors the beer’s temperature and switches power between the cooling and heating outlets. When the beer gets too warm, it turns on the fridge. When it gets too cold, it turns on a heat wrap or light bulb.
The Inkbird ITC-308 is the go-to controller for this build. It has two outlets — one for cooling, one for heating — and a probe that reads the beer’s temperature. The dual display shows both the current temperature and your set point, so you always know what’s happening. It also has a buzzer alarm that sounds if the temperature goes out of range, which is handy when you’re fermenting a lager at 50°F and the ambient room drops to 40°F overnight.
Simplified Wiring for an Inkbird Controller
Wiring an ITC-308 is genuinely plug-and-play. You don’t need to cut wires or touch mains voltage. Here’s the setup:
- Plug the Inkbird into the wall outlet.
- Plug your fridge or freezer into the outlet marked “Cool” on the controller.
- Plug your heat source (a seedling heat mat or a reptile heat bulb in a metal housing) into the outlet marked “Heat”.
- Place the temperature probe in a thermowell in your fermenter, or tape it to the side and insulate it.
- Set your target temperature and the differential (usually 1–2°F).
That’s it. No electrical knowledge required. The controller does the switching automatically. The compressor delay feature on the ITC-308 protects your fridge from short-cycling, which is a real concern when the controller is flipping the compressor on and off every few minutes.
One note: chest freezers work better than mini fridges because they hold temperature more evenly and have more headroom for a tall fermenter. You’ll need a temperature controller that can handle the freezer’s startup surge — the ITC-308 is rated for 1100W, which covers most home freezers. Check the current price on Amazon if you’re shopping.
If you’re building a chamber from scratch, consider adding a small circulating fan inside to eliminate temperature stratification. A cheap computer fan running on a 12V adapter does the job. Without airflow, the top of the chamber can be 5°F warmer than the bottom, which defeats the purpose of precise control.
Method 3: Advanced Tactics – Pressure Fermentation & Diacetyl Rests
Pressure fermentation is a workaround that lets you ferment warm without the usual off-flavors. When yeast ferments under pressure — typically 10–15 psi — it produces fewer esters and fusel alcohols. This means you can ferment a lager at 60°F (16°C) instead of 50°F (10°C) and get a clean result in half the time.
You need a pressure-capable fermenter (like a keg or a Fermzilla) and a spunding valve to regulate pressure. The valve releases excess CO2 once the pressure hits your set point. It’s a clever trick, but it’s not a replacement for proper temperature control — it’s a supplement. Pressure affects yeast metabolism, but it doesn’t eliminate the need for temperature management. You still need to keep the beer within a reasonable range.
Diacetyl rests are another advanced tactic. Diacetyl is a compound that tastes like butter or butterscotch. It’s produced during fermentation and normally reabsorbed by the yeast as fermentation winds down. But at cold temperatures, yeast stops cleaning up after itself. That’s why lagers need a diacetyl rest.
Here’s the protocol: when fermentation is about 80–90% complete (usually day 5–7 for a lager), raise the temperature to 60–65°F (16–18°C) and hold it there for 2–3 days. This wakes the yeast up and prompts it to reabsorb the diacetyl. Then you can crash cool. High-gravity ales can benefit from a diacetyl rest too, especially if you fermented them at the low end of the range.
Cold-Side Control: Lagering and Cold Crashing
Temperature control doesn’t stop when fermentation ends. Cold crashing — dropping the beer to near-freezing before packaging — helps yeast and haze particles settle out, leaving clearer beer. It also helps you avoid transferring sediment to your keg or bottles.
For lagers, the traditional approach is to drop the temperature gradually — about 5°F per day — until you reach 32–35°F (0–2°C). Then hold it for 2–4 weeks. This is what gives lagers their clean, crisp character. A temperature controller makes this easy: just lower the set point a few degrees each day.
For ales, a quick cold crash to 35°F (2°C) for 24–48 hours is usually enough. You don’t need to be gentle — just drop the temperature and wait. The key is to do it before packaging, not after. Once you bottle or keg, the beer is at whatever temperature your serving setup provides.
If you’re using a Tilt hydrometer or similar floating device, you can track both specific gravity and temperature in real time. This lets you see the exothermic spike as it happens and adjust your controller before the beer gets too warm. It’s a nice-to-have, not a necessity, but it makes the whole process more visible.
Final Checklist for Perfect Fermentation Control
- Measure the beer’s temperature, not the room’s. Use a thermowell or insulated probe taped to the fermenter.
- Know your yeast strain’s ideal range, and aim for the low end during the first 72 hours to minimize esters and fusel alcohols.
- Expect a 5–10°F (3–6°C) exothermic spike during peak fermentation. Set your controller to compensate.
- Start with a swamp cooler if you’re on a budget, but plan to upgrade to a temperature-controlled chamber once you’re brewing regularly.
- Build a chamber with an Inkbird ITC-308, a chest freezer, and a heat source. It’s plug-and-play, no wiring required.
- Use a diacetyl rest for lagers and high-gravity ales: raise to 60–65°F (16–18°C) for 2–3 days near the end of fermentation.
- Cold crash before packaging, and consider pressure fermentation as a supplement to — not a replacement for — temperature control.
Fermentation temperature control is the difference between beer that tastes like your recipe and beer that tastes like your room. It’s the one upgrade that improves every batch, regardless of style or skill level. Start with the cheapest method that works for you, and build from there. Your palate will notice the difference immediately.
Frequently Asked Questions
What happens if I ferment too warm?
You’ll get increased ester production (fruity flavors) and fusel alcohols (hot, solvent-like flavors). In extreme cases, the beer can taste like nail polish remover. These compounds don’t age out quickly — fusels can take months to mellow, and they often never fully disappear. The fix is prevention: keep fermentation within your yeast’s ideal range.
Can I ferment in a regular fridge without a controller?
Technically yes, but a fridge’s built-in thermostat keeps the air at 38–40°F (3–4°C), which is too cold for ale fermentation and too cold for most lager fermentation too. You’d need to unplug and plug the fridge manually, which is impractical. A temperature controller like the Inkbird ITC-308 replaces the fridge’s thermostat and lets you set any temperature you want.
How do I know if my beer needs a diacetyl rest?
If you’re brewing a lager, you should always do one. If you’re brewing a high-gravity ale (above 1.060 OG) or a beer fermented below 62°F (17°C), it’s a good idea. The test is simple: after fermentation appears complete, warm the beer to 60–65°F (16–18°C) for 2–3 days. If you taste butter or butterscotch in a sample, the rest is working. If you don’t, you’re done.
Is pressure fermentation worth the extra equipment?
It depends on your goals. If you want to ferment lagers at ale temperatures and save time, yes. If you’re happy with your current setup and don’t mind waiting, it’s not necessary. Pressure fermentation also lets you carbonate naturally while fermenting, which saves CO2. But it adds complexity and cost, and it doesn’t eliminate the need for temperature control entirely.
What’s the best way to cool a fermenter without a fridge?
A swamp cooler with a fan is the most effective budget method. You can also use frozen water bottles rotated every 8–12 hours, but that’s labor-intensive. Another option is a dedicated cooling wrap or a heat exchanger like a glycol chiller, but those are more expensive. For most homebrewers, a swamp cooler is the sweet spot between cost and effectiveness.

I am a mechanical engineer and love doing research on different home and outdoor heating options. When I am not working, I love spending time with my family and friends. I also enjoy blogging about my findings and helping others to find the best heating options for their needs.
Related guides

HVAC Service Frequency: How Often Should You Schedule Maintenance?
HVAC systems should be serviced at least once a year to ensure optimal performance, efficiency, and longevity. Your…
Build a Smart Temperature Controlled Fan with Arduino
To make a temperature-controlled fan using Arduino, connect a temperature sensor and a relay module to control the…
7 Warning Signs Your HVAC Is Low on Refrigerant
When HVAC is low on refrigerant, it leads to reduced cooling efficiency, increased energy bills, and potential compressor…