
You turn on the burner and expect a crisp blue cone of flame. Instead you get a lazy yellow flicker that leaves soot on your pans. Or maybe one burner won’t light at all, and you’re tired of swapping parts that don’t fix it. That’s the moment most people realize they’ve been treating their gas stove wrong.
This article walks you through what actually causes burner problems, which cleaning tricks work and which ones ruin your stove, and how to get every burner back to perfect operation. No vague advice. No marketing fluff. Just the numbers, the tools, and the routine that keeps gas flames sharp and efficient.
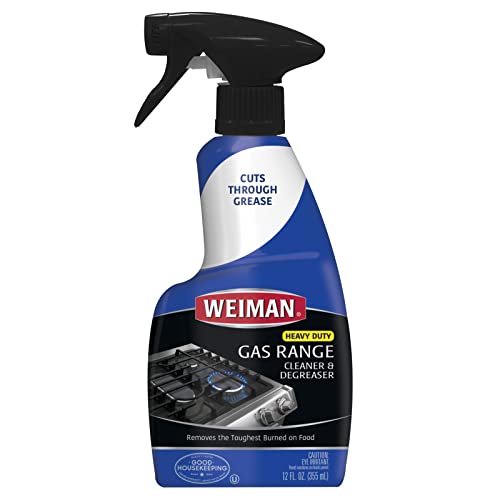
Weiman
Weiman Gas Range Cleaner and Degreaser, Single,…
Powerful Gas Range Cleaner & Degreaser: Dissolves cooked-on, stubborn splatter, grease and food messes and gives your gas range a sleek shine
See on AmazonBy the end you’ll know why yellow flames cost you money, why soaking burner caps in water is a bad idea, and exactly how to clean each burner part without damaging it.
To keep those burners looking and performing like new, a dedicated cleaner helps cut through the baked-on grease that sticks to grates and burner caps. Weiman Gas Range Cleaner and Degreaser is formulated to dissolve that stubborn residue without harsh fumes. Spray it on, let it sit for up to 30 minutes on heavy buildup, then wipe clean. It works on stovetops, knobs, drip pans, and even BBQ grates.
Why Your Gas Stove Burner Acts Up
Every burner issue traces back to one of three things: blocked gas flow, improper air mixture, or physical damage. Blocked gas flow is the common one. A tiny bit of crud inside the burner ports stops gas from escaping evenly. That creates a weak flame on one side and a strong one on the other.
Air mixture problems show up as orange or yellow flames. The burner needs the right amount of oxygen to burn cleanly. If the air shutter is clogged or adjusted wrong, the gas doesn’t combust completely. That wastes fuel and coats your cookware with carbon.
Physical damage means warped burner caps, rusted igniters, or bent gas orifices. Those parts usually need replacement. But nine times out of ten, the fix is just a thorough cleaning. Knowing which problem you’re facing saves you money on unnecessary repairs.
The Yellow Flame Myth (And Why It Costs You Money)
Here’s the myth: yellow flames mean the stove is running hotter. That’s dead wrong. A yellow flame indicates incomplete combustion. The gas is burning, but not all of it turns into heat. Some of it turns into carbon monoxide and soot.
That yellow tip you see means you’re paying for gas that doesn’t cook your food. Inefficient flames can waste 10 to 15 percent of the fuel. Over a year, that adds up. Plus the soot buildup on your pots and burner grates means more scrubbing.
What causes yellow flames? Usually a dirty air shutter or a misaligned burner cap. Sometimes it’s moisture trapped in the burner ports after cleaning. The fix is simple: dry the burner cap and head completely after washing, and check that the air shutter isn’t clogged with grease. Most burners have a small metal flap near the gas inlet. A soft brush clears it.
If the flame stays yellow after cleaning and drying, the air shutter may need adjustment. That’s a simple turn of a screw. But don’t guess – look up your stove’s manual for the correct air-to-fuel ratio. It’s usually set at the factory, but a few quarter-turns can fix a persistent yellow flame.
Soaking Burner Caps: The Expensive Mistake Most People Make
Your burner caps look tough. They’re cast iron or enameled steel. So you drop them in a sink full of soapy water and leave them overnight, right? Don’t do that.
Here’s why: burner caps and heads have tiny gas ports – those holes where the flame comes out. When you soak them, water gets trapped inside those holes. It’s nearly impossible to dry them completely by shaking or air drying. The trapped water blocks gas flow the next time you cook. You get weak flames or no flame at all.
Worse, moisture inside the burner head causes rust. Rust flakes break loose and clog the gas orifice, the tiny brass fitting that meters gas. Replacing a clogged orifice costs $10 to $20. But the labor to access it – pulling the stove out, disassembling the burner – runs much more. I’ve seen repair bills over $150 for something a different cleaning method would have prevented.
The right approach: wipe burner caps and heads with a damp cloth or sponge, scrub with a non-abrasive brush, then dry them immediately with a towel or hairdryer on low heat. If you must use a wet method, disassemble the burner and blow compressed air through the ports afterward. A can of keyboard duster works fine.
Step-by-Step Burner Maintenance Routine
Here’s a routine that keeps every burner running perfectly. I split it by part because each piece needs a different approach.
Burner grates (the metal bars that hold pans). These get caked with grease and burnt food. Clean them with a degreaser like Weiman’s, let it sit 10-15 minutes, then scrub with a stiff nylon brush. Avoid steel wool – it scratches the enamel and creates rust spots. Dry thoroughly before putting back.
Burner caps (the top piece covering the flame). Never soak them. Wipe with a damp cloth and mild soap, use a toothbrush on the ports, then dry completely. If food is baked on, use a dedicated range cleaner spray and let it sit for 5 minutes before wiping.
Burner heads (the base where gas exits). These have the flame ports. Use a straightened paperclip or a sewing needle to clear each port. Push gently – don’t widen the hole. Then brush the surface with a soft brush to dislodge loose debris. Compressed air finishes the job.
Gas orifices (tiny brass fittings under the burner head). These rarely clog if you maintain the ports above. If you suspect a clog, unscrew the orifice and soak it in vinegar for 30 minutes. Rinse and dry. Reinstall carefully – the threads are fine and cross-threading damages the valve body.
Here’s a comparison table for quick reference:
| Part | Best Cleaning Method | Frequency | What to Avoid |
|---|---|---|---|
| Burner grates | Degreaser spray + nylon brush | Weekly or after heavy spill | Steel wool, oven cleaner |
| Burner caps | Damp cloth + toothbrush, dry immediately | Monthly | Soaking in water, dishwasher |
| Burner heads | Paperclip to clear ports, brush, compressed air | Every 3 months | Metal tools that scratch |
| Gas orifices | Vinegar soak only if clogged | As needed | Drilling or enlarging holes |
For more on managing overall stove expenses, check gas stove maintenance costs. If you want to squeeze more performance from your burners, see our guide on optimize heat output.
Frequently Asked Questions
Can I use oven cleaner on burner caps?
No. Oven cleaner is caustic and damages the protective coating on burner caps. It can also leave a residue that causes yellow flames. Stick to a mild degreaser or a dedicated range cleaner.
How often should I clean burner ports?
Every three months is a good baseline. If you cook greasy foods daily, bump it to every two months. You’ll know it’s time when one side of the flame is smaller than the other, or when the flame sounds sputtery.
Is it normal for flames to be orange sometimes?
A brief orange flash when lighting is normal – dust burning off. But a steady orange or yellow flame means the air-to-fuel ratio is off. Check for a dirty air shutter or a misaligned burner cap. Also make sure the burner is completely dry after cleaning.
What causes a burner to not light?
Three common causes: a clogged gas port, a dirty igniter, or a tripped safety valve. Clean the ports first. Then wipe the igniter (the spark tip) with a dry cotton swab. If it still won’t light, the safety valve may need resetting – turn off the stove gas valve for 2 minutes, then turn it back on. If that fails, call a pro.
Can I use a toothpick to clean burner holes?
A wooden toothpick can work, but it breaks easily and leaves splinters inside the port. A straight paperclip or a dedicated burner cleaning needle is better. Whatever you use, push straight in and out – don’t wiggle or scrape the sides.
What to Do From Here
- Clean burner grates weekly with a degreaser spray and nylon brush.
- Never soak burner caps or heads in water – wipe and dry immediately.
- Clear burner ports with a paperclip or needle every 3 months.
- Check flame color weekly. Yellow or orange flames need attention.
- Use compressed air or a hairdryer to dry burner parts after cleaning.
- Replace warped burner caps or rusted igniters – don’t try to fix them.
- Store a dedicated range cleaner like Weiman’s under the sink for quick maintenance.

