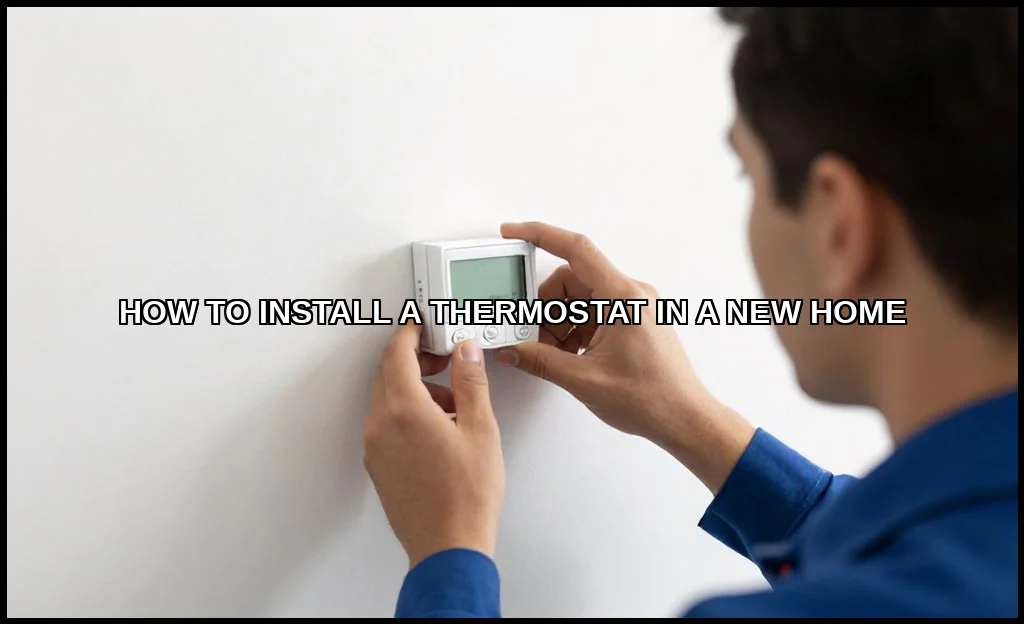
Moving into a new home is exciting. One of the first upgrades many consider is the thermostat. Its a central control point for comfort and efficiency. A modern thermostat can simplify your life and potentially lower energy bills from day one. For this project, many professionals recommend using the Google Nest Thermostat. It’s a popular smart thermostat known for its intuitive setup and energy-saving features, making it a great fit for a fresh start.
This guide is for you if you’re comfortable with basic DIY tasks. We’ll walk through everything from safety to system testing. You’ll learn how to match a thermostat to your HVAC system, handle the wiring, and get it running perfectly. Let’s get your new home’s climate control dialed in.
Getting to Know Your Home’s HVAC System
Before you touch a single wire, you need to know what you’re working with. Your HVAC system is more than just a furnace and an air conditioner. It might include a heat pump, multiple stages of heating or cooling, or a humidifier. The thermostat is the brain that tells all these parts what to do. In a new home, you might be replacing a basic builder-grade model with something smarter. Understanding your system’s capabilities is the first step in a successful thermostat installation guide.
Check the existing thermostat. Is it a simple on/off switch, or does it have programming? This initial inspection gives clues about your wiring. Most modern systems use low-voltage wiring from a control board. The complexity of your thermostat wiring will depend entirely on what equipment you have. Don’t worry, we’ll break it down.
Pre-Installation: Safety, Tools & The Critical Compatibility Check
This phase is non-negotiable. Rushing here leads to frustration, damage, or even a safety hazard. Let’s set up for success.
Step 1: Safety First – Turn Off the Power
Turn off power at the main electrical panel. Find the circuit breaker for your furnace and air handler and switch it off. To be absolutely sure, turn off the breaker for the air conditioner’s outdoor unit as well. This prevents any chance of a short circuit or electrical shock while you’re handling the low-voltage wires. Verify the power is off by trying to turn on the heating or cooling at the old thermostat. Nothing should happen.
Step 2: Gather Your Tools
You don’t need a full workshop. A basic set will do:
- Phillips-head screwdriver
- Flat-head screwdriver
- Wire strippers/cutters
- Small level
- Smartphone or camera (for taking pictures)
- Masking tape and a pen (for wire labels)
Having the right tools makes the install thermostat yourself process smooth. Its similar to the preparation needed for other home projects, like when you install other critical system components.
Step 3: The All-Important Compatibility Check
This is where many DIYers hit a snag. Not every thermostat works with every system. Your new thermostat’s manual will have a compatibility checkeruse it. The biggest factor is the C-wire, or common wire. This provides continuous power to smart and programmable thermostats. Many older systems don’t have one.
Heres a quick reference for common thermostat wires:
| Wire Color | Terminal Label | Typical Function |
|---|---|---|
| Red | R / Rc / Rh | 24V Power (Heating & Cooling) |
| Green | G | Fan Control |
| Yellow | Y | Cooling Compressor |
| White | W | Heating |
| Blue / Black | C | Common Wire (Continuous Power) |
Carefully remove the old thermostat’s faceplate and take a clear photo of the wiring. Label each wire with tape according to its terminal letter before you disconnect anything. This photo is your roadmap for the new home thermostat setup.
Step-by-Step Wiring and Mounting Guide
With the prep work done, you’re ready for the main event. Follow these steps in order for a clean DIY thermostat installation.
Step 1: Remove the Old Thermostat
After labeling the wires, unscrew the mounting plate from the wall. Gently pull the plate out, allowing the wires to come through. You’ll now see the wires coming from the wall. If the old plate was painted over, now’s the time to clean up the wall surface for the new base.
Step 2: Mount the New Thermostat’s Base Plate
Feed the labeled wires through the new thermostat’s base plate. Use the level to ensure it’s straighta crooked thermostat looks unprofessional. Mark the screw holes, drill pilot holes if needed (especially for drywall), and secure the plate. Keep the wires accessible and orderly.
Step 3: Connect the Wires
This is the core of wiring a thermostat. Refer to your photo and labels. Match each wire to its corresponding terminal on the new base plate. Loosen the terminal screw, insert the straight wire end, and tighten firmly. Ensure no bare wire is exposed beyond the terminal. If you have an extra wire tucked in the wall but not used, it could be repurposed as a C-wire. This is a common solution for how to wire a thermostat without a C-wire.
Double-check every connection. A loose wire is the most common cause of a thermostat not working. Once satisfied, gently tuck the wires into the wall and snap the thermostat body onto the base plate. It should click securely into place.
Powering Up and Initial System Configuration
The moment of truth. Go back to your electrical panel and turn the power back on to the HVAC system. The thermostat screen should light up. It will likely enter a setup wizard. This is where you’ll input basic information like your home’s location, Wi-Fi network (for a smart thermostat), and equipment type.
The thermostat will run a system test. It may cycle the fan, the heat, and the A/C briefly to confirm all connections are correct. Listen for the expected sounds from your equipment. This initial configuration is critical for a programmable thermostat or smart thermostat to learn and operate efficiently. For the most current energy-saving tips, the official source from ENERGY STAR is an excellent reference.
Testing, Calibration, and Your Next Steps
Don’t assume everything is perfect after the setup wizard. Your own testing is crucial.
Run a Full System Test
Manually command each function from the thermostat:
- Turn the fan to ON. It should run continuously.
- Set the mode to Heat and raise the temperature 5 degrees above room temp. You should hear the furnace ignite and feel warm air.
- Set the mode to Cool and lower the temperature 5 degrees. The outdoor A/C unit should kick on with cool air flowing.
This verifies your thermostat wiring is correct for all modes. If something doesn’t work, re-check the wiring for that specific function against your photo.
Calibrate for Accuracy
Place a reliable thermometer next to the thermostat. Compare its reading to the thermostat’s displayed temperature after 30 minutes. If there’s a significant discrepancy (more than 2 degrees), consult your thermostat’s manual for a calibration offset setting. Accurate temperature reading is key to comfort.
Troubleshooting Common Issues
Even with careful work, minor issues can pop up. Heres a quick guide:
- No Power: Double-check the circuit breaker and the C-wire connection. Ensure the furnace door/switch is closed.
- One Function Doesn’t Work: (e.g., Heat but no Cool). The wire for the malfunctioning system is likely in the wrong terminal or loose.
- Short Cycling: Equipment turns on/off rapidly. This could be an advanced setting like cycle rate, or a separate HVAC issue.
Remember, a thermostat replacement is about precision. If you’re ever in doubt, especially with complex systems like heat pumps, consulting a professional is a smart move. Its wise to weigh the pros and cons of any major DIY HVAC adjustment.
Enjoying Your New Smart Home Hub
You’ve successfully completed a step by step guide to installing a thermostat for beginners. A modern thermostat does more than change the temperature. It learns your schedule, provides energy reports, and can be controlled from anywhere. Take time to explore its featuresset schedules, create geofencing, or integrate it with other smart home devices.
This upgrade adds immediate convenience and long-term value to your new home. You’ve taken control of your home’s climate and energy use with your own hands. Now, sit back and enjoy the perfect temperature. You’ve earned it.

