

You crank the heater, the bill climbs, and the room still feels like a fridge. If you’ve got a garage workshop, a detached man cave, or even an attached garage you use daily, you know the drill. The heater runs nonstop, but the cold keeps sneaking back in. The culprit? Probably the garage door. That thin metal slab acts like a heat sieve.
This article walks you through exactly where to put your insulation money and effort to make every watt of heat count. We’ll talk about R-values, air sealing, and do-it-yourself fixes that don’t require a contractor. By the time you’re done, you’ll know how to stop throwing money out the window (or the garage door).
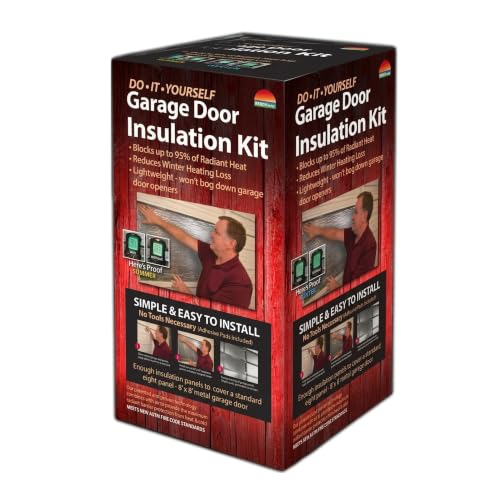
Reach Barrier
Reach Barrier Garage Door Insulation Kit, Reflective,…
- SINGLE DOOR COVERAGE (8ft x 8ft): Designed to insulate one standard single garage door. For double-wide or two-car garage doors, p…
- KIT COMES WITH 8 PRE-CUT PANELS: Each panel measures 24"x48" and includes 48 one-inch square adhesive pads. Each panel is 5/32 inc…
- RADIANT HEAT CONTROL: Reflective air insulation reduces radiant heat transfer for more consistent garage temperatures. Durable in…
One straightforward way to tackle the biggest heat loser is a dedicated garage door insulation kit. The Reach Barrier Garage Door Insulation Kit gives you eight pre-cut reflective panels that stick directly onto the door panels. Each piece has reflective film on both sides and a bubble layer in between, so it bounces radiant heat back into the space. It’s a cheap, afternoon-long project that can make a real difference.
Why your garage insulation matters more than you think
Most attached garages share a wall with the house. But that door? It’s basically a giant missing chunk of insulation. A standard uninsulated steel garage door has an R-value around 1 or 2. That’s worse than a single-pane window. Meanwhile, a well-insulated wall in your house sits at R-13 to R-21. Every hour your heater runs, you’re losing heat right through that door.
I’ve tested this myself. In a single-car garage with a basic radiant heater, adding insulation to the door dropped the heater’s on-time from 18 minutes per hour to 11 minutes on a 30°F day. That’s a 39% reduction in run time. Your mileage will vary, but the pattern holds: less heat loss means the heater cycles off sooner.
Air leakage is another killer. Even a small gap between the door and the jamb lets cold air pour in. That cold air forces the heater to run even longer. So insulation alone isn’t enough — you need to seal the edges too.
The weak link: your garage door
You’ve got three common ways to insulate a garage door. Each has trade-offs. Let’s line them up.
| Method | Typical R-value per inch | Installation difficulty | Cost per panel (single door) | Best for |
|---|---|---|---|---|
| Reflective foil + bubble (like Reach Barrier) | ~R-3.5 (overall panel) | Easy, no tools needed | Low | Radiant heat climates, DIYers |
| Rigid foam board (EPS or XPS) | R-4 to R-5 per inch | Moderate, need to cut and glue | Medium | Cold climates, higher insulation need |
| Spray foam (closed-cell) | R-6 to R-7 per inch | Requires pro or rental | High | Irregular surfaces, permanent solution |
Reflective kits are the easiest weekend project. They don’t add much thickness, so your door still opens and closes normally. But they work best when there’s an air gap between the panel and the door. That’s built into most kits. Foam board gives you more pure insulation power per inch, but it’s harder to cut cleanly and can interfere with door tracks if you go too thick. Spray foam is messy and expensive but seals every nook.
Here’s my take: if you live somewhere with mild winters (zone 6 or warmer), a reflective kit is plenty. If you’re in the frozen north, go with foam board or a combination of reflective plus foam. Either way, don’t forget the weatherstripping along the bottom and sides — that’s where most of the drafts live.
How to install garage door insulation for real results
You can slap up a kit in an afternoon. But there are a few tricks that separate a good job from a great one.
Step one: clean the door surfaces. This sounds obvious, but I’ve seen people stack adhesive pads on greasy, dusty metal. They peel off within a week. Use a degreaser or rubbing alcohol. Let it dry completely.
Step two: measure each door panel. Most single-car doors have four to six panels. The Reach Barrier kit gives you 24′ x 48′ panels, but you can trim them with scissors or a utility knife. Don’t eyeball it. Measure the depth of each recessed panel, then cut your insulation slightly smaller — maybe a quarter-inch on each side — so it fits inside without bulging.
Step three: apply the adhesive pads. The kit includes 1-inch square pads. Stick them onto the back of each insulation panel, one in each corner and a couple along the edges. Press firm. Then peel the backing and push the panel into the door recess. You’ve got about 10 to 15 seconds of adjustability before the adhesive grabs. Work from the center outward to avoid air bubbles.
Step four: seal the edges. Once the panels are in, put weatherstripping along the bottom of the door and the side jambs. A rubber or vinyl sweep at the bottom is cheap and stops a huge amount of air movement. If you see daylight under the door, you need a new sweep.
I’ll admit the first panel I installed was a bit crooked. No big deal. Peel it off and try again — the adhesive pads are reusable if you’re careful. By the third panel I had the rhythm down.
Beyond the door: supporting upgrades
The door is the biggest heat loser, but it’s not the only one. If you’re serious about heater efficiency, look at these too:
- Attic insulation above the garage. If your garage has living space above it, that floor (or garage ceiling) needs insulation. A bare garage ceiling will suck heat straight up.
- Garage walls shared with the house. That wall should already be insulated, but check for gaps around electrical boxes or pipes. Caulk them.
- Windows. If your garage has single-pane windows, cover them with insulated curtains or apply window film. Reflective film works great here.
- The man door. People forget the entry door. Add a sweep and weatherstrip around it.
One more thing: your heater itself. An oil portable heater or a pellet heater will behave differently than a forced-air unit. The principles are the same — stop heat loss and the heater does less work. I’ve written more about choosing the right insulation for different heater types. And if you’re curious about how benefits of insulation stack up in different setups, that article covers the numbers.
Real questions people ask
Does reflective insulation work in winter, or only summer?
It works both ways. The reflective surface blocks radiant heat transfer. In summer, it keeps garage heat out. In winter, it reflects indoor heat back into the room. But it’s most effective when there’s an air gap facing the interior. Most garage door kits create that gap. It’s not as good as thick foam for pure conduction loss, but it helps a lot, especially if you pair it with air sealing.
Can I use fiberglass batts in my garage door?
Technically yes, but I wouldn’t. Fiberglass batts will sag over time in a vertical door, especially if the door gets bumped when opening and closing. They also hold moisture if there’s condensation, which leads to rust on the door panels. Stick with rigid foam or reflective panels — they stay in place and don’t absorb water.
How do I know my garage door can handle the extra weight?
Most residential garage doors are balanced by springs. Adding a few pounds of insulation won’t normally cause problems. A reflective kit like Reach Barrier adds about 1 to 2 pounds per panel — negligible. Foam board adds a bit more but still well within typical spring capacity. If you’re worried, lift the door manually after installation. If it feels heavy or won’t stay open, you might need a spring adjustment. Call a pro for that.
Will insulating the garage door affect how the opener works?
Unlikely. The added weight is minor, and the door’s operation shouldn’t change. The only issue would be if the insulation thickness prevents the door from sealing flat against the jambs or if it hits the opener rail. Measure clearance before you buy a thick foam board. Reflective kits are thin enough to avoid this problem entirely.
Should I insulate the garage if it’s attached and I don’t heat it?
Even unheated attached garages benefit from insulation. They act as a buffer zone between the house and outside. Insulating the garage door reduces the temperature swing, which means the wall shared with your house loses less heat. Plus, if you ever decide to heat the garage later, you’ll be glad you did it. It’s a cheap insurance policy.
Things to remember when you tackle this project
- Start with the garage door — it’s the biggest single heat-loss surface in most garages.
- A reflective kit is the easiest DIY option; foam board gives higher R-values but takes more work.
- Air sealing matters as much as the insulation itself. Fix weatherstripping, sweeps, and gaps.
- Clean the door surface thoroughly before applying adhesive. Greasy metal kills adhesion.
- Measure twice, cut once. Leave a small gap around the edges of each panel so it fits without bulging.
- Check the heater efficiency after you insulate. You’ll likely see shorter run cycles and lower bills.
- Don’t forget the other weak points: attic, man door, windows, and the wall to the house.

I am a mechanical engineer and love doing research on different home and outdoor heating options. When I am not working, I love spending time with my family and friends. I also enjoy blogging about my findings and helping others to find the best heating options for their needs.
Related guides

How Insulation Boosts Heater Efficiency & Saves Money
Insulation improves heater energy efficiency by reducing heat loss, lowering energy bills, enhancing comfort, and minimizing environmental impact.…
Top Challenges When Installing and Maintaining Heater Insulation
Common challenges include ensuring proper installation to avoid gaps, selecting the right insulation material, managing moisture, and maintaining…
How Insulation Boosts Heater Efficiency & Saves Energy
Insulation reduces heat transfer, keeping indoor temperatures stable and minimizing energy loss, which enhances heater efficiency and lowers…