How to Insulate Basement for Better Heater Efficiency in 2 Days
On this page 5 sections
Say your basement is 24 by 30 feet with concrete walls and a dirt floor. Without insulation, your heater works overtime to keep it warm, driving up your energy bills. Insulating the basement slows heat loss and helps your heater maintain a steady temperature with less effort.
This guide covers the essential steps, tools, and materials you need to insulate your basement effectively. You’ll also learn about common mistakes that cause damage or leaks and when to call in a professional.
How to Insulate Basement for Better Heater Efficiency
To insulate a basement effectively for better heater efficiency, seal the rim joists, insulate walls and floors with moisture-resistant materials, and install vapor barriers to control dampness. This approach stops heat loss through cold surfaces and drafts, so your heater spends less energy warming the space.
Start by sealing the rim joists, which are the horizontal wood beams at the top of your foundation walls. These areas often leak cold air, so applying rigid foam boards or spray foam insulation here cuts drafts sharply. Spray foam expands to fill gaps, offering an airtight seal that rigid foam alone can’t match.
Next, choose insulation for your basement walls. Rigid foam panels are best against concrete because they resist moisture and keep the space warm. Fiberglass batts are less ideal directly on concrete; they absorb moisture unless covered by a proper vapor barrier. Spray foam works well here too but at a higher cost.
Installing a vapor barrier on walls and floors is crucial. It blocks moisture migrating from the earth or concrete, which can degrade insulation performance and encourage mold. Polyethylene sheets or specialized basement vapor retarders should be fixed tightly behind or over insulation, depending on local building codes.
Insulating floors, especially if your basement is unfinished, also helps maintain consistent temperatures. Use rigid foam under plywood subflooring to cut heat loss through the cold slab. Even a thin layer of insulation here reduces the heater’s workload significantly.
Where you place insulation changes how well your heater works. Insulating the basement walls and sealing leaks means the heater heats the air inside rather than fighting cold surfaces. Uninsulated walls act like giant heat sinks, pulling warmth away nonstop. A well-insulated basement keeps heat where you want it, cutting fuel or electricity use.
In basement heater insulating, remember that an insulated basement can allow you to choose a smaller, more efficient heater. Less heat escapes, so the heater doesn’t cycle on as often. This lowers operating costs and lengthens heater life.
Basement insulation that saves heat and controls moisture includes sealing rim joists, applying rigid or spray foam to walls, installing vapor barriers correctly, and insulating floors. These steps reduce heat loss and help your heater work better.
Common Mistakes That Cause Damage or Heat Loss

Insulation traps heat by slowing its flow, so heater insulating depends on installing materials correctly and sealing gaps. Compressing fiberglass insulation reduces its R-value because crushed fibers hold less air, which is the actual insulator. If you stuff batts too tightly into cavities, you lose efficiency and end up with a colder basement and higher heating costs.
Skipping vapor barriers is a major error. Without one, moisture from the ground or warm indoor air condenses on cold basement walls and insulation, causing mold, rot, and a musty smell. A polyethylene sheet or foil-faced insulation on walls and floors keeps moisture out and the insulation dry.
Not sealing air leaks around windows, pipes, and rim joists lets cold air bypass insulation. Even small gaps allow drafts that force your heater to work harder. Use caulk or spray foam to seal openings before insulating to keep heat inside and reduce energy waste.
Ignoring signs of existing water damage or leaks ruins insulation jobs fast. Stains, peeling paint, or dampness on walls signal leaks that must be fixed before insulation. Adding insulation over wet areas traps moisture, causing mold and structural damage.
Using incorrect insulation materials against concrete walls is common. Fiberglass batts alone can absorb moisture and lose effectiveness. Rigid foam boards or spray foam insulation with a built-in vapor barrier are better choices for concrete because they block moisture and provide a consistent R-value.
When to Get Permits or Hire a Licensed Professional
These heaters must have proper venting and secure fuel connections to minimize carbon monoxide hazards. Always use an oxygen depletion sensor model indoors and ensure a working carbon monoxide alarm is installed.
Hiring a licensed professional is wise when spray foam insulation goes near gas lines or electrical panels. Mistakes can cause fire hazards or gas leaks. A pro also knows local code requirements for basement insulation and ventilation, which vary widely and affect heater insulator performance and indoor air quality.

Permits also cover adding wall-mounted heaters or making venting changes. These installations often require inspection to confirm proper clearance, venting, and electrical hookup. Safety considerations multiply in damp basements since moisture can affect both heater operation and wiring.
Insulate water heater tanks with blankets or foam covers to reduce standby heat loss, but remember that electrical or gas connections on water heaters should be handled by licensed tradespeople. Incorrect work risks leaks, electrical faults, or scald hazards.
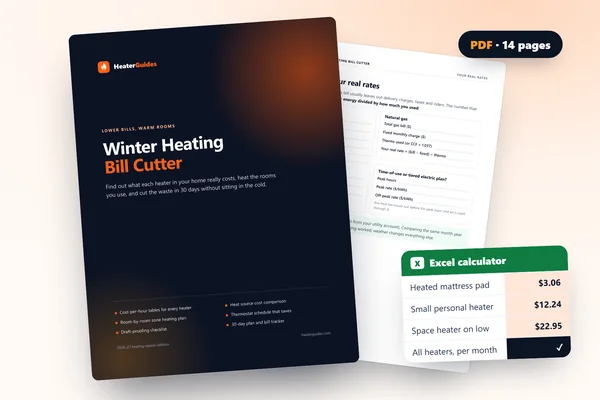 Winter Heating Bill CutterSee what every heater in your home really costs, heat the rooms you use, and cut the waste in 30 days.Cost-per-hour tables for every heaterThermostat schedule and draft-proofing planRunning-cost and bill calculator (Excel)
Checklist of Tools and Materials for Basement Insulation
To insulate your basement effectively for better heater efficiency, you need to gather the right tools and materials before you start. Having everything on hand keeps the job smooth and reduces trips to the hardware store on a cold day.
Start with essential tools: a sharp utility knife for cutting insulation and vapor barriers, a caulk gun to apply sealants neatly, and a measuring tape to size everything accurately. Don’t forget safety gear—gloves protect your hands from fiberglass and foam, goggles shield your eyes from dust and spray, and a respirator keeps you safe from inhaling harmful particles or fumes.
Materials to insulate for heat retention include rigid foam boards that provide a moisture-resistant thermal barrier, spray foam to fill gaps and seal rim joists tight against drafts, and vapor barrier sheets to prevent moisture from compromising your insulation. Insulation fasteners like plastic cap nails or insulation hangers will keep everything securely in place.
You’ll also need measurement and sealing supplies: expanding foam for cracks around pipes or electrical lines, caulk for smaller gaps and seams, and weatherstripping to seal basement doors or windows against heat loss. These help stop air leaks that undermine your heater’s work.