What Is the Best Temperature for Heating a House? A Cost-Per-Degree Guide
On this page 15 sections
- The Short Answer: Why 68°F is the Magic Number
- The Math of Comfort vs. Cost: How Much You Save Per Degree
- The “Away” and “Asleep” Strategy: Setback Schedules That Work
- Room-by-Room Adjustments: Zoning and Smart Vents
- Why Your Thermostat’s Location is Sabotaging Your Bill
- The Health Threshold: When “Cold” Becomes Dangerous
- Smart vs. Programmable: Which Thermostat Pays You Back Faster?
- Quick Wins: Insulation, Weatherstripping, and Ceiling Fans (Reverse Mode)
- Three Common Mistakes to Avoid
- Room-By-Room Adjustments: Zoning and Smart Vents
- Gas Heaters for Homes
- Smart Thermostats and Temperature Sensors
- The Short Answer: Why 68°F Is the Magic Number
- Gas Heaters for Homes
- Gas Heaters for Homes
You come home from work, the house feels like a walk-in freezer, and you crank the thermostat to 74°F. Then the heating bill arrives and you wonder if you’re paying to heat the whole neighborhood. That cycle—freeze, crank, regret—is why most people ask what the best temperature for heating a house actually is.
This guide gives you a straight answer with the math to back it up. You’ll learn the exact temperature to set for different times of day, how much money each degree actually costs, and why your thermostat’s location might be making your furnace work harder than it should. For the full breakdown, see our guide to the best temperature for heat in house. I’ll also cover the health threshold where “cold” stops being a comfort issue and becomes a real risk.
A programmable thermostat makes these strategies easier, and the Honeywell Home X2P Programmable Thermostat handles the scheduling automatically. It offers 5-2 day programming, a backlit display, and a change-filter reminder so you don’t have to think about maintenance. Check the current price on Amazon if you want to see if it fits your setup.

The Short Answer: Why 68°F is the Magic Number
Set your thermostat to 68°F when you’re awake and at home. That’s the consensus from the U.S. Department of Energy and it’s not arbitrary—it balances comfort, energy use, and equipment wear.
At 68°F, most people in light clothing (sweater, long pants) feel comfortable while sedentary. Go lower and you’ll reach for a blanket. Go higher and you’re paying for heat you don’t strictly need.
But here’s the catch: 68°F is a starting point, not a law. If you have elderly family members, infants, or someone with a medical condition, you might need 70°F or 72°F. Comfort is subjective, but the energy math is not.
The Math of Comfort vs. Cost: How Much You Save Per Degree

Every degree you lower your thermostat saves about 1-3% on your heating bill over a 24-hour period. The exact percentage depends on your climate, insulation quality, and how leaky your house is. A drafty 100-year-old farmhouse will see bigger savings per degree than a well-sealed new build.
Let’s run the numbers. Say your winter heating bill runs $200 per month. Lowering the thermostat from 72°F to 68°F—a 4-degree drop—saves roughly 4-12% per month. That’s $8 to $24 monthly, or $96 to $288 over a 4-month heating season.
Now apply the same logic to a setback schedule:
- 8 hours at 62°F while you sleep: saves about 5-10% annually
- 8 hours at 60°F while at work: saves another 5-10%
- Combined 16 hours of setback: total savings of 10-20% per year
- Identify the rooms you actually occupy during waking hours—usually living room, kitchen, home office, and one bathroom.
- Close the vents in guest bedrooms, formal dining rooms, and unused bathrooms. Be careful not to close more than 20% of your vents total, or you’ll increase duct pressure and reduce system efficiency.
- If you have a two-story house, close upstairs vents during the day (heat rises) and open them at night if you sleep upstairs.
- Use a smart vent in the coldest room to balance temperature, rather than cranking the main thermostat.
- Directly above a supply vent: warm air blows on the thermostat, it reads 68°F, and shuts off the furnace while the rest of the house is still at 63°F.
- In a hallway near the kitchen: cooking heat and oven warmth trick the thermostat into thinking the house is warmer than it is.
- On an exterior wall with poor insulation: the wall is cold, the thermostat reads 65°F, and the furnace runs longer than needed.
- In direct sunlight: afternoon sun through a window heats the thermostat housing and causes short cycling.
- Weatherstripping: A drafty front door can leak as much air as a 2-inch hole in your wall. Replace worn weatherstripping around doors and windows—it costs $20-$40 and takes an afternoon. Check for drafts with a candle or incense stick; if the flame flickers, you have a leak.
- Ceiling fans in reverse: Warm air rises, so your ceiling is warmer than the floor. Run ceiling fans clockwise at low speed to push warm air down. This can make a room feel 3-4°F warmer without changing the thermostat.
- Window film: For drafty windows you can’t replace, apply insulating window film. It’s clear, cheap ($10 per window), and reduces heat loss significantly. The plastic shrinks tight with a hairdryer and looks fine from inside.
- Cranking the thermostat to warm up faster. Your furnace heats at one rate regardless of the setpoint. Setting it to 80°F doesn’t make the house warm faster—it just makes the furnace run past 68°F and overshoot. Set it to the target temperature and wait.
- Closing too many vents. Closing more than 20% of your vents increases static pressure, which can damage the blower motor and reduce efficiency. Zoning works, but don’t overdo it.
- Ignoring the filter. A dirty air filter reduces airflow, which makes the furnace run longer and work harder. Check it monthly and replace it every 1-3 months. A clean filter can save 5-15% on heating costs.
That’s not pocket change. On a $1,500 annual heating bill, a 15% reduction puts $225 back in your wallet. The catch is recovery time—when you raise the thermostat back to 68°F, the furnace runs longer to warm the house. But the energy used during recovery is almost always less than what you saved during the setback. The house loses heat slower when it’s cooler inside, so the temperature differential between inside and outside shrinks, and your heat loss drops proportionally.
One honest caveat: heat pumps work differently. If you have a heat pump, a large setback can trigger the auxiliary electric resistance heat, which is expensive. For heat pumps, keep the setback to 3-5°F max, or use a smart thermostat that staggers the recovery.
The “Away” and “Asleep” Strategy: Setback Schedules That Work
The best temperature for heating a house changes based on what you’re doing. Here’s a realistic schedule that saves money without making you miserable:
While Awake and at Home: 68°F
This is your baseline. If you’re still cold at 68°F, put on a sweater before you touch the thermostat. That’s not a joke—each degree you add costs real money over a season.
While Asleep: 62-65°F
Your body temperature drops naturally during sleep, and most people sleep better in a cooler room. The National Sleep Foundation recommends around 65°F for optimal sleep quality. 62°F works if you use a decent blanket. The recovery in the morning takes about 30-45 minutes with a typical furnace, so program the thermostat to start warming the house 30 minutes before your alarm goes off.
Away from Home (8+ Hours): 58-62°F
When nobody’s home, there’s no reason to keep the house warm. 58°F is a safe minimum—it keeps pipes from freezing in most climates while saving the most money. If you have pets, keep it at 62°F. If you have houseplants, most tropical varieties tolerate 60°F but struggle below that.
The key difference between “away” and “asleep” is recovery speed. Coming home to a 58°F house means waiting 45-60 minutes for it to reach 68°F. That’s why the away setback should be smaller than you might think—the discomfort of a cold house upon arrival often pushes people to crank the thermostat to 75°F, which negates the savings. A 62°F away setting is a better compromise.
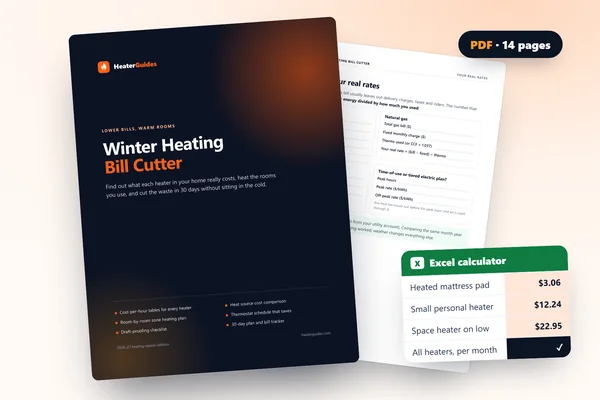 Winter Heating Bill CutterSee what every heater in your home really costs, heat the rooms you use, and cut the waste in 30 days.Cost-per-hour tables for every heaterThermostat schedule and draft-proofing planRunning-cost and bill calculator (Excel)
Room-by-Room Adjustments: Zoning and Smart Vents
Heating the whole house to 68°F is wasteful if you only use three rooms. Zoned heating lets you heat occupied spaces and leave the rest cooler.
Traditional zoning uses motorized dampers in the ductwork, controlled by separate thermostats in each zone. That’s the gold standard, but retrofitting it into an existing house is expensive—usually $2,000-$5,000 depending on duct layout.
Smart vents are a cheaper alternative. These are replacement vents with built-in dampers and temperature sensors that open and close based on room occupancy. You install them in the rooms you use most and set the others to stay closed. Cost runs $80-$150 per vent, and they pay for themselves in a season or two if you have a large house.
Here’s the practical playbook:
This room-by-room approach pairs well with a hydronic heating system if you have one, since those systems are inherently easier to zone with individual room controls.
Why Your Thermostat’s Location is Sabotaging Your Bill
Your thermostat reads the air temperature where it sits, not the average temperature of your house. If it’s in a bad spot, it lies to you, and you pay for that lie.
The worst locations:
Fixing this usually means moving the thermostat, which involves running new wires. But there’s a simpler workaround: use a smart thermostat with a remote sensor. Place the main unit wherever it is now, then put the remote sensor in a neutral location—an interior hallway, away from vents and windows. The thermostat averages the sensor reading with its own, or you can set it to prioritize the sensor.
If you can’t move anything, at least close the door to the room where the thermostat sits and keep that room’s vent partially closed. That forces the thermostat to read more representative air.
The Health Threshold: When “Cold” Becomes Dangerous
Comfort is one thing. Health is another. Below 62°F, the risk of health problems starts climbing, especially for vulnerable people.
The World Health Organization recommends a minimum indoor temperature of 64°F for healthy adults and 68°F for infants, elderly people, and those with respiratory conditions. Below 62°F, blood pressure can rise as your body constricts blood vessels to preserve core heat. For someone with heart disease, that’s a real risk. Below 60°F, the risk of hypothermia increases, particularly for older adults who may not feel cold as acutely.
If you have anyone in your household who is over 65, under 2, or has a chronic illness, don’t let the house drop below 64°F, even when away. The few dollars saved aren’t worth a hospital visit.
Also watch humidity levels. Cold air holds less moisture, and dry air makes respiratory infections more likely and skin conditions worse. If your house is at 62°F and the humidity is below 30%, consider a humidifier—it’ll make the space feel warmer without raising the thermostat.
Smart vs. Programmable: Which Thermostat Pays You Back Faster?
Both programmable and smart thermostats can run setback schedules, but they differ in how much effort they require.
A programmable thermostat like the Honeywell Home X2P lets you set 5-2 day schedules (weekdays one schedule, weekends another). You set it once and forget it. The winter temperature settings are easy to program, and the backlit display makes nighttime adjustments painless. It’s not fancy, but it works reliably and costs less upfront.
A smart thermostat learns your habits, detects occupancy, and adjusts automatically. It also gives you remote control via phone—useful if you’re coming home early and want the house warm. But it costs 3-5 times more, and the learning algorithms aren’t always intuitive. Some people love them; others find them fiddly.
| Feature | Programmable | Smart |
|---|---|---|
| Setback scheduling | Manual setup, reliable | Automatic learning |
| Remote control | No | Yes, via app |
| Sensor integration | No | Yes, with remote sensors |
| Upfront cost | $25-$60 | $100-$250 |
| Payback period | 1-2 seasons | 2-4 seasons |
| Best for | Fixed schedules | Irregular schedules |
My take: if you leave and return at roughly the same times daily, a programmable thermostat is the better value. If your schedule varies wildly, a smart thermostat’s occupancy detection wins. Either way, the savings come from the setback schedule, not the device itself.
Quick Wins: Insulation, Weatherstripping, and Ceiling Fans (Reverse Mode)
Lowering your thermostat only helps if the heat stays put. Three cheap fixes make a bigger difference than any thermostat setting:
These fixes reduce your heat loss rate, which means your furnace runs less often to maintain the same temperature. That’s the same as lowering your thermostat, but without sacrificing comfort.
Three Common Mistakes to Avoid
Even with the right temperature set, people sabotage themselves. Watch for these:
The best temperature for heating a house isn’t a single number—it’s a schedule. Set 68°F when you’re home and awake, 62-65°F for sleeping, and 58-62°F when away. Use zoning to heat only what you occupy, fix your thermostat location, and don’t drop below 64°F for vulnerable people. Do that, and you’ll cut your heating bill by 10-20% without feeling like you’re camping indoors.
Room-By-Room Adjustments: Zoning and Smart Vents
Balancing airflow is key to keeping room temperatures consistent and avoiding hot or cold spots. You want to make sure your supply vents are open and unobstructed in the rooms you use most, while closing or partially closing vents in unused areas to reduce wasted heat. But don’t close more than about 20% of your vents total, or you risk raising duct pressure and reducing your system’s efficiency.
If you notice some rooms stay cold while others get too warm, check for blocked vents, dirty filters, or dampers stuck partially closed. Adjusting dampers in ductwork or using smart vents with built-in sensors can help balance airflow automatically by opening and closing vents based on occupancy and temperature. Ceiling fans running in reverse mode during winter also push warm air down from the ceiling to even out temperatures.
Gas Heaters for Homes
Gas heaters provide an efficient way to heat your home by burning natural gas or propane. They come in various types including furnaces, wall heaters, and gas fireplaces. When choosing a gas heater, look for models with an automatic shutoff and an oxygen depletion sensor to ensure safe indoor use.
Installation and ventilation are critical for gas heaters. They must be vented properly to exhaust combustion gases outside and prevent carbon monoxide buildup. Never use outdoor-rated gas heaters indoors. A licensed technician should handle installation and annual inspections to keep everything running safely and efficiently.
Smart Thermostats and Temperature Sensors
Temperature sensors help your heating system maintain accurate and consistent room temperatures. Traditional thermostats measure air temperature only where they’re installed, which can misrepresent the rest of the house. Adding remote temperature sensors in different rooms lets smart thermostats balance heating better by averaging readings or focusing on occupied spaces.
Some smart thermostat systems include wireless sensors that detect temperature and occupancy, adjusting heat delivery accordingly. This reduces wasted energy and keeps comfort levels steady throughout your home, especially in larger or multi-story houses.
The Short Answer: Why 68°F Is the Magic Number
The United States uses Fahrenheit for household thermostat settings, so 68°F is the recommended starting point for heating a home while you’re awake and there. In Celsius, that’s about 20°C. If your thermostat displays Celsius or another scale, check its settings before changing the setpoint; the number 68 only means the right temperature when the display is in Fahrenheit.
Gas Heaters for Homes
Gas wall heaters can heat a home, but choose an indoor-rated model that matches the room and follows its listed venting requirements. A vented natural-gas heater sends combustion gases outdoors; an unvented model releases them indoors and may be restricted or banned by local code. Keep a working carbon monoxide alarm in the home, follow the manufacturer’s ventilation instructions, and have gas connections and venting handled by a licensed professional where required.
Gas Heaters for Homes
Fixed gas heaters are a reasonable option for heating a specific room or area when you want a permanent installation. Confirm the heater is listed for indoor use and that its fuel type and venting suit your home; don’t treat an outdoor or construction heater as an indoor substitute. Gas connections and vent installation can create fire and carbon monoxide hazards, so use a licensed professional where required and follow local code.