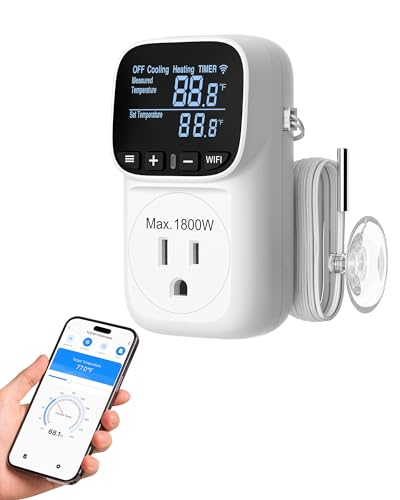
You know the drill. You wake up shivering at 3 AM because the heat kicked on at midnight and then shut off, leaving the house cold. Or you come home to a stuffy living room because the AC ran all day while nobody was there. Traditional thermostats are dumb in the literal sense: they follow a fixed schedule or hold one temperature until you physically change it. That costs you money every single month.
Smart temperature control fixes that by learning your habits, sensing occupancy, and adjusting automatically. But the marketing noise around these devices is thick. Some claims are true, some are exaggerated, and a lot depends on your specific HVAC system and home. This article cuts through that. You’ll learn how the technology actually works, what payback period you can realistically expect, how to set everything up in your first 30 days, and what to do when things don’t connect smoothly.

Amazon
Amazon Smart Thermostat, Save money and energy,…
- An Alexa thermostat - Amazon Smart Thermostat is an easy way to switch from a traditional thermostats for homes and help reduce en…
- Create comfort zones throughout your home by connecting to select Alexa devices to automatically adjust heating and cooling based…
- Save money and energy - After purchase, Amazon will send you an email with details about home thermostat rebates that may be avail…
If you’re starting from zero, the Amazon Smart Thermostat is a solid entry point. It’s an ENERGY STAR certified model that works with Alexa and Ring, requires a C-wire, and handles scheduling plus presence detection. It won’t break the bank, and it gives you a clear baseline for measuring savings. Check the current price on Amazon if you want specifics.

The Hidden Cost of Inefficient Climate Control
Most people underestimate how much heating and cooling actually costs. The U.S. Department of Energy says HVAC accounts for roughly 48% of a typical home’s energy use. On a $200 monthly utility bill, that’s $96 going toward temperature control. If your thermostat runs the system more than necessary—say, 20% extra—you’re throwing away about $19 a month. That’s $230 a year for nothing.
Worse, the waste compounds. An oversized or poorly controlled system short-cycles, which wears out the compressor and blower motor faster. Repair bills for a heat pump compressor run $1,500 to $2,500. A smart thermostat that prevents short-cycling isn’t just saving energy; it’s extending the life of expensive equipment.
There’s also the carbon angle. The average American household produces about 8.1 metric tons of CO2 per year from home energy use. Heating and cooling is the biggest slice. Cutting your HVAC energy use by 15% means roughly 0.5 metric tons less CO2 annually. For context, that’s equivalent to not driving about 1,200 miles.
Why Traditional Thermostats Fail Modern Lifestyles
The classic programmable thermostat was designed for a 9-to-5 world. You leave at 8 AM, return at 6 PM, sleep from 11 PM to 7 AM. Set it once, forget it. But real life is messier. You work from home some days. You travel on weekends. Your kids have different school schedules. Your sleep pattern shifts.
A traditional thermostat can’t adapt to any of that. It holds a schedule you manually set, and if your life deviates, you either override it manually or suffer the consequences. Most people end up leaving the schedule on “hold” at one temperature, which defeats the entire purpose of programming.
There’s a deeper problem: traditional thermostats don’t know if anyone is home. They heat and cool empty rooms all day. They don’t know that the afternoon sun raises the temperature in the living room by 4 degrees while the bedrooms stay cool. They respond to one sensor in one location, which is often in a hallway that nobody uses.
Smart thermostats solve these problems with data. They use occupancy sensors, geofencing, and learning algorithms to build a model of your home and habits. But understanding how that works requires looking under the hood.
The Core Mechanics: How Smart Temperature Control Actually Works
At its heart, a smart thermostat is a computer with a temperature sensor, a relay, and a network connection. The relay switches your HVAC system on and off just like a mechanical thermostat. The difference is the logic that decides when to flip that switch.
Sensors, Geofencing, and Learning Algorithms
Most smart thermostats have multiple inputs. The built-in temperature sensor measures the air near the unit. Some models, like the Amazon Smart Thermostat, integrate with separate room sensors or use Alexa devices as remote sensors. That gives you a more accurate picture of the whole house, not just one spot.
Geofencing uses your phone’s location. When your phone crosses a virtual boundary around your home, the thermostat switches from away mode to home mode. The radius is usually 500 to 1,000 feet. This is more reliable than a schedule because it adapts to your actual movements. If you leave work early on Friday, the house is already comfortable when you arrive.
Learning algorithms go a step further. Over the first week or two, the thermostat watches when you adjust the temperature and when you’re home. It builds a schedule that matches your behavior. Some models, like the Nest, are famous for this. The Amazon Smart Thermostat takes a slightly different approach: it lets Alexa handle the learning, which works well if you’re already in the Alexa ecosystem.
One thing to know: these algorithms aren’t magic. They need consistent data. If you travel a lot or your schedule is chaotic, the learning features may not converge. In that case, manual schedules plus geofencing work better.
Zoning: Why One Temperature Doesn’t Fit All
Most homes have a single thermostat controlling the whole house. That’s a design compromise. The kitchen gets hot from cooking. The upstairs bedrooms are warmer in summer because heat rises. The basement is always cold. A single sensor in the hallway averages none of this.
Smart temperature control helps with temperature zoning in two ways. First, remote sensors let you choose which room drives the system. If you spend evenings in the living room, you can set that sensor as the primary input. The thermostat then heats or cools until that room reaches the setpoint, not the hallway.
Second, some systems support actual motorized dampers in the ductwork. That’s a bigger investment—typically $2,000 to $4,000 for a professional installation—but it lets you close off unused rooms entirely. If you have a two-story house, you can stop dumping conditioned air into the upstairs hallway and focus on the downstairs living area. This is the single biggest efficiency win available, but it requires ductwork that’s designed for zoning. Not every home qualifies.
If you’re curious about how these systems decide what to do, smart systems control temperature through a combination of setpoints, hysteresis, and anticipator logic. The thermostat doesn’t just turn the system on at 70°F and off at 71°F. It learns how fast your home gains and loses heat, then cycles the system to maintain the setpoint without overshooting.
The Real ROI: Calculating Your Payback Period and Monthly Savings
Let’s talk money. The EPA estimates that an ENERGY STAR certified smart thermostat saves an average of $90 per year on energy bills. That’s the headline number, but your actual savings depend on three factors: your current thermostat, your HVAC system, and your behavior.
Here’s a realistic calculation. Suppose your average monthly heating and cooling bill is $150. If you currently use a manual thermostat that you leave at a constant temperature, switching to a smart thermostat with scheduled setbacks and geofencing typically saves 10% to 15%. That’s $15 to $22 per month, or $180 to $270 per year.
If you already use a programmable thermostat but never set the schedule, the savings are similar because the smart thermostat automates what you couldn’t be bothered to do. If you already use a programmable thermostat with a good schedule, the incremental savings drop to maybe 5%—about $90 per year.
Now factor in the cost of the device. A decent smart thermostat runs $80 to $250. Add installation costs if you need an electrician to run a C-wire, which can be $100 to $200. At $180 annual savings, your payback period is roughly 1 to 2 years. After that, it’s pure profit.
But there’s a catch. The savings aren’t automatic. A smart thermostat only saves money if you let it do its job. If you override the schedule constantly, or if you set the away temperature too close to the home temperature, the savings evaporate. The device is a tool, not a miracle worker.
For a detailed breakdown of how different systems compare, check this table:
| Scenario | Annual HVAC Cost | Smart Thermostat Savings | Payback Period |
|---|---|---|---|
| Manual thermostat, constant temp | $1,800 | 12% = $216 | ~1 year |
| Programmable, no schedule used | $1,800 | 10% = $180 | ~1.2 years |
| Programmable, good schedule | $1,800 | 5% = $90 | ~2.5 years |
| Heat pump, mild climate | $1,200 | 8% = $96 | ~2 years |
| Electric resistance heat, cold climate | $2,400 | 15% = $360 | ~0.7 years |
Note the heat pump row. Heat pumps are different from furnaces. They’re most efficient when they run steadily at a moderate output, not when they cycle on and off aggressively. A smart thermostat needs a setting for this—often called “heat pump balance” or “compressor protection.” If you have a heat pump, don’t set a 10°F setback at night. The recovery will use more energy than you saved. A 3°F to 5°F setback is the sweet spot.
Beyond the Thermostat: Boosting Efficiency with Insulation and Fans
A smart thermostat is a controller, not a source of heat or cooling. It can only manage the energy that your HVAC system consumes. If your house leaks air like a sieve, the thermostat will run the system longer to compensate. No algorithm can fix missing insulation.
Before you spend money on a smart thermostat, do a quick audit. Check the attic insulation depth. If it’s less than 10 inches of fiberglass, you’re losing heat through the roof. Check the weatherstripping around doors and windows. A 1/8-inch gap under a door is equivalent to a 1-square-inch hole in the wall. Add up all those gaps and you might as well have a window open all winter.
Ceiling fans are another overlooked tool. In summer, run them counterclockwise to create a downdraft. That makes the room feel 4°F cooler, so you can set the thermostat 4°F higher and still feel comfortable. In winter, run them clockwise at low speed to push warm air down from the ceiling. This is especially useful in rooms with 10-foot ceilings where warm air stratifies near the top.
The combination is powerful. A smart thermostat with a 4°F setback plus a ceiling fan in the summer can cut cooling energy by 20% to 30% without any perceived loss of comfort. The thermostat does the automation; the fan does the heavy lifting.
The Health and Productivity Case for Precision Climate
Comfort isn’t just about avoiding a sweater. It’s about your body’s ability to function. Research on thermal comfort shows that cognitive performance drops measurably when room temperature deviates from the optimal range of 70°F to 77°F. One study from Lawrence Berkeley National Laboratory found that typing speed and accuracy decreased by 4% at 86°F and by 6% at 60°F compared to the optimal range.
Sleep is even more sensitive. Your core body temperature needs to drop by about 1°F to initiate and maintain deep sleep. A bedroom that’s too warm interferes with that process. The ideal bedroom temperature is 65°F to 67°F for most people. If your thermostat keeps the whole house at 72°F at night, your sleep quality suffers even if you don’t consciously notice.
Smart temperature control lets you create a night-time setback for the bedroom while keeping the rest of the house comfortable. If you have a remote sensor in the bedroom, the thermostat can use that as the primary input at night. That’s a level of precision that a traditional thermostat simply cannot offer.
There’s also the humidity angle. Most smart thermostats don’t control humidity directly—you need a separate humidistat or a whole-home humidifier—but they do track it. High humidity (above 60%) makes 75°F feel like 80°F. Low humidity (below 30%) makes 68°F feel like 62°F. If your thermostat reports humidity, you can adjust your setpoints accordingly, or use a portable humidifier/dehumidifier to improve the effective comfort.
A 30-Day Implementation Plan for Immediate Results
Buying a smart thermostat is easy. Getting the most out of it takes a little effort. Here’s a day-by-day plan that works.
- Day 1: Install and connect. Turn off power to your HVAC system at the breaker. Remove the old thermostat faceplate. Take a photo of the wiring before disconnecting anything. Match the wires to the new thermostat’s terminals. Most smart thermostats need a C-wire for continuous power. If you don’t have one, you’ll need a power adapter kit or an electrician. Once installed, connect to your Wi-Fi and pair with your phone app.
- Day 2: Set your baseline. Don’t change your habits yet. Let the thermostat run in manual mode at your usual temperature. Note the daily energy usage in the app. This is your control data.
- Day 3-7: Enable learning or set a schedule. If your thermostat has a learning feature, turn it on. If not, create a schedule manually. Set the away temperature 8°F to 10°F lower in winter (higher in summer) than your home temperature. Set the sleep temperature 4°F to 6°F lower than your daytime temperature.
- Day 8: Enable geofencing. Turn on location-based away mode. Set the radius to about 500 feet. Test it by leaving the house with your phone and checking that the thermostat switches to away mode within 5 minutes.
- Day 9-14: Let the system learn. Don’t override the schedule unless you’re truly uncomfortable. The thermostat is building a model of your home’s thermal dynamics. Overriding confuses it.
- Day 15: Compare energy data. Look at the daily usage from the past week versus your baseline week. Expect a 5% to 10% reduction already. If you see no change, check that the away and sleep temperatures are actually different from your home temperature.
- Day 16-21: Fine-tune. Adjust the recovery time. Some thermostats let you set when the system starts pre-heating or pre-cooling. If you wake up at 7 AM, you want the house at 70°F by 7 AM, not at 7:45. Set the recovery to start 30 to 60 minutes before you need the temperature.
- Day 22-28: Add remote sensors. If you have extra sensors, place one in the bedroom and one in the main living area. Set the schedule to use the bedroom sensor at night and the living room sensor during the day.
- Day 29-30: Review and adjust. Look at the monthly energy report. If savings are below 10%, check for common issues: HVAC system running too long (dirty filter), poor insulation, or a thermostat location that’s inaccurate (near a vent, in direct sunlight).
This plan works because it forces you to establish a baseline before making changes. Most people skip the baseline and then can’t tell if the thermostat actually helped.
Troubleshooting Common Integration and Connectivity Issues
Smart thermostats are reliable, but they’re not immune to problems. Here are the most common issues and how to fix them.
The thermostat won’t connect to Wi-Fi. This is almost always a 2.4 GHz vs 5 GHz issue. Many smart thermostats only support 2.4 GHz networks. If your router broadcasts both bands under the same SSID, the thermostat may struggle. Create a separate 2.4 GHz network for IoT devices, or temporarily disable the 5 GHz band during setup.
The C-wire connection is dead. You have a C-wire but the thermostat still shows low power. Check that the C-wire is actually connected at both the thermostat and the HVAC control board. Sometimes installers leave a spare wire in the wall that isn’t connected to anything. Use a multimeter to verify 24V AC between R and C. If you don’t have a C-wire, use a power adapter kit that plugs into a wall outlet near the thermostat.
The thermostat says “no power” but the old one worked. This usually means the new thermostat draws more power than your system provides. Older mechanical thermostats used a simple mercury switch that needed almost no power. Smart thermostats need constant power for the display, Wi-Fi, and processor. Check the wiring diagram and make sure you’ve connected both R and C. If your system is a heat pump, you may need to connect the O/B wire correctly for the reversing valve.
Geofencing doesn’t work reliably. Location services on your phone may be set to “while using the app” instead of “always.” Change it to “always.” Also check that battery optimization isn’t killing the app in the background. On Android, add the thermostat app to the battery optimization whitelist. On iOS, disable “Low Power Mode” which can delay location updates.
Alexa commands don’t control the thermostat. Make sure the Amazon Smart Thermostat is linked to the same Amazon account as your Echo device. In the Alexa app, check that the thermostat appears under Devices. If it doesn’t, go to Devices, select the plus icon, and add the thermostat manually using its serial number.
The temperature reading seems wrong. The built-in sensor is affected by heat from the wall, sunlight, or nearby electronics. If the thermostat is in a bad spot, use a remote sensor and set it as the primary input. This is the fix for the classic “hallway thermostat” problem.
If you’re dealing with a more complex system, the benefits of smart temperature control systems article covers integration with different HVAC types in more detail.
Frequently Asked Questions
Will a smart thermostat work with my heat pump?
Yes, but you need to configure it correctly. Heat pumps use a reversing valve to switch between heating and cooling. The thermostat needs a specific O/B terminal to control that valve. Most smart thermostats support this, but you must select the correct setting during setup. Also, don’t set aggressive temperature setbacks with a heat pump. The recovery will trigger the auxiliary electric heat, which is expensive. A 3°F to 5°F setback is the maximum you should use.
How much can I actually save on my utility bills?
The EPA says an ENERGY STAR certified thermostat saves about $90 per year on average. Your actual savings range from 5% to 15% of your heating and cooling costs. If you spend $1,800 a year on HVAC, that’s $90 to $270 in savings. The higher end applies if you previously left the thermostat at a constant temperature. The lower end applies if you already used a well-programmed schedule.
Do I need a C-wire for every smart thermostat?
Most smart thermostats require a C-wire for continuous power. Some models, like the ecobee, include a power extender kit that works without an existing C-wire. The Amazon Smart Thermostat requires a C-wire. If your home doesn’t have one, you have three options: run a new wire, use an adapter kit, or hire an electrician. Running a new wire is the most reliable but costs $100 to $300.
Can smart thermostats control humidity?
Most smart thermostats measure humidity but don’t directly control it. They can display the humidity level and, in some cases, trigger a whole-home humidifier or dehumidifier if you have one wired in. If you don’t have a dedicated humidifier, the thermostat can’t add moisture to the air. You’d need a portable unit or a whole-home system for that.
Will a smart thermostat work without Wi-Fi?
Yes, but it loses most of its intelligence. Without Wi-Fi, the thermostat still holds its programmed schedule and maintains temperature. But geofencing, remote control, and learning features all require a network connection. If your internet goes down, the thermostat acts like a basic programmable model. That’s fine for a day or two.
The Verdict: Is It Time to Upgrade?
Smart temperature control isn’t a gimmick. The math works for most households. If you spend more than $100 a month on heating and cooling, a smart thermostat pays for itself within two years. After that, it’s saving you $100 to $300 annually, every year, without any ongoing effort.
But it’s not for everyone. If you live in a mild climate where you rarely use heat or AC, the savings won’t justify the cost. If your HVAC system is ancient and inefficient, a smart thermostat won’t fix that. If you’re renting and can’t install a C-wire, the hassle may not be worth it.
For everyone else, the upgrade is a no-brainer. The technology is mature, the prices are reasonable, and the potential savings are real. The key is to set it up correctly, give it time to learn, and pair it with basic efficiency measures like insulation and ceiling fans.
Start with a baseline. Track your energy usage for a week before you change anything. Then install the thermostat and follow the 30-day plan. The data will tell you if it’s working. In most cases, it will.
Here’s what to remember:
- Set away temperatures 8°F to 10°F different from home temperatures in winter, 5°F to 8°F in summer.
- Use geofencing over fixed schedules if your life is irregular.
- Keep the temperature setback moderate (3°F to 5°F) if you have a heat pump.
- Place remote sensors in rooms you actually use, not hallways.
- Check your insulation and weatherstripping before blaming the thermostat.
- Give the learning algorithm two weeks of consistent data before judging it.
- Track your energy usage in the app monthly to verify savings.
Smart temperature control is a financial and health investment, not a gadget purchase. Done right, it pays you back in dollars, comfort, and better sleep.

I am a mechanical engineer and love doing research on different home and outdoor heating options. When I am not working, I love spending time with my family and friends. I also enjoy blogging about my findings and helping others to find the best heating options for their needs.
Related guides

Smart Home Temperature Systems: Boost Efficiency & Save Money
Smart systems enhance home temperature efficiency by utilizing sensors and algorithms to optimize heating and cooling, ensuring comfort…
How Smart Heating Systems Automatically Adjust to Temperature Changes
Smart systems utilize sensors to detect temperature variations, adjusting operations automatically to maintain optimal conditions for efficiency and…
How Smart HVAC Systems Achieve Perfect Temperature Consistency
Smart systems enhance temperature consistency by utilizing sensors and algorithms to monitor and adjust heating and cooling in…