

SEER and SEER2 are efficiency ratings used for heat pumps that tell you how much cooling you get per unit of electricity over a season. Understanding these ratings can save you money and help pick the best heat pump for your home and climate.
This article explains what SEER, SEER2, HSPF2, and related ratings mean, how testing has changed, and what these numbers mean for your energy bills and comfort.
Understanding SEER Ratings: Heat Pump Efficiency Explained
SEER ratings show how efficiently a heat pump cools over a season by comparing BTUs removed to the electricity used. SEER2 is the updated test standard that better reflects real-world performance by simulating duct pressure, giving you a more accurate efficiency number.

SEER stands for Seasonal Energy Efficiency Ratio. It measures the total cooling output in BTUs over the cooling season divided by the total electrical energy consumed in watt-hours. A heat pump with a SEER of 16 means it moves 16 BTUs of heat out for every watt-hour it uses.
The newer SEER2 rating uses an M1 blower test that adds static pressure to mimic real ductwork resistance, which the original SEER ignored. This change typically lowers the SEER2 number compared to the old SEER, but it gives you a rating closer to what you’ll see on your electric bill.
| Rating | What It Means |
|---|---|
| SEER2 | Seasonal cooling efficiency under realistic duct conditions |
| HSPF2 | Heating Seasonal Performance Factor, heating efficiency |
| EER2 | Energy Efficiency Ratio at 95°F outdoor temperature — peak cooling efficiency |
| COP | Coefficient of Performance, ratio of heat moved to electrical energy used |
HSPF2 rates heating efficiency over a heating season, while EER2 measures cooling efficiency at a fixed, high outdoor temperature, useful for peak load comparisons. COP explains why heat pumps can deliver 300% to 500% efficiency—by moving heat instead of generating it, they can output three to five times the electrical energy they consume.
Efficiency varies with outdoor temperature. Heat pumps work best in moderate climates; colder air reduces heating efficiency, which makes HSPF2 and cold-climate ratings important. The U.S. requires minimum SEER2 standards by region: generally 14.3 in the southeast and southwest, and 13.4 in northern states.
What SEER rating is best? Higher SEER2 numbers mean lower energy bills and better humidity control, but the ideal rating depends on your climate and usage. For many, a SEER2 of 15 to 17 balances cost and savings well.
How SEER2 Testing Differs from Original SEER
The exact difference between SEER and SEER2 testing is the use of an M1 blower to add static pressure during testing, simulating real ductwork resistance. This change means SEER2 ratings include losses that original SEER testing ignored.
In the original SEER test, heat pumps were measured without the added resistance ducts create, so the blower motor and compressor ran under ideal conditions. The M1 blower procedure in SEER2 adds static pressure of about 0.5 inches water column, simulating the load ducts place on the system.
SEER2 ratings are generally lower than SEER because they reflect the energy the system actually uses to overcome duct losses. The heat pump itself isn’t less efficient; the rating now accounts for the extra electricity the blower motor consumes when pushing air through ductwork.
This means you can’t compare SEER and SEER2 numbers directly. A SEER2 rating of 16 might correspond to a SEER of about 17 or 18 on an older label. Knowing this helps avoid confusion when comparing equipment or rebates based on these ratings.
For installers and homeowners, this means ductwork quality affects not just comfort but also the official efficiency rating. Units installed with leaky or restrictive ducts will show lower SEER2 performance, highlighting the importance of proper installation and duct sealing.
How Ductwork Quality and Installation Affect SEER2 Ratings
Duct losses cut into the effective SEER2 rating by reducing the heat pump’s ability to deliver cooled air where you need it. If your ducts leak or restrict airflow, the unit must work harder and run longer, using more electricity for the same comfort level.
A 10% to 20% loss in duct efficiency typically lowers the real-world SEER2 performance by about the same percentage. That means a heat pump rated at 16 SEER2 could effectively perform at 13 to 14 SEER2 in your home if duct losses are significant.
SEER2 testing assumes properly sealed and sized ductwork, so manufacturers’ ratings reflect ideal conditions. The M1 blower test adds static pressure to mimic typical duct resistance, but it can’t capture installation flaws or aged duct damage.
Checking duct sealing and airflow is the best way to protect your investment in a high-SEER2 heat pump. Look for leaks, loose connections, or blocked registers. Improving ductwork quality can save 10% to 20% on cooling and heating bills by ensuring efficient delivery of conditioned air.
Choosing Heat Pump Efficiency by Climate and Usage
A good SEER2 rating varies by region because cooling demand differs widely across the US. Hot climates like the Southeast and Southwest benefit most from units with 16 SEER2 or higher, where cooling hours and temperatures are high.
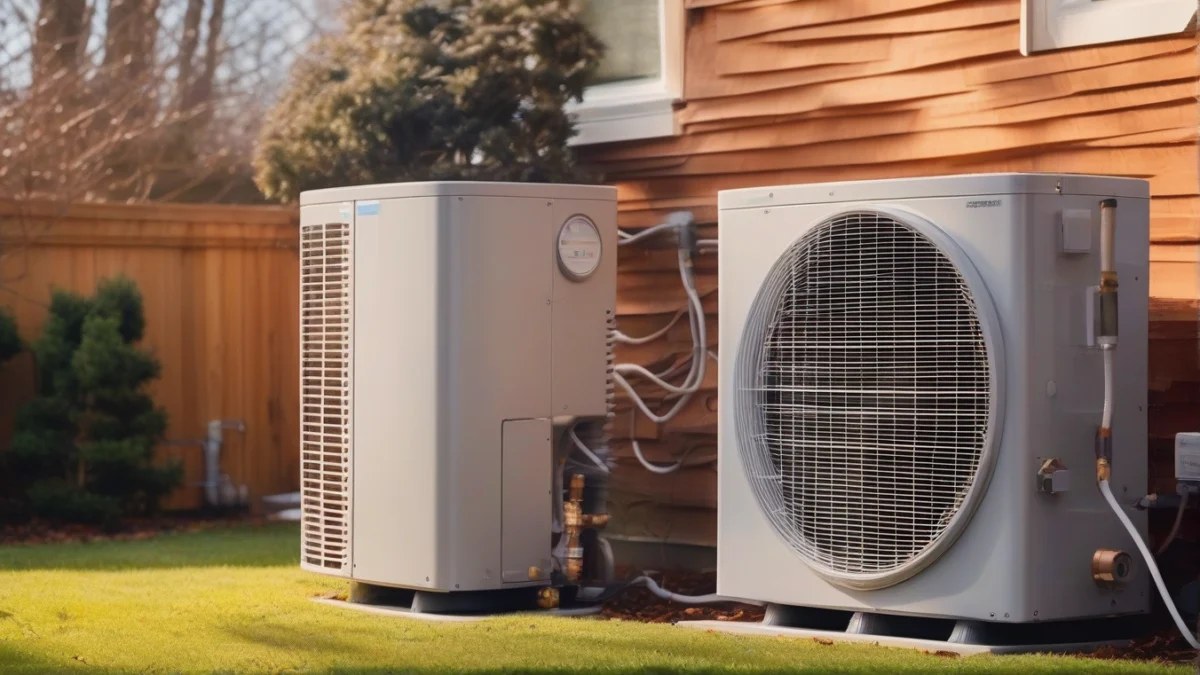
In milder or northern regions with fewer cooling hours, a 14 to 15 SEER2 heat pump may provide enough efficiency to balance upfront cost and energy savings. Heating efficiency, measured by HSPF2, becomes more important in colder climates where the heat pump runs longer in winter.
Higher SEER2 ratings usually come with higher upfront prices. Payback periods depend on your local electricity rates, cooling hours, and how long you plan to keep the system. For example, a 1,500-square-foot home in a hot climate running a 16 SEER2 unit might save $150 to $250 annually versus a 13 SEER2 model, recouping the cost difference in about 5 to 7 years at 17 cents per kWh.
Inverter and variable-speed compressors improve real-world efficiency by adjusting output to match demand instead of cycling on and off. They maintain steady temperatures, reduce wear, and save energy, especially in variable climates and partial-load conditions.
Federal minimum SEER2 standards require 14.3 SEER2 in the Southeast and Southwest, and 13.4 in northern states. Energy Star certification demands at least 15.2 SEER2 and 7.8 HSPF2, guiding those who want higher efficiency.
New refrigerants like R-454B help heat pumps achieve better efficiency with lower environmental impact. That means your choice affects both your energy bills and your carbon footprint.
Choosing the right efficiency means weighing your climate, energy prices, and how you use heating and cooling. Higher SEER2 units save more in hot climates with heavy cooling demand, while HSPF2 and cold climate features matter more up north.
A good starting point is selecting a heat pump that meets or slightly exceeds federal minimums for your region, then adjusting up if your cooling load or energy costs justify the extra investment. Variable-speed and inverter models often offer the best balance of comfort and efficiency across diverse conditions.
You can learn more about choosing heat pumps and their efficiency ratings in our buying guide on top-rated heat pumps.
Comparing SEER2 with European SEER/ESEER and Other Ratings
SEER2, EER2, and COP are different ways to express heat pump efficiency, each suited to specific conditions and uses. SEER2 measures seasonal cooling efficiency across a range of outdoor temperatures, while EER2 focuses on performance at a fixed, high outdoor temperature, usually 95°F. This makes EER2 more relevant for peak summer conditions, especially in hotter climates.
European standards use SEER and ESEER ratings, which also measure seasonal efficiency but with different test procedures and climate profiles. ESEER adjusts for partial load conditions typical in Europe, weighting performance at various outdoor temperatures to better reflect their milder summers. These differences mean you can’t directly compare US SEER2 numbers with European SEER or ESEER without context.
COP, or coefficient of performance, expresses the physical heat moved per unit of electricity consumed. Unlike SEER or EER, COP isn’t just about cooling; it applies to heating mode too and varies with outdoor temperature. For example, a heat pump’s COP drops as it gets colder outside because it has to work harder to extract heat, which affects heating performance and energy use.
| Rating | Test Conditions | Purpose |
|---|---|---|
| SEER2 | Seasonal average (65°F to 104°F) | Cooling efficiency over a cooling season |
| EER2 | Fixed high temperature (95°F) | Efficiency at peak cooling demand |
| COP | Varies with temperature | Physical heat moved per electricity unit, heating or cooling |
Long-Term Cost-Benefit and Integration with Solar Power
High SEER2 heat pumps usually cost more upfront but save money over time through lower electricity bills. Payback periods depend on factors like the price premium, available rebates, local energy rates, and how often you use cooling. For example, a 1,500 W unit running 8 hours a day at 17 cents per kWh uses about 2 kWh daily, costing roughly 34 cents. A higher-efficiency model can cut this by 20% or more, adding up over months.
Inverter technology in modern heat pumps extends equipment life by reducing wear from constant starts and stops, lowering lifecycle costs. Proper installation and quality ductwork are essential; poor ducts waste cooled air and reduce savings, even with a high SEER2 rating.
Solar panels can dramatically reduce the net electricity cost of running a heat pump. By generating your own power during the day, you cut reliance on grid electricity, which is usually more expensive. Combining solar with a high-SEER2 heat pump maximizes efficiency gains and lowers your utility bills.
| Heater | Watts | Per hour | Per day (8 h) | Per month (30 days) |
|---|---|---|---|---|
| Standard unit, 8 hours/day, 30 days, $0.17/kWh | 1,500 W | 26¢ | $2.04 | $61.20 |
| High-SEER2 unit, 8 hours/day, 30 days, $0.17/kWh ( | 1,200 W | 20¢ | $1.63 | $48.96 |
Frequently Asked Questions
What is the difference between SEER and SEER2 testing?
How does HSPF2 rating affect heat pump heating performance?
At what outdoor temperatures do heat pumps lose efficiency?
What SEER2 rating qualifies for federal rebates or tax credits?
How does duct leakage impact my heat pump’s efficiency?
Are heat pumps really 300% efficient as claimed?
Is a higher SEER2 rating always worth the extra upfront cost?

I am a mechanical engineer and love doing research on different home and outdoor heating options. When I am not working, I love spending time with my family and friends. I also enjoy blogging about my findings and helping others to find the best heating options for their needs.
Related guides
Heat pump vs traditional HVAC systems.
Upgrade your home's HVAC system with a heat pump. Learn the benefits and differences compared to traditional systems.…

Heat Pump HVAC Systems: Big Savings & Eco Benefits
Heat pump HVAC systems reduce energy costs, increase efficiency, and lower carbon emissions, providing significant long-term economic benefits…
Heat Pumps for Home HVAC: Efficiency & Installation Guide
Incorporating heat pumps in residential HVAC systems enhances energy efficiency, reduces utility costs, and provides effective heating and…
