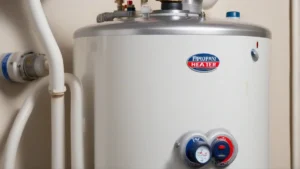
How to Light a Rheem Water Heater Pilot (Step-by-Step)
On this page 9 sections
- Know Your Rheem Ignition System First
- Safety Checks Before You Touch Anything
- Lighting a Standing Pilot Rheem (Step-by-Step)
- Lighting an Electronic Ignition Rheem
- Common Problems and What They Mean
- Standing Pilot vs. Electronic Ignition: Which One Are You Dealing With?
- How to Tell If Your Rheem Has a Standing Pilot or Electronic Ignition
- Frequently Asked Questions
- What to Do After You Get It Lit
It’s 6:30 AM, the shower water turns icy, and you pull back the access panel on your Rheem gas water heater only to find the pilot flame is out. Maybe a draft blew it out, maybe the thermocouple finally gave up, or maybe you just replaced the gas valve and need to start fresh. Whatever the cause, you’re standing there with a lighter and a vague memory of a YouTube video you half-watched.
This guide walks you through the exact procedure for lighting a Rheem pilot light, covering both older standing pilot models and newer electronic ignition units. You’ll learn the tools you need, the safety checks that actually matter, and the common mistakes that turn a five-minute job into a service call. By the end, you’ll know how to do it yourself, and more importantly, when not to.
Before we get into the mechanics, a quick note: if you’re the kind of person who wants to understand how light and shadow work on a physical object like a flame, The Water Heater Workbook is a surprisingly useful side read. It won’t fix your water heater, but it will give you a mental model for why the pilot flame should look blue with a sharp inner cone instead of a lazy yellow flicker. That visual knowledge transfers directly to diagnosing combustion problems.
Know Your Rheem Ignition System First
Rheem makes two main types of gas water heaters, and the lighting procedure differs significantly between them. Open the bottom access panel and look at the gas control valve. If you see a dial with settings like PILOT, ON, and OFF, plus a red button, you have a standing pilot model. These are common on units manufactured before roughly 2026 and on some budget lines since.

If you see a digital display, a push-button igniter, or a small black box with wires running to the burner, you have an electronic ignition model. These use a spark igniter or a hot surface igniter to light the pilot automatically when the thermostat calls for heat. You don’t light these the same way, and forcing the procedure can damage the control board.
One more distinction: some Rheem models, particularly the Professional Classic series, use a piezoelectric igniter built into the gas valve. You’ll see a red or black button next to the dial. Pressing it generates a spark. Other models require you to use a manual lighter held at the pilot orifice. Check the label on the side of the tank for the specific model number and search for the manual if you’re unsure. The label also lists the gas type, which matters because natural gas and propane use different pilot orifices.
Safety Checks Before You Touch Anything
Gas is not something to be casual about. The first rule: if you smell gas near the floor or around the heater, do not light anything. Leave the house, call your gas utility from a neighbor’s phone, and let them check for leaks. A faint rotten egg smell right at the pilot assembly after a long shutdown is often just residual odorant, but you don’t guess with this.
Assuming no gas smell, turn the gas control valve to OFF and wait at least five minutes. This lets any lingering gas in the combustion chamber dissipate. Five minutes feels like forever when you’re cold, but it’s non-negotiable. During this wait, check the area for anything flammable within three feet of the heater. Cardboard boxes, paint cans, and cleaning supplies all too often end up parked next to water heaters.
You also need to confirm the pilot tube is clear. Look at the small copper tube running from the gas valve to the burner assembly. If it’s kinked or blocked with debris, no amount of relighting will work. A can of compressed air can clear dust, but if you see actual spider webs or insect nests, you’re better off calling a professional to clean the burner assembly properly.
Lighting a Standing Pilot Rheem (Step-by-Step)
This is the classic procedure that works on most Rheem models with a PILOT/OFF/ON dial. You’ll need a long lighter or a barbecue lighter with a flexible neck. A regular match works but it’s awkward, and you risk burning your fingers when you reach into the access panel.
- Turn the dial to OFF and wait the full five minutes. If the heater has been running and the burner is hot, wait longer for the metal to cool enough that you can work without burning yourself. Remove the outer access panel and fold back the inner insulation blanket. You’ll see the pilot tube, the thermocouple, and the main burner tube. The pilot assembly is usually a small bracket near the front of the burner chamber.
- Turn the dial to PILOT. Press and hold the red button (or the dial itself, depending on your model) to send gas to the pilot tube. While holding it, press the piezo igniter button repeatedly until the pilot flame appears. If your model doesn’t have a red button, look for a small black button near the gas valve.
- Keep holding the red button for about 30 seconds after the pilot lights. This lets the thermocouple heat up and generate enough voltage to keep the gas valve open. If you release too early, the pilot will go out.
- Release the button. The pilot flame should stay lit. If it goes out, wait five minutes and repeat the process, holding the button longer.
- Turn the dial from PILOT to ON. Replace the access panel and insulation blanket. Set the thermostat to your desired temperature.
One thing that catches people off guard: the order matters. You must turn the dial to PILOT before pressing the red button. If you press the button while the dial is ON, gas flows to the main burner, which is not what you want when you’re holding a flame nearby.
 Water Heater Owner's ToolkitFix the common faults yourself, keep it running for years, and know when a repair is money wasted.No-hot-water flowcharts, gas and electricFlush, anode, relief valve and descaling stepsRepair-or-replace calculator (Excel)
Lighting an Electronic Ignition Rheem
Electronic ignition models are simpler in some ways, but they have their own quirks. The control board handles the sequence, so you don’t manually hold a button for 60 seconds. Instead, you initiate a startup sequence and let the board do its thing.
- Turn the gas valve to OFF and wait five minutes. Same rule as before.
- Locate the igniter button or the control panel. On many Rheem models, you’ll see a small black button labeled IGNITER or a digital display with a reset option.
- Press and hold the igniter button for about 5 to 10 seconds. The control board will open the gas valve and generate a spark. You’ll hear a clicking sound, like a gas grill starter.
- If the pilot doesn’t light after a few attempts, the control board may need to be reset. Turn the gas valve to OFF, wait 10 seconds, then turn it to ON and try again. Some models require pressing a separate RESET button on the control panel.
- Once the pilot is lit, the main burner should ignite automatically when the thermostat calls for heat. If it doesn’t, check the error code on the digital display (if available) and consult your manual.
If the electronic ignition fails, the problem is often a dirty spark electrode or a faulty control board. The electrode is a small metal rod near the pilot. You can clean it with fine sandpaper, but be gentle. If the board is the issue, you’ll need to replace it, which is a job best left to a professional unless you’re comfortable working with gas valves and wiring.
Common Problems and What They Mean
If the pilot won’t light or stay lit, the cause is usually one of these:
- Thermocouple is dirty or faulty: A weak or dirty thermocouple won’t send enough voltage to keep the gas valve open. Clean it gently with fine sandpaper, or replace it if it’s worn.
- Pilot tube is clogged: Dust or spider webs can block the small pilot tube. Use a thin wire or compressed air to clear it.
- Gas supply issue: Make sure the gas shutoff valve is fully open and no other gas appliances are having issues.
- Igniter is broken: If you don’t hear a clicking sound, the piezo igniter may need replacement.
- Control board failure: On electronic ignition models, a faulty control board may prevent the spark or gas valve from working.
Sometimes the pilot lights but goes out when you release the button. That’s the classic thermocouple failure. The thermocouple is a copper tube with a tip that sits in the pilot flame. It generates a small electrical voltage when heated, and that voltage keeps the gas valve open. If it’s dirty, bent, or worn out, it won’t generate enough voltage. You can test it with a multimeter, but honestly, if it’s more than five years old, just replace it. They cost about $15 and take ten minutes to swap.
If the pilot won’t light at all, check for gas flow. Make sure the main gas shutoff valve near the heater is open. The handle should be parallel to the pipe, not perpendicular. Also check that the pilot tube isn’t blocked. A tiny spider can clog it in a single season.
If the pilot lights but the flame looks yellow and lazy, you have incomplete combustion. This usually means the pilot orifice is partially blocked or the air shutter is misadjusted. A healthy pilot flame is blue with a sharp inner cone. A yellow flame produces carbon monoxide, which is a serious health hazard. If you see yellow, shut the unit down and call a professional.
Standing Pilot vs. Electronic Ignition: Which One Are You Dealing With?
How to Tell If Your Rheem Has a Standing Pilot or Electronic Ignition
Look at the gas valve. A standing pilot model has a dial with settings like OFF, PILOT, and ON, and you’ll see a small red button. An electronic ignition model has a digital display or a simple on/off switch, and there’s no pilot flame visible when the heater is idle. If you’re still unsure, check the model number on the tank’s label and search for the manual online.
| Feature | Standing Pilot | Electronic Ignition |
|---|---|---|
| Ignition method | Manual flame held to pilot orifice | Automatic spark or hot surface igniter |
| Control interface | Dial with PILOT/ON/OFF, red reset button | Digital display or push-button igniter |
| Pilot flame behavior | Burns continuously between heating cycles | Lights only when thermostat calls for heat |
| Energy efficiency | Uses a small amount of gas 24/7 | No standing pilot, so slightly more efficient |
| Common failure point | Thermocouple wears out | Spark electrode gets dirty or control board fails |
| Relighting difficulty | Moderate; requires holding button for 60 seconds | Easy; press igniter and wait |
| DIY repairability | High; thermocouple is a cheap, simple swap | Medium; electrode cleaning helps, board replacement is tricky |
If you own a newer Rheem with an electronic ignition, you might wonder if you can convert it to a standing pilot. There are conversion kits for older pilot light units, but they’re not plug-and-play. The gas valve, burner assembly, and control board all differ. Unless you have a specific reason and the right kit, stick with what you have.
More water heaters guides on HeaterGuides.
Frequently Asked Questions
How long should I hold the red button when lighting the pilot?
Hold it for a full 60 seconds on a cold thermocouple. If the heater has been running recently and the thermocouple is still warm, 30 seconds might be enough, but why risk it? Sixty seconds is the safe standard. If the pilot goes out after you release the button, wait five minutes and try again. If it keeps failing, the thermocouple is likely bad.
Why does my pilot light keep going out?
Three causes cover 90% of cases: a failing thermocouple, a draft blowing out the flame, or a dirty pilot orifice. The thermocouple is the most common. It’s a wear item, and it eventually stops generating enough voltage. Drafts are more common in basements or garages with open doors. A dirty orifice produces a weak flame that doesn’t wrap around the thermocouple properly. Clean it with a small wire brush or compressed air.
Can I use a regular lighter instead of a long-reach lighter?
You can, but you’ll probably burn your fingers. The pilot assembly sits deep inside the access panel, and the insulation blanket gets in the way. A barbecue lighter with a flexible neck costs a few dollars and makes the job much easier. If you’re in a pinch, a long fireplace match works, but you’ll need quick hands.
What does the thermocouple actually do?
It’s a safety device. The thermocouple sits in the pilot flame and generates a small electrical voltage, usually around 30 millivolts, when heated. That voltage holds the gas valve open. If the pilot goes out, the thermocouple cools, the voltage drops, and the gas valve closes. This prevents gas from leaking into your house. Without it, a blown-out pilot would fill the room with gas.
When should I call a professional instead of trying to fix it myself?
Call a pro if you smell gas anywhere near the heater, if the pilot flame is yellow instead of blue, if you see soot or carbon deposits around the burner, or if the heater is leaking water from the tank. Also call if you’ve tried relighting three times without success. Repeated failure points to a deeper issue like a faulty gas valve, which is not a DIY job. A licensed plumber or HVAC technician has the tools to test gas pressure and diagnose the control system safely.
What to Do After You Get It Lit
Once the pilot is burning steadily, turn the gas valve to ON (if it wasn’t already) and set your thermostat to the desired temperature. Watch the burner cycle on and off a couple of times to confirm everything works. If you smell gas at any point, turn off the gas supply immediately, ventilate the area, and call a professional.
Once the pilot is stable and the main burner fires, take a minute to check the whole system. Look at the flame through the burner viewport. It should be blue with maybe a tiny yellow tip at the very edge. A mostly yellow flame means incomplete combustion, and that’s a carbon monoxide risk. If you see that, shut it down and call someone.
Listen for any unusual sounds. A low rumble is normal, but a popping or hissing sound could indicate a burner issue. Feel around the base of the tank for any dampness. A leaking tank is a separate problem from a pilot outage, and it usually means the tank needs replacement.
Write down the date you relit the pilot. If you find yourself relighting it more than twice a year, something is wrong. A healthy standing pilot should burn for years without needing attention. Frequent outages mean a failing thermocouple, a draft issue, or a gas pressure problem.
Finally, consider whether your heater is due for maintenance. Sediment builds up in the bottom of the tank over time, which reduces efficiency and can cause rumbling noises. Draining a few gallons from the drain valve every six months flushes out the sediment and extends the life of the tank. It’s a ten-minute job that most people skip, and it’s the single best thing you can do for your water heater besides keeping the area clean.
If you’re still having trouble after following these steps, check out our guide on restarting a Rheem gas water heater for a broader troubleshooting approach. And if you’re comparing brands before a replacement, our AO Smith vs. Rheem comparison covers the real-world differences in reliability and serviceability.
Relighting a pilot is one of those skills that looks intimidating until you’ve done it once. The first time takes fifteen minutes and a lot of nervous button-holding. The second time takes three. Keep a long lighter near the water heater, know your model type, and remember the five-minute wait rule. That’s the whole secret.