Your gas stove should be a reliable powerhouse, not a source of culinary frustration. When the flame is weak, yellow, or just not hot enough, it’s more than an annoyanceit’s a sign of inefficiency. Optimizing your stove’s heat output isn’t just about boiling water faster; it’s about safety, energy savings, and getting the performance you paid for.
Think of it as a simple tune-up. Most heat issues stem from a few common, fixable problems. From basic cleaning to understanding the role of your cookware, a little knowledge goes a long way. For a deep clean that tackles tough grease and carbon, many homeowners find a specialized cleaner like the Weiman Gas Range cleaner to be incredibly effective. It’s formulated to dissolve residue without harsh scrubbing, which is a good first step in restoring burner efficiency.
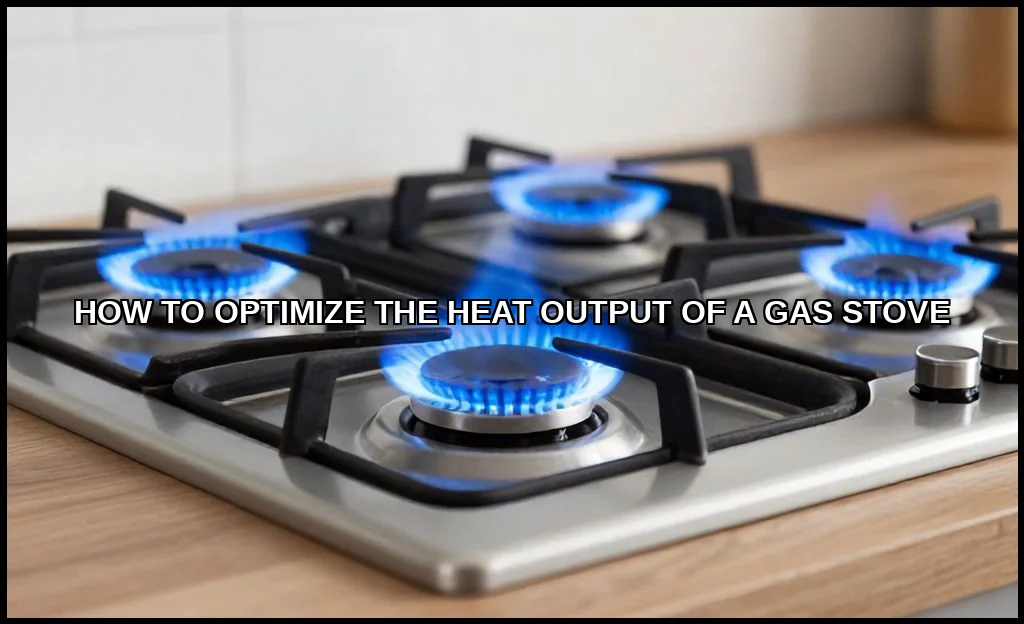
Gas Stove Heat Output and the Critical Flame Color
Before you start adjusting anything, you need to diagnose the problem. The flame itself is your best diagnostic tool. A healthy, efficient gas stove flame should be steady and almost entirely blue with a small, sharp blue cone at its base. This indicates complete combustion, where the gas is mixing with the right amount of air and burning cleanly for maximum BTU (British Thermal Unit) output.
A yellow or orange flame, however, is a red flag. It signals incomplete combustion, meaning the gas isn’t burning completely. This produces carbon monoxide, wastes fuel, and delivers less heat to your pan. If you’re asking, “why is my gas stove flame so low and yellow?”, the answer usually involves a clog, an airflow issue, or incorrect gas pressure. The color is non-negotiable for safety and performance.
Step-by-Step Burner Cleaning for Maximum Heat
This is the most common fix and your first line of defense. Over time, food spills, grease, and dust clog the tiny ports in the burner head and the space under the burner cap. This directly restricts the flame and causes a low, lazy burn.
How to Clean Clogged Ports on a Gas Burner
- Turn Off the Gas: Safety first. Ensure the burner knobs are in the “Off” position.
- Remove Burner Caps and Heads: Lift off the circular caps, then gently lift out the burner heads underneath. They are usually not screwed in.
- Clean Thoroughly: Soak the caps and heads in warm, soapy water. For the burner head’s ports, use a stiff brush (an old toothbrush works) or a straightened paper clip to gently clear each hole. This is orifice cleaning at its most basic. Avoid using a toothpick, as it can break off.
- Dry Completely: Any moisture left in the assembly will cause sputtering when you relight. Let everything air-dry fully or use a cloth.
- Wipe the Stovetop: Clean the area where the burner sits to remove any debris that could block airflow from below.
- Reassemble and Test: Place the burner head back in its well, ensuring it’s seated flat. Set the cap on top. Turn on the gas and ignite. You should see an immediate improvement in flame height and color.
Regular cleaning is the single best way to maintain your stove’s burner efficiency and prevent the “gas stove not hot enough” dilemma.
Checking Gas Pressure and Air Shutter Adjustment
If cleaning doesn’t solve a persistent yellow flame or low heat, the issue might be with the gas-air mixture. This involves two components: the gas regulator and the primary air shutter.
Can you adjust the pressure on a natural gas stove? Typically, no. The gas pressure regulator is a sealed safety device, and tampering with it is dangerous and likely against code. If you suspect a pressure issue (all burners are weak), you need a certified technician. However, you can often adjust the air mixture.
Each burner has a primary air shutter, usually a sliding plate or a rotating sleeve located where the burner tube meets the control valve. Its job is to mix air with the gas before it reaches the burner ports. Adjusting it changes the flame’s character.
- Too little air: Creates a soft, yellow, sooty flame (too rich).
- Too much air: Creates a loud, lifting, blue flame that may blow itself out (too lean).
To adjust, light the burner. Locate the shutter (consult your manual) and slowly adjust it while the flame is on low. You’re aiming for that quiet, solid blue flame. Make tiny adjustments and observe. This simple act of gas stove flame adjustment can dramatically increase gas stove heat quality.
For complex gas work, always refer to an authority guide on appliance safety or call a pro. It’s not worth the risk.
Optimizing Your Cookware and Stovetop Setup
Your pots and pans are the final link in the heat transfer chain. Using the wrong cookware is like putting low-grade fuel in a high-performance engine.
Best Pots and Pans for Maximum Heat on Gas Stove: Look for heavy-bottomed, flat-based cookware made from materials with high thermal conductivity, like clad stainless steel, copper, or cast iron. A warped or rounded bottom creates an air gap, wasting a massive amount of energysometimes over 50% of the heat just escapes around the sides.
Placement matters, too. Always match the pan’s bottom to the burner’s size. A small pan on a large burner wastes heat; a large pan on a small burner creates uneven cooking and a stove burner low flame struggle. Ensure your cookware is clean and dry on the bottom for optimal contact. This simple habit maximizes the BTU output actually hitting your food.
Ventilation and Combustion Air: The Unsung Hero
Your stove needs oxygen to burn the gas efficiently. Modern, airtight homes can sometimes starve an appliance of combustion air. If your flame is yellow or unstable, especially when the house is sealed up or the range hood is on high, poor airflow might be the culprit.
Ensure your kitchen’s ventilation system is clean and functional. If you have a downdraft or overhead hood, run it on low while cooking to remove byproducts without pulling excessive air from the burner itself. In extremely tight homes, cracking a nearby window slightly can provide the necessary air for clean burning. Proper stove ventilation & airflow supports a perfect blue flame.
When to Call a Professional: Safety First
Know your limits. While cleaning and minor air shutter adjustments are solid DIY tasks, some problems require expert hands.
- You smell gas when the stove is off. This is an emergency. Evacuate and call your utility company.
- The thermocouple (the safety sensor that keeps gas flowing only when the pilot is lit) is faulty, causing the burner to go out.
- You suspect a problem with the gas line, regulator, or control valves.
- All burners are consistently weak, pointing to a systemic pressure issue.
- You’ve cleaned and adjusted but still have a yellow flame. A pro can check for a damaged burner head or a misaligned orifice.
Investing in professional service for complex issues is cheaper than the alternatives. Brands known for reliability, like a navien tankless heater, build their reputation on certified installation and maintenancethe same principle applies to your gas stove.
A well-tuned gas stove is a joy to use. It responds instantly, heats evenly, and operates safely. Start with a deep cleanit solves most issues. Understand what a proper blue flame looks like and adjust the air shutter if needed. Choose your cookware wisely and give the stove the air it needs to breathe. These steps will transform your cooking experience, ensuring every BTU of energy is used to cook your food, not wasted. For persistent or dangerous problems, never hesitate to call a technician. Your safety, and your perfect sear, depend on it.
