You know that smell. The first cold morning of the year, you flip the switch on your convection heater, and a cloud of burnt dust rolls out. It lingers for hours, and you wonder if the unit is about to catch fire. It probably isn’t, but that smell is a sign you’ve skipped a season of maintenance.
Convection heaters work by drawing cool air in at the bottom, passing it over a heating element, and letting the warm air rise out the top. There are no moving parts in the heating process itself, which makes them reliable. But that passive airflow is also the problem. Dust, pet hair, and lint settle on the fins and elements, and every time you fire the unit up, you bake that debris. This article walks you through the exact steps to keep your baseboard, wall-mounted, and portable convection heaters running clean and efficient for years. You will learn what to clean, how to test the safety controls, and when to stop fiddling and call a professional.
Lubegard
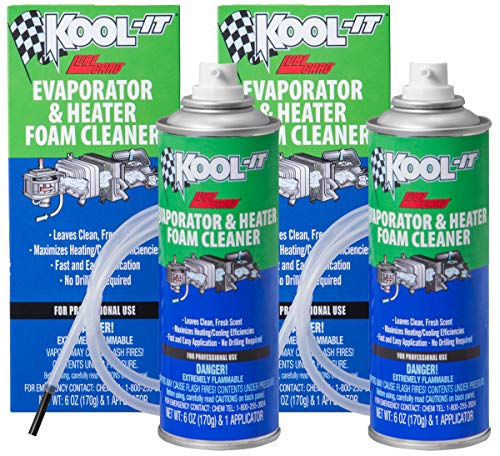
Lubegard 96030 Kool-It Evaporator and Heater Foam…
- Leaves a clean, fresh scent
- Maximizes cooling system efficiency
- No equipment or drilling required
Before you start pulling things apart, grab a can of foam cleaner made for heater cores. The Lubegard Kool-It Evaporator and Heater Foam Cleaner is handy for this job because it dissolves the oily film that plain water misses, and it leaves a fresh scent instead of a chemical smell. It’s not a substitute for physical cleaning, but it does help break down grime deep between the fins that a brush can’t reach.
Why Convection Heater Maintenance Matters
Most people ignore their heaters until something breaks. That’s a mistake, but not for the reason you think. A dirty convection heater doesn’t usually stop working. It just gets slower and hungrier. Dust acts as an insulator. It traps heat against the element instead of letting it transfer to the passing air. The element runs hotter, the thermostat cycles more often, and your power bill creeps up.
There is also a safety angle. A thick layer of dust on the heating element can reach temperatures high enough to singe or smolder. The thermal cutoff switch will usually trip before a fire starts, but you shouldn’t rely on that as your first line of defense. Keeping the fins clean is the difference between a heater that lasts fifteen years and one that dies in five.
You don’t need specialist tools for most of this. A vacuum with a brush attachment, a soft paintbrush, and a can of compressed air cover ninety percent of the work. The remaining ten percent involves a multimeter, and that’s only if you want to verify the safety controls are alive.
Safety First: Power Down and Cool Down
Do not touch anything until the unit is cold. Convection heaters retain heat in the fins long after the power is off. A cool down period of at least thirty minutes is the minimum. An hour is better if the heater was running at full output.
Unplug portable units from the wall. For hardwired baseboard or wall-mounted units, switch off the circuit breaker that feeds the heater. Do not rely on the wall thermostat to cut power. Many thermostats only switch one leg of the circuit, leaving live wires inside the junction box. If you are not comfortable verifying a dead circuit with a non-contact voltage tester, stop here and call an electrician.
Once the unit is cool and powered down, do a quick visual inspection. Look for discolored metal, melted plastic around the cord entry point, or signs of arcing near the electrical connections. Any of these mean the unit needs professional servicing, not cleaning.
Deep Cleaning the Exterior and Air Intake Vents
Start with the outside. The intake vents at the bottom of the unit are the first filter. If those are clogged with dust bunnies, the whole heater starves for air. Use a vacuum with a crevice tool to pull the loose debris out of the louvers. Then go over the same area with a soft brush to dislodge anything stuck to the metal.
Wipe down the exterior casing with a damp microfiber cloth. Mild dish soap in warm water is fine. Do not use solvent-based cleaners. They can strip the paint or damage plastic components on some models. Dry the casing completely before moving on.
Using the Right Tools (Vacuum, Soft Brush, Compressed Air)
The tools matter more than you might expect. A standard vacuum hose without a brush attachment will scratch the fins and can bend them. Bent fins restrict airflow and create hot spots. Use the soft brush attachment for the fins and a crevice tool for the gaps between the casing and the heating element.
A soft paintbrush, around 2 inches wide, is perfect for sweeping dust off the fins without damaging them. Hold the brush at a slight angle and sweep in the direction of the fins, not across them. Compressed air is useful for blowing dust out of hard-to-reach corners, but do it outdoors. Otherwise you will coat the room in a fine layer of dust.
For stubborn buildup, the foam cleaner mentioned earlier works well. Spray it directly onto the fins, let it sit for ten minutes, then wipe away the dissolved grime with a cloth. It is not a substitute for vacuuming, but it removes the oily residue that dry tools leave behind.
Cleaning and Inspecting Heating Elements and Fins
This is the heart of the job. The heating element is usually a metal sheath bent back and forth, with aluminum fins pressed onto it to increase surface area. Dust accumulates between those fins, and that is exactly where you cannot reach with a cloth.
Work methodically from one end of the element to the other. Use the soft brush to sweep dust toward the open end of the unit, then catch it with the vacuum. If the fins are heavily caked, use the compressed air to blast the debris out, then vacuum it up. Repeat until the vacuum picks up nothing more.
Look closely at the fins while you clean. They should be straight and evenly spaced. If some are bent, gently straighten them with a butter knife. Bent fins are not just a cosmetic issue. They disrupt the laminar airflow and cause the element to run hotter in spots, which shortens its life.
Check the element sheath for cracks or dark burn marks. A hairline crack in the metal can expose the internal resistance wire, creating an electrical hazard. If you see any cracking, the heater is done. Do not try to patch it.
Checking and Testing Thermostat and Safety Controls
Your heater has two main safety devices. The thermostat regulates temperature by cycling the element on and off. The thermal cutoff is a one-time fuse that blows if the unit overheats. Both can fail, and both are worth testing if you own a multimeter.
First, test the thermostat. Set it to its lowest position and check for continuity across the two terminals with your multimeter. You should read an open circuit. Then turn the dial to its highest position. You should read near zero ohms, indicating a closed circuit. If the readings are reversed or show no change, the thermostat is stuck and needs replacing.
The thermal cutoff is a small cylindrical component attached to the element housing. It is normally closed, meaning it passes current. Test it for continuity. If it reads open, the fuse has blown. Sometimes this happens because the heater genuinely overheated, and sometimes the fuse just aged out. Replace it with the exact same rating, usually 250V at a specific amperage. Do not substitute a higher-rated fuse. That defeats the safety purpose.
If the thermal cutoff keeps blowing after replacement, you have a deeper problem. The element may be shorting to ground, or the fins are so clogged that the unit cannot shed heat. Clean the fins thoroughly and test the element resistance to ground with the multimeter. Any reading below 100 kilohms means the element is leaking current and must be replaced.
Inspecting Electrical Cords, Plugs, and Connections
Portable units see a lot of abuse. The cord gets stepped on, pinched behind furniture, and yanked out by the cord instead of the plug. Inspect the entire length of the cord for cracks, fraying, or exposed copper. Pay special attention to the last six inches near the plug and the point where the cord enters the heater casing.
Check the plug prongs for discoloration or a burnt smell. Blackened prongs indicate arcing inside the outlet, which is a fire hazard. If the outlet itself looks scorched, stop using it and have an electrician replace the receptacle.
For hardwired units, open the junction box and inspect the wire connections. Look for loose screws, corroded wires, or melted insulation. Tighten any loose connections with a screwdriver. If the wires are aluminum, not copper, call a professional. Aluminum wiring requires special anti-oxidant compound and proper torque, and a mistake here can start a fire.
Never use an extension cord with a convection heater. The draw is too high, and a standard household extension cord will overheat. If the unit’s cord is too short, have a licensed electrician install a dedicated outlet closer to where you need it.
Troubleshooting Common Noises and Performance Issues
Convection heaters are mostly silent. The only sound you should hear is the click of the thermostat relay when it cycles. If you hear rattling, buzzing, or crackling, something is wrong.
A rattling noise usually means a loose component. The element may have worked loose from its mounting brackets, or a fin is vibrating against the casing. Tighten the mounting screws and check that the fins are not touching the metal shroud. A gentle push with a screwdriver usually fixes the fin contact.
Buzzing is more serious. It often comes from the electrical connections or the relay in the thermostat. A loose connection will arc and buzz. Turn off the power and inspect every connection in the junction box and at the thermostat. If you find a burnt or loose wire, fix it. If the buzzing persists with everything tight, the relay is failing and needs replacement.
Crackling or popping sounds during warm-up are usually just dust burning off. That is normal if it stops after a few minutes. If it continues, the element may have a hairline crack. Shut the unit down and inspect the element sheath closely.
If the heater runs but produces weak or no heat, check the thermostat setting first. Then verify the unit is getting power. If it is, the element may be open. Test it with a multimeter for continuity. An open element reads infinite resistance and must be replaced.
Seasonal Maintenance and Off-Season Storage
Portable convection heaters need proper storage when the heating season ends. Do not just shove them in a closet. A quick clean before storage prevents dust from baking on during the summer heat.
Follow the cleaning steps above, then wrap the power cord loosely around the unit or in a separate bag. Do not wrap the cord tightly around the casing. That puts stress on the internal wire connections. Store the heater in a dry place, off the floor if possible, to avoid moisture and pests.
Cover the unit with a cloth or keep it in its original box. A plastic bag traps moisture and can cause corrosion on the fins. Cardboard is fine.
For hardwired baseboard units, clean them at the end of the season and again before the first cold snap. That twice-a-year schedule catches the dust that accumulates during spring and fall when windows are open.
If you have smart thermostats or timers, set them to keep the room at a lower temperature when you are away. This reduces the heater’s duty cycle and keeps the dust from baking on as quickly. Zone heating, where you only heat the room you are using, also cuts down on the total hours the heater runs. That means less dust accumulation and lower energy bills.
When to Call a Professional
Some jobs are not DIY. If you find melted wires, a cracked element, or any sign of arcing, call an electrician or an HVAC technician. Do not attempt to repair a heater that has been damaged by overheating. The internal insulation may be compromised even if it looks fine from the outside.
If you are not comfortable working inside the junction box with live mains voltage, hire someone. The cost of a service call is far less than the cost of a house fire. A professional can also verify the heater is drawing the correct amperage and that the circuit breaker is properly sized.
Annual professional servicing is a good idea for hardwired units that run for months at a time. They can check the internal thermal cutoff, verify the grounding, and measure the element resistance to confirm it is healthy.
Quick Maintenance Schedule Checklist
Here is a simple schedule to keep your heaters in top shape all year. Adjust the frequency based on how dusty your home is. Homes with pets or wood stoves need more frequent cleaning.
| Frequency | Task | Time Required |
|---|---|---|
| Monthly (in use) | Vacuum intake vents and exterior casing | 5 minutes |
| Quarterly (in use) | Deep clean fins with brush and compressed air; inspect element for cracks | 30 minutes |
| Annually (before first use) | Test thermostat and thermal cutoff with multimeter; inspect all electrical connections | 1 hour |
| Annually (end of season) | Full clean, check cord and plug, store portable units properly | 45 minutes |
| Every 2-3 years | Professional inspection for hardwired units | 1-2 hours |
Stick to this schedule and you will avoid the burnt-dust smell, keep your energy bills predictable, and extend the life of your equipment. For more details on how these units work, check out our guide on heat distribution methods.
Frequently Asked Questions
How often should I clean my convection heater?
Vacuum the exterior vents monthly during the heating season. Do a deep clean of the fins and element at the start and end of each season. If you have pets, increase the frequency. Pet hair clogs the fins much faster than regular dust.
Can I use a wet cloth to clean the heating element?
No. The element must be completely dry before power is applied. Any moisture left on the element can cause a short circuit. Use a dry brush, vacuum, and compressed air. If you use a foam cleaner, allow at least two hours of drying time before turning the heater on.
Why does my heater smell like burning dust?
That is dust burning off the hot element. It happens on the first use of the season. It should stop after a few minutes. If the smell persists or is accompanied by smoke, shut the unit down and clean the fins thoroughly. Persistent burning smell indicates heavy buildup or a failing component.
How do I know if my thermal cutoff switch is bad?
Test it with a multimeter set to continuity mode. A good thermal cutoff reads near zero ohms. If it reads open circuit, it has blown. Replace it with the exact same rating. If the new one blows immediately, the heater has a deeper problem like a shorted element.
Is it safe to leave a convection heater running overnight?
Modern convection heaters with working thermostats and thermal cutoffs are generally safe to run unattended. The bigger risk is dust buildup, which can cause overheating. Clean the unit before running it all night, and keep it at least three feet away from bedding, curtains, and furniture. For more on this, see our article on convection heater safety.
What You Should Do This Weekend
- Unplug the heater and let it cool for an hour before touching anything.
- Vacuum the intake and output vents with a brush attachment.
- Use a soft paintbrush to sweep dust off the fins, then vacuum it up.
- Inspect the power cord for cracks, frays, or scorch marks.
- Test the thermostat and thermal cutoff with a multimeter if you own one.
- Clean the unit at the end of the season and store it in a dry place with the cord loose.
- Call a professional if you see melted wires, cracked elements, or any sign of arcing.
Maintaining a convection heater is not glamorous work, but it is simple and it pays off. A clean heater runs safer, uses less power, and lasts longer. That is a fair trade for an hour of your time twice a year. If you want to dig deeper into how insulation affects your heater’s performance, this insulation impact guide is worth a read.

I am a mechanical engineer and love doing research on different home and outdoor heating options. When I am not working, I love spending time with my family and friends. I also enjoy blogging about my findings and helping others to find the best heating options for their needs.
Related guides

Top Inkjet Printers for Heat Transfer Projects
Looking for the best inkjet printer for heat transfer? Find top picks that ensure vibrant prints and flawless…
Top Choice Heat Gun for Effortless Paint Removal
Ready to tackle stubborn paint? Find the best heat gun for paint removal and make your DIY projects…
ONLYFIRE FP042 Fire Pit: The Ultimate Portable Pellet Solution
Ignite your outdoor gatherings with the ONLYFIRE FP042 Patio Wood Pellet Fire Pit. Read our review to find…