

Cold shower at 6 AM. You turn the knob, wait, and nothing but ice. The pilot light went out again, and now you’re standing in a towel wondering if this is a five-minute fix or a $500 service call. For most Rheem Classic Professional models, it’s the former—provided you know the exact sequence and don’t skip the safety checks.
This guide walks you through the entire process: what you need before starting, the step-by-step lighting procedure for both Honeywell and Robertshaw gas valves, and what to do when things don’t go as planned. You’ll also learn why the gas valve has a red button and what that clicking sound actually means. By the end, you’ll be able to relight the pilot in under ten minutes without guessing.
If you need a visual reference while working, a Rheem pilot lighting guide can supplement what’s written here, but the instructions below are complete on their own.
Before You Touch Anything: The Non-Negotiables
Gas and water heaters don’t mix with shortcuts. You need three things in place before you even open the access panel.
Ventilation. Open a window or door near the heater. Natural gas is odorless on its own; the rotten egg smell is added mercaptan. A small leak during lighting can build up fast in a closed utility closet. Two minutes of cross-ventilation prevents a bad afternoon.
Smell test. Stand close to the floor and sniff around the base of the unit. Gas is heavier than air, so it pools low. If you smell gas at all, stop. Do not flip any switches, do not light anything, and call your gas utility or a licensed plumber. That’s not paranoia; that’s the difference between a pilot light and a crater.
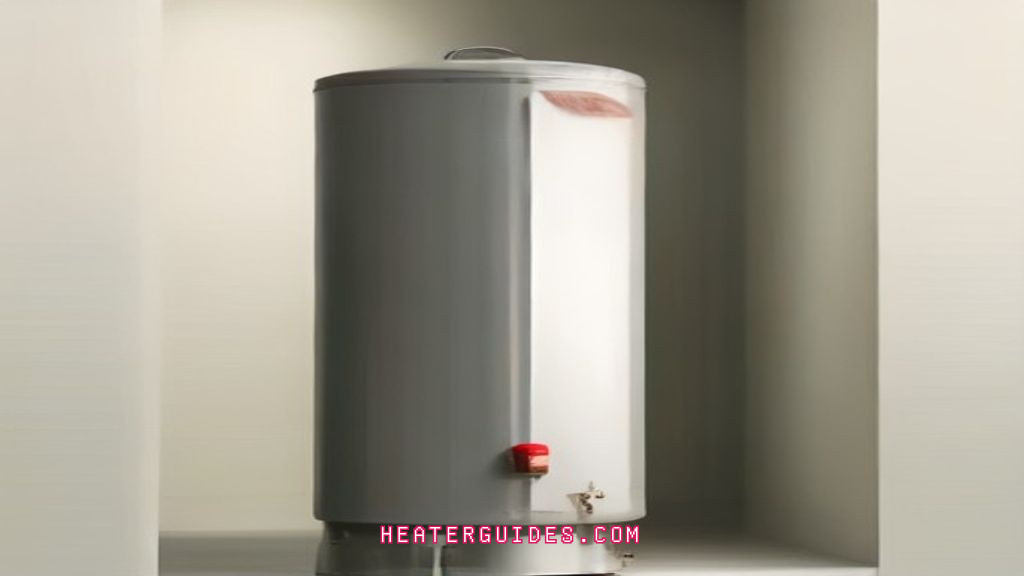
Find the gas valve. On the Rheem Classic Professional, it’s typically a black or white box on the outside of the tank, about a third of the way up. It has three markings: ON, OFF, and PILOT. There’s also a red button and a small silver or black thermocouple wire running down into the burner chamber. Know where these are before you start.
Step-by-Step: Lighting the Pilot on a Honeywell Valve
Most Rheem Classic Professional units built after 2026 use a Honeywell gas valve. The process below works for the common WV4460E and similar models. If your unit has a Robertshaw valve, skip to the next section.
- Turn the gas valve to OFF. Press down on the knob slightly and turn it clockwise until it points at OFF. Wait five minutes. This isn’t just a formality—it lets any residual gas in the burner chamber dissipate. Set a timer if you have to.
- Remove the outer and inner access panels. Two screws hold the outer panel. The inner panel is just a metal plate; it slides up and out. You should now see the burner assembly and the pilot tube.
- Turn the valve to PILOT. Push the knob down and turn it counterclockwise to PILOT. You’ll feel a spring resistance. Keep holding it down.
- Press the red igniter button. While holding the gas knob down, press the red button on the valve. You’ll hear a clicking sound—that’s the piezoelectric igniter sparking. Keep pressing until the pilot flame appears at the end of the small copper tube inside the burner chamber. Usually takes 2-5 clicks.
- Hold the knob down for 30 seconds. Once the pilot is lit, keep holding the gas knob in the PILOT position. The thermocouple needs time to heat up and generate enough millivolts to keep the gas valve open. Thirty seconds is the minimum; sixty is safer on cold mornings.
- Release and verify. Let go of the knob. The pilot flame should stay lit. If it goes out, you didn’t hold it long enough, or the thermocouple is dirty. Start over from step one.
- Turn the knob to ON. Once the pilot holds steady, push the knob down and turn it to ON. The main burner should fire within a few seconds as the thermostat calls for heat.
- Replace both access panels. Put the inner panel back first, then the outer. Screw the outer panel back in. Leaving them off is a code violation and a carbon monoxide risk.
The whole sequence takes about seven minutes if you include the five-minute gas purge. Rushing the purge is the most common mistake—people skip it, then wonder why they hear a faint hiss when they open the panel.
Robertshaw Valve: A Slightly Different Dance
Older Rheem Classic Professional models (pre-2026) and some budget lines use a Robertshaw gas valve. The lighting procedure is similar but with one key difference: no red button.
- Turn the knob to OFF and wait five minutes.
- Open the access panels and find the pilot tube.
- Turn the knob to PILOT and push it down.
- Use a long lighter or a barbecue igniter to light the pilot flame directly at the end of the tube. Hold the knob down for 30-60 seconds.
- Release, confirm the flame stays, then turn to ON.
The Robertshaw valve relies on you to supply the spark. A standard grill lighter with a curved nozzle works best; a straight lighter forces your hand too close to the burner. If you don’t have one, a long fireplace match does the job, but it’s awkward.
One thing to watch on Robertshaw valves: the thermocouple nut can loosen over time. If the pilot lights but goes out every time you release the knob, check that the copper tube’s nut is snug against the valve body. Hand-tight plus a quarter turn with a wrench is right. Overtightening strips the threads.
When the Pilot Won’t Stay Lit: Real Troubleshooting
You followed every step, the flame catches, then dies the second you release the knob. This is the most common failure, and it’s almost always one of three things.
Thermocouple is dirty or worn out. The thermocouple sits in the pilot flame and generates a small voltage that keeps the gas valve open. Over time, soot builds up on it, insulating it from the flame. Turn off the gas, remove the access panels, and gently clean the tip with fine sandpaper or a scouring pad. If it’s corroded or bent out of position, replace it. A new one costs under $20 and takes ten minutes to swap—two nuts and a pull.
Pilot flame is too weak or misaligned. The flame should be a sharp blue cone, about half an inch tall, with the tip wrapping around the thermocouple. If it’s yellow or flickering, the pilot tube is partially clogged. You can blow it out with compressed air, but if that doesn’t fix it, the tube may need replacement. Also check that the thermocouple tip is actually inside the flame. If it’s off to the side, bend it gently back into position.
Gas valve itself is failing. If the thermocouple is clean and the flame is perfect, but the pilot still won’t hold, the valve’s internal magnet is weak. This is uncommon but happens on 10+ year old units. Replacement valves run $150-$250, which is close to the cost of a new water heater. Run the numbers before you commit.
There’s also the electrical safety switch on some models. It’s a small black button near the bottom of the valve. If it’s tripped, the gas won’t flow. Press it until it clicks, then try lighting again. It’s a long shot, but it’s free to check.
Honeywell vs. Robertshaw: Which Lighting Process Do You Need?
| Feature | Honeywell Valve | Robertshaw Valve |
|---|---|---|
| Ignition method | Piezoelectric red button | External lighter or match |
| Typical model years | 2026 and newer | Pre-2026, some budget lines |
| Knob positions | OFF, PILOT, ON | OFF, PILOT, ON |
| Common failure point | Igniter button stops sparking | Thermocouple nut loosens |
| Ease of lighting | Easier—no open flame needed | Requires a steady hand |
| Spare parts cost | Igniter assembly ~$30 | Thermocouple ~$15 |
If you’re not sure which valve you have, look at the front of the unit. The Honeywell has a distinct red button next to the knob. The Robertshaw doesn’t. That’s the quickest way to tell without pulling the panels.
Safety Checks After the Pilot Is Lit
Getting the flame to stay is step one. Making sure it’s burning safely is step two. Do these three checks before you walk away.
- Check the draft hood. Place your hand near the top of the tank where the vent pipe connects. You should feel warm air rising. If you feel nothing or air pushing back, the vent is blocked. Turn the unit off and call a professional.
- Listen for the burner. When the thermostat calls for heat, you should hear a soft whoosh as the burner ignites. A loud boom or pop means gas is accumulating before ignition—turn it off and inspect the burner ports for debris.
- Smell around the base. After ten minutes of operation, sniff the floor around the unit. Any gas smell means a leak at the valve or the supply line. Soapy water on the fittings will show bubbles if there’s a leak. Do not use a match to check.
One more thing: the temperature dial. If you set it above 120°F, you’re in scald territory, especially with kids around. The Rheem Classic Professional dial is usually marked in temperature, not just A/B/C. Keep it at 120°F for normal use and bump it only if you have a dishwasher that needs hotter water.
If the unit is older than eight years, check the anode rod while you have the panels off. A quick visual inspection can save you from a rusty tank later. Here’s a Rheem anode replacement guide if you decide to tackle it.
Frequently Asked Questions
Why does my Rheem water heater pilot keep going out randomly?
Random outages point to a weak thermocouple or a draft blowing out the flame. If it happens after a windy day, check the vent for down-drafts. If it happens weekly, replace the thermocouple—they degrade slowly and fail intermittently before they fail completely.
Can I relight the pilot without turning off the gas?
No. You must turn the valve to OFF and wait five minutes. Attempting to light it with gas flowing risks a flashback that can burn your face or damage the burner assembly. The five-minute wait is non-negotiable.
What does the red button on the gas valve actually do?
It’s the piezoelectric igniter. Pressing it creates a high-voltage spark at the pilot tip, similar to a grill igniter. It doesn’t control gas flow—the knob does that. If the button clicks but no spark appears, the igniter wire is broken or the electrode is grounded out.
Is it safe to relight a water heater pilot after a flood?
Only if the gas valve and burner assembly stayed dry. If the water level reached the bottom of the tank, the valve internals could be corroded or shorted. Have a plumber inspect it. The cost of a service call beats the risk of a gas leak.
How often should the pilot light be on?
Constantly. The pilot flame should burn 24/7, even in summer. If it goes out repeatedly, you have a problem—don’t just relight it and forget it. A standing pilot costs about $5-10 per year in gas, so leaving it on isn’t wasteful. If you’re going away for more than a month, turning it off is fine, but you’ll need to relight it when you return.
What to Do When You’ve Tried Everything
Sometimes the pilot won’t cooperate no matter what. If you’ve cleaned the thermocouple, replaced it, verified the flame is strong, and the valve still won’t hold, you’re looking at a valve replacement. At that point, do the math on the unit’s age.
For a tank older than 10 years, the replacement valve plus labor often exceeds half the cost of a new water heater. New units also come with better insulation and higher efficiency ratings. For a tank under 5 years old, replacing the valve makes sense. In between, it’s a judgment call based on how the rest of the unit looks. Rust on the tank exterior or a damp base means the tank itself is failing—don’t sink money into a valve for a tank that will leak in six months.
If you’re comparing brands for a replacement, a Rheem vs. AO Smith comparison covers the main differences in build quality and warranty terms.
Final Pointers to Keep Handy
- Always wait five full minutes after turning the gas off before attempting to light.
- Hold the knob down for a full 30-60 seconds after the pilot ignites—this is the most skipped step.
- Use a grill lighter for Robertshaw valves; your fingers shouldn’t be near the burner.
- Clean the thermocouple tip with sandpaper before replacing it—it fixes half the issues.
- Check for gas smell at floor level before and after lighting.
- Replace both access panels when done; they’re part of the safety system.
- If the unit is over 10 years old and the valve fails, price a new heater before ordering parts.

I am a mechanical engineer and love doing research on different home and outdoor heating options. When I am not working, I love spending time with my family and friends. I also enjoy blogging about my findings and helping others to find the best heating options for their needs.
Related guides

Rheem Water Heater Sediment Sensor Kit: Must-Have Alert Tool
Stay ahead of water heater issues with the Rheem sediment sensor kit that sends automatic alerts when flushing…
Rheem Water Heater Anti-Vibration Kit: Quiet Living Area Install!
Say goodbye to noisy water heaters with the Rheem anti-vibration isolation kitperfect for peaceful living area installations!
Flickering Red LED on Water Heater Cord? Fix It Fast
A flickering red LED on a water heater cord typically indicates a power issue or malfunction; check connections…