Your infrared portable heater is a workhorse during the cold months. It provides focused, efficient warmth without drying out the air like some forced-air models. But that quiet efficiency can be compromised by a layer of dust and grime, which not only reduces performance but can become a safety hazard. A proper clean is the key to longevity and safe operation.
Think of it like any other appliance in your home. Just as you’d service a furnace or clean a range hood, your portable heater deserves regular attention. This infrared heater cleaning guide will walk you through the entire process, from a simple exterior wipe-down to a more thorough internal component care. For those looking to upgrade their entire home heating system while tackling portable heater maintenance, many find a centralized solution like the Chromex Tankless Water heater to be a good complement for whole-house efficiency.
Safety First: Essential Precautions Before You Start
Heater safety cleaning begins before you touch a single cloth. This isn’t just a suggestion; it’s the most critical step. Ignoring these precautions can lead to electric shock or fire risk.
First, and this cannot be overstated: unplug and cool completely. Unplug the heater from the wall outlet. Then, allow it to sit for at least one to two hours. The internal components, especially the heating element and reflector, retain intense heat long after being turned off. You need everything to be at room temperature.
Work in a well-ventilated, dry area. Lay down a towel or sheet to catch any dislodged dust. Gather your tools: a soft, dry microfiber cloth, a vacuum cleaner with a brush attachment, a can of compressed air, and perhaps a soft-bristled brush (like a clean paintbrush). Avoid water, harsh chemicals, or abrasive scrubbers. They can damage finishes and electrical parts.
Step 1: Exterior Wipe-Down and Vent Cleaning
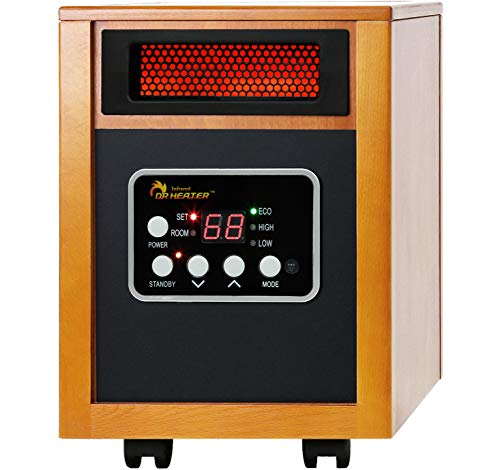
Start with the outside. This is the simplest part of your portable space heater cleaning routine but makes a big visual difference. Use your microfiber cloth to gently wipe down the entire plastic or metal casing. Pay special attention to the control panel, removing fingerprints and smudges.
The air intake and exhaust vents are crucial. Dust buildup here forces the heater to work harder. Use the brush attachment on your vacuum to suck dust from these grilles. For stubborn debris, a quick blast of compressed air from the outside can help dislodge it. Always direct the airflow away from the heater’s interior at this stage.
- Use a dry cloth only. No liquids.
- Vacuum vents gently to avoid damaging internal fins.
- Check the power cord for any fraying or damage while you’re at it.
Step 2: Accessing and Cleaning the Internal Reflector
This is where the real appliance deep clean begins. Most infrared heaters have a front grill or cover that can be removed, often with a few screws or simple clips. Consult your owner’s manual for the specific method. Once the grill is off, you’ll see the reflector panel.
The reflector is the curved, usually metallic, surface behind the heating element. Its job is to direct infrared rays into the room. If it’s dusty or tarnished, your heater’s efficiency plummets. This is the core of heater reflector care.
Carefully remove any screws holding the reflector in place. Gently lift it out. Use your soft brush or the vacuum’s brush attachment to remove loose dust. For fingerprints or smudges on the reflective surface, a microfiber cloth is perfect. Never use glass cleaner or other chemicals, as they can strip the reflective coating. If you’re wondering how to clean dust from inside an infrared heater, this is the primary target.
Addressing the Heating Element and Grill
With the reflector removed, the quartz tube or carbon fiber heating element is exposed. This is fragile. Do not touch it with your hands, as oils can create hot spots. Do not use any liquid or abrasive near it.
To dust off heating element, use your can of compressed air. Hold the can upright and use short, controlled bursts to blow dust off the tube and its ceramic holders. You can also use a dry, soft-bristled brush to very gently dislodge dust before blowing it away. The metal protective grill or cage can be cleaned with your vacuum brush or wiped with a dry cloth.
Step 3: Filter Maintenance (If Applicable)
Not all infrared heaters have air filters, but many newer models with fan-assisted convection do. If yours has one, it’s typically located near the air intake vent. A clogged filter is a common reason for reduced airflow and overheating.
Remove the filter according to the manual. Most are not washable and should be replaced annually. If it’s a reusable, washable type, rinse it gently under lukewarm water and let it air dry completely for 24 hours before reinstalling. This is a key part of infrared heater maintenance that’s often overlooked.
Final Steps: Reassembly, Function Test & Storage Advice
Now, reverse your steps. Carefully place the clean reflector back into its mounts and secure it. Reattach the front grill or cage. Ensure all screws are snug but not over-tightened. Double-check that no wires were disturbed or pinched during reassembly.
Once fully reassembled, plug the heater into an outlet. Turn it on to perform a function test. Run it on a low setting for 5-10 minutes. Listen for unusual noises and smell for any burning dust (a brief odor is normal if a little dust remained). Watch for proper operation of all settings. If anything seems off, unplug it immediately and re-check your work.
How Often and How to Store
How often should you clean a portable infrared heater? For exterior vents, a quick wipe-down every couple of weeks during peak use is smart. A full internal clean, like the step-by-step guide to disassemble and clean heater we just covered, should be done once per season, ideally before you store it for the summer.
For storage, ensure the heater is completely cool and clean. Coil the cord neatly. Store it in its original box or a plastic bin in a dry place, like a closet or shelf. This protects it from dust, moisture, and accidental damage. Proper winter heater care includes putting it away correctly.
It’s worth noting that for permanent heating solutions, homeowners often explore options like tankless water heaters. Brands like Navien have strong reputations, but always consult an official source for broader safety standards that apply to all heating appliances.
Your Clean Heater is a Safe, Efficient Heater
A clean infrared heater doesn’t just look better. It heats more effectively, uses less energy, and most importantly, operates safely. Dust buildup is more than an annoyance; it’s insulation that traps heat where you don’t want itinside the unit. That stress can shorten its lifespan.
This process might seem detailed, but after the first time, it becomes a quick 20-minute seasonal ritual. You’re not just cleaning; you’re performing preventative maintenance that ensures reliable warmth for winters to come. Your future self, enjoying a cozy and safe room, will thank you.