Burning wood efficiently means using seasoned hardwood under 20% moisture, building a hot fire fast, and avoiding smoldering. A careful DIY cleanup and fire-building job takes about 15 to 30 minutes plus whatever time your wood needs to season; chimney or vent work is a licensed-pro job in most places.
The common mistake is trying to save a bad fire by closing it down too soon. That usually costs you in smoke, creosote, and extra wood, because a cooler fire gives up heat to the flue instead of the room.
Start with dry fuel, enough air, and a clean stove or fireplace path. Then the fire does less complaining and more heating.
What to remember
Use seasoned hardwood that reads under 20% moisture on a wood moisture meter.
Build the fire hot and keep it from smoldering in the first few minutes.
Burn only clean wood in indoor appliances; skip pressure-treated, painted, or glued scraps.
Clean ashes into a covered metal container stored outdoors.
Call a pro for chimney cleaning, vent repairs, or any gas, electrical, or flue issue.
How To Burn Wood Efficiently
To burn wood efficiently, use seasoned hardwood below 20% moisture, start with plenty of air and dry kindling, then add larger splits only after the fire is burning strongly. Clean, efficient burning means bright flames, an active secondary burn where your appliance has one, and little visible smoke after startup—not a slow, smoky fire that turns heat into creosote.
Keep the wood stove door closed once the fire is established, burn only clean untreated wood, and use the air control to keep flames lively without sending heat straight up the chimney. A carbon monoxide detector belongs in a home with a wood-burning appliance; smoke and carbon monoxide are poor houseguests.
1
Open the air supply
Set the stove’s air control fully open for startup, following the appliance manual. Confirm the flue or damper is in the operating position before lighting.
2
Build a small hot fire
Place natural fire starters or dry kindling under small splits, leaving gaps for air. Avoid packing the firebox tightly; a little space helps the first flames heat the flue and establish draft.
3
Add fuel gradually
Once the kindling is burning across the load, add two or three larger splits. Put the thickest pieces on only after the smaller wood is flaming well, so the new load doesn’t smother the fire.
4
Adjust the air slowly
Leave enough air for bright flames and, where fitted, visible secondary combustion near the top of the firebox. Reduce the control in small steps after the new load catches; don’t chase a long burn by starving the fire.
5
Tend the fire by flame, not impatience
Add wood before the fire collapses into glowing coals, but don’t open the door repeatedly. A hot coal bed and active flames should heat the next load quickly.
Fuel condition
What happens in the fire
Seasoned hardwood below 20% moisture
Lights more readily, burns hotter and cleaner, and makes less creosote.
Green or wet wood
Uses heat to boil off water, burns cooler, makes more smoke, and can increase creosote.
Treated, painted, or glued wood
Can release toxic chemicals and damage the appliance; don’t burn it.
Wax-and-sawdust manufactured log
Use only if the stove instructions approve that product; many are made for open hearths.
A moisture meter is more reliable than a crackling sound or a dry-looking surface.
Air Control
The right setting depends on the stove, chimney draft, wood load, and manual. Closing the control slightly after the fire is established is normal; closing it until flames disappear creates a smoldering fire.
Prevent Smoke Rollback
Open the wood stove door slowly, and only as the manual allows. A closed damper, weak draft, or sudden door opening can push smoke into the room; if smoke rolls back, close the door, restore the proper damper or air setting, and stop if the problem continues.
In short
Bright flames and a fast, hot start are the useful signals. If the fire spends long periods smoking or barely flaming, add dry fuel and air rather than loading more wood onto it.
What You’ll Need
Use tools that help you measure moisture, start the fire cleanly, and keep the burn safe.
Wood craft marking
1DFAUL Wood Burn Paste Kit
This kit is made for adding designs to wood with burn gel and a pen, so it won’t measure moisture, light a stove fire, or replace a proper ash and chimney-cleaning tool. Skip it for efficient heating; it’s only useful if your project also includes wood crafts.
The optimal moisture content for burning wood efficiently is below 20%; use clean, seasoned hardwood such as oak or maple for the main fuel, while pine and fir are better kept for kindling indoors. Dense hardwoods usually need longer firewood seasoning than lighter species, so the calendar is only a rough guide.
Using seasoned hardwood below 20% moisture ensures efficient burning.
Below 20%
Target moisture content
Wood at this level burns hotter and cleaner, with less smoke and creosote than green or wet wood.
Measure a split face, not the bark. Split a piece, press the wood moisture meter pins into the fresh center, and check several pieces from different parts of the stack; one dry-looking log can be the charming liar in the pile.
1
Split Before You Stack
Cut and split firewood to the size your stove accepts. Smaller splits expose more surface area and dry sooner than unsplit rounds.
2
Stack For Airflow
Keep the pile outdoors and off the ground. Cover only the top, leaving the sides open so wind can move through the stack and rain can’t soak the wood.
3
Wait And Recheck
Use the table as a starting point, then confirm with the meter before burning. Wet weather, shade, large splits and poor airflow can extend the drying time.
Wood group
Rough seasoning time
Indoor use
Softwoods such as pine and fir
About 3–6 months
Dry kindling; usually not the main fuel
Lighter hardwoods
About 6–12 months
Main fuel once below 20%
Dense hardwoods such as oak and maple
About 12–24 months
Longer-lasting main fuel once below 20%
These are cautious ranges, not promises; local weather and stacking conditions can change them.
Have These Ready
Wood moisture meter
Gloves and dry kindling
Covered metal ash container stored outdoors
Fire extinguisher nearby
Choose Clean Fuel
Never substitute pressure-treated, painted or glued wood for firewood. For species comparisons, see the guide to best woods for hot clean-burning heat.
Check The Middle
If the outside of a split reads dry but the fresh center is above 20%, keep seasoning the stack.
Avoid The Mistakes That Waste Heat
Most wasted heat comes from wet fuel, restricted airflow, or fuel the stove was never designed to burn. Have the chimney professionally swept about once a year, and sooner if you burn heavily or creosote appears quickly.
Regular chimney maintenance prevents heat waste and ensures safety.
Fast warning check
Dark glass, lazy flames, a sharp tar smell and flaky soot point to poor burning or creosote buildup. A chimney that suddenly needs sweeping more often is another warning sign.
Wet wood, logs packed too tightly, closing the air control too early and overfilling the firebox all reduce clean combustion. Keep gaps between splits, let the fire establish a lively flame before reducing air, and follow the stove’s loading limits.
Myth
A big fire fixes wet wood.
Fact
Wet wood uses heat to drive off water, so the fire burns cooler and makes more smoke and creosote. Drying the fuel is the fix; adding more fuel only makes a dirtier fire.
Myth
Any wood product is fine in a wood stove.
Fact
Burn clean, seasoned firewood only unless the appliance manual says otherwise. Trash, plastic, pressure-treated, painted and glued wood can release toxic chemicals and damage the appliance.
Check Manufactured Logs
Many wax-and-sawdust logs are made for open hearths only. Use an artificial or manufactured log in a wood stove only when both the product label and stove instructions permit it.
Sweep Before Deposits Grow
A professional chimney sweep should usually be scheduled annually. Arrange it sooner after heavy use or whenever creosote appears fast, especially as flaky or tar-like deposits.
From HeaterGuides · our own guidePage 4 shows what each heater costs per hour; the 30-day plan on page 11 cuts the bill.Winter Heating Bill CutterSee what every heater in your home really costs, heat the rooms you use, and cut the waste in 30 days.Cost-per-hour tables for every heaterThermostat schedule and draft-proofing planRunning-cost and bill calculator (Excel)$14.99$9.99Get it for $9.99See what's inside and watch the 2-minute video →14-page printable PDF + Excel calculator · instant download · 30-day refund
Know When A Pro Or Permit Is Required
Install carbon monoxide detectors at the sleeping-area level and near the wood stove, following each detector’s instructions; a model with a digital PPM display can show exposure more clearly than an alarm alone. Keep a working detector on every floor where required by local code, and test the alarms before the heating season.
Chimney installation, liner work, vent repairs, gas hookups, and structural changes to a wood-burning appliance may require a licensed professional and a permit. The same applies to changing clearances, hearth construction, or support framing; ask your building department before cutting into a wall or roof. A failed flue can send smoke and carbon monoxide into the house instead of up the chimney.
Stop Before Working On The Flue
Don’t improvise chimney repairs, liner sizing, or vent connections. A licensed chimney or heating professional should check the flue, clearances, draft, and appliance connection, while a working carbon monoxide detector provides a warning—not permission to ignore a venting problem.
Job
DIY line
Call a pro or check permits when
Ash removal
Scoop fully cooled ash into a covered metal container stored outdoors.
Ash is hot, the container is damaged, or disposal rules are unclear.
Chimney care
Look for visible damage and keep the inspection date recorded.
The chimney needs sweeping, a liner is damaged or missing, or draft is poor.
Appliance change
Read the stove manual and preserve its listed clearances.
The stove, flue, hearth, framing, or vent route will change.
Local code and the appliance listing control the final decision.
Old Stove, Smoky Stove
EPA-certified wood stoves generally burn cleaner and produce more heat with less wood than older models. Replacement can make sense when an old appliance smokes even with dry fuel, has damaged parts, or wastes wood; compare the certified model’s installation requirements before buying.
Outdoor fire pit clearance has no single nationwide number: follow local fire code and the fire pit or appliance manual, using the stricter requirement. Keep the pit away from buildings, vegetation, fences, and overhangs as those rules require; sparks and smoke make guessing a poor design method.
To burn wood efficiently, check the fuel before you light the stove, then confirm the appliance and chimney are ready. Wet wood means seasoning or buying dry fuel; an old smoky stove means a replacement conversation; an overdue chimney means inspection before the next fire.
Before The First Cold Snap
Split a sample log, test the fresh face with a wood moisture meter, and separate fuel below 20% moisture from wood that needs more seasoning.
Sort out clean, seasoned hardwood for the main fire; set aside wet, painted, glued, pressure-treated, or questionable pieces instead of burning them.
Remove cooled ash into a covered metal container stored outdoors, and check that the wood stove door and its gasket close properly.
Check the chimney inspection and cleaning schedule. If it is overdue, arrange professional service before using the stove.
Install, test, and date the carbon monoxide detectors near the sleeping area and near the stove as their instructions require.
Follow this order: test wood moisture, sort the fuel, clean the cooled ash, check the chimney schedule, then set and test the carbon monoxide alarms.
Questions People Ask
What Is the Optimal Moisture Content for Burning Wood Efficiently?
Keep firewood below 20% moisture content before loading it into the stove. Check a freshly split face, not the bark, and test several pieces from different parts of the stack because the outside can dry faster than the center.
How Long Should Oak and Maple Be Seasoned Before Burning?
Oak usually needs longer firewood seasoning than maple because its dense wood dries slowly. The calendar is only a rough guide: split, stack and cover the wood properly, then burn it only after a moisture meter shows below 20%.
Can I Burn Pine in a Wood Stove?
Use dry pine as kindling, but don’t rely on it as the main indoor fuel. Small pine pieces can help start a hot fire; seasoned hardwood is the better main load for steady heat and lower creosote production.
How Often Should a Chimney Be Professionally Cleaned?
Arrange a professional chimney inspection at least once a year, with cleaning whenever the inspection finds creosote or other deposits. Heavy use, smoky fires and wet wood can require cleaning sooner, so don’t wait for the yearly date if the flue has a visible buildup or the draft worsens.
Where Should Carbon Monoxide Detectors Go in a House With a Wood Stove?
Place carbon monoxide detectors outside sleeping areas, on each level of the home, and near the wood stove as the detector instructions direct. Keep an alarm close enough to detect a problem but away from locations that could cause nuisance readings, such as directly beside the stove or in a very dusty area.
Can Manufactured Fire Logs Be Used in a Wood Stove?
Only use a manufactured fire log if the log packaging and your stove manual specifically approve that combination. Many wax-and-sawdust logs are made for open hearths, and using one in a wood stove can damage the appliance or create unsafe burning conditions.
Before you go · a welcome giftGet the Winter Heating Bill Cutter for $4.99See what every heater in your home really costs, heat the rooms you use, and cut the waste in 30 days. Normally $14.99; your welcome price saves $10.00. We'll email your link right now.or buy it now for $9.99 without the gift →One email with your link now. We never share your address.


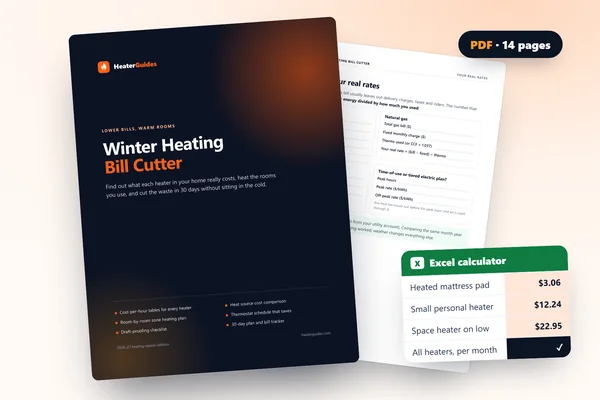 Winter Heating Bill CutterSee what every heater in your home really costs, heat the rooms you use, and cut the waste in 30 days.Cost-per-hour tables for every heaterThermostat schedule and draft-proofing planRunning-cost and bill calculator (Excel)