

Your HVAC system works hardest when it’s dirty. A thin layer of dust on evaporator coils can cut cooling capacity by up to 30%, according to studies from the U.S. Department of Energy. That means your system runs longer, uses more electricity, and wears out faster. Most homeowners don’t realize that simple cleaning tasks—things you can do in an afternoon—can shave 10–15% off your cooling costs.
This guide walks through the exact cleaning steps that matter, how to do them safely, and how to measure the results. You’ll learn what to clean, when to clean it, and when to call a professional. No vague advice—just numbers, steps, and real-world trade-offs.

Knugoua
Air Conditioner Fin Cleaning Kit, HVAC Coil…
- Comprehensive Air Conditioner Cleaning Kit: This complete air conditioner fin cleaner set includes 1 Window Blind Cleaner Duster B…
- Multi-Purpose Cleaning Brushes Set: The dual-sided condenser evaporator coil cleaner brush effectively removes tough debris and di…
- Durable Condenser Fin Brush: The brush condenser ac coil cleaner is firm and smooth, effectively removing all dirt while ensuring…
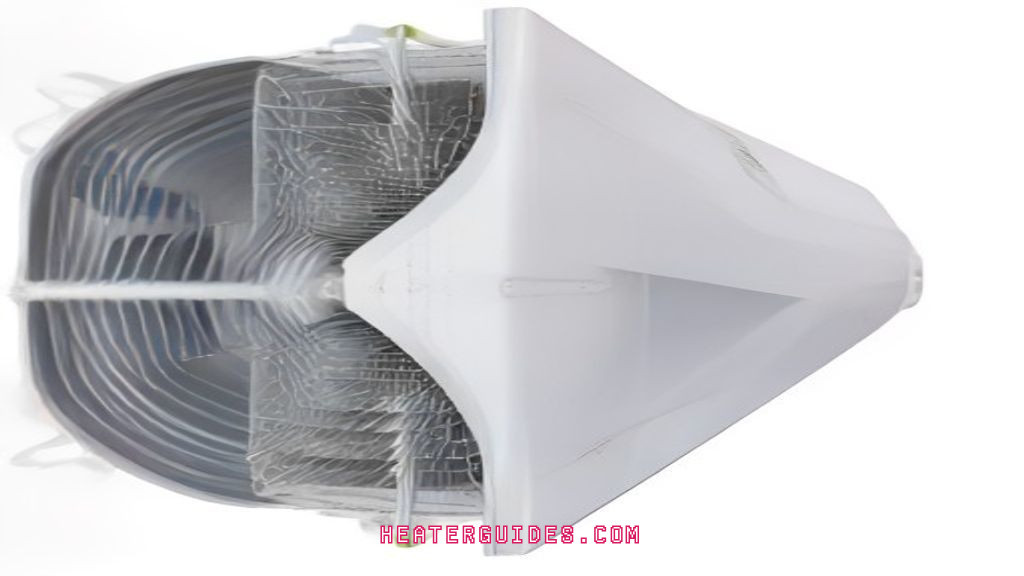
If you’re ready to get your hands dirty, a good air conditioner fin cleaning kit makes the job easier. The Knugoua set includes fin combs, brushes for tight spaces, and a duster for condenser fins—everything needed to clean coils without damaging them.
Why DIY Cleaning Matters for Your Energy Bill

Your HVAC system moves heat from inside your home to outside. Anything that blocks airflow or heat transfer forces the system to work harder. A dirty filter alone can increase energy consumption by 5–15%. Dirty condenser coils can push that number higher.
Here’s the math: If your monthly cooling bill is $150, a 15% efficiency loss costs you about $22 per month. Over a four-month cooling season, that’s $90 wasted. Cleaning costs almost nothing—just your time and a few basic tools.
The Environmental Protection Agency estimates that regular maintenance, including cleaning, can reduce HVAC energy consumption by up to 15%. That’s not a small number. It’s the difference between an efficient system and one that’s slowly choking on dust.
The Seasonal HVAC Cleaning Checklist
Your HVAC system has two main seasons: cooling and heating. Each season requires specific tasks to keep efficiency high. Here’s a checklist you can follow twice a year.
Spring: Pre-Cooling Season Tasks
- Replace or clean the air filter. If it’s disposable, swap it. If it’s reusable, wash it with water and let it dry completely.
- Inspect the outdoor condenser unit. Remove leaves, grass clippings, and debris from the fins. Use a fin comb to straighten any bent fins.
- Clean the condenser coils. Spray them with a coil cleaner or a gentle water rinse. Avoid high-pressure washers—they can bend fins and force debris deeper.
- Check the condensate drain line. Pour a cup of white vinegar down the line to kill algae and prevent clogs.
- Clear at least two feet of space around the outdoor unit. Shrubs, fences, or stored items restrict airflow.
- Test the system’s temperature drop (see the section below). If it’s outside the normal range, something needs attention.
Fall: Pre-Heating Season Tasks
- Repeat the filter check. A clean filter is just as important for heating as it is for cooling.
- Clean the indoor blower wheel. Dust builds up on the blades, reducing airflow. Access it through the blower compartment and brush it gently.
- Inspect the heat exchanger if you have a furnace. Look for cracks or rust—if you see any, call a professional immediately.
- Clear the condensate drain again. Algae can grow year-round, especially in humid climates.
- Check the thermostat batteries and settings. A programmable thermostat can save 10% on heating costs if set correctly.
This checklist covers the basics. For a deeper dive into specific parts, see our cleaning tips for HVAC parts guide.
How to Clean Your Air Filter (and Why It’s Non-Negotiable)
Your air filter is the first line of defense. It keeps dust, pollen, and pet dander out of the system. But when it gets clogged, it restricts airflow. Reduced airflow means less heat transfer, which means the system runs longer and uses more energy.
Here’s what to do:
- Turn off the HVAC system at the thermostat and the breaker.
- Locate the filter slot—usually in the return air duct or the blower compartment.
- Remove the filter and check it. Hold it up to a light. If you can’t see light through it, it’s dirty.
- If it’s disposable, replace it with a new one. Choose a filter with a MERV rating between 8 and 13. Higher MERV filters trap more particles but also restrict airflow more.
- If it’s reusable, rinse it with water and let it dry completely before reinstalling.
- Write the date on the filter frame so you know when it was last changed.
How often should you change it? For a standard 1-inch filter, every 1–3 months. If you have pets or allergies, change it monthly. If you live in a dusty area, check it every month.
Some people think a higher MERV filter is always better. That’s not true. A MERV 16 filter on a standard blower motor can reduce airflow by 20% or more. Stick with MERV 8–13 for most homes.
Deep Cleaning the Outdoor Condenser Unit
The condenser unit sits outside, exposed to everything. Leaves, grass, pollen, and dirt accumulate on the coils and fins. This layer acts as insulation, trapping heat inside the coils. The system can’t release heat effectively, so it runs longer and uses more electricity.
Here’s how to clean it properly:
- Turn off the power to the unit. There’s a disconnect switch near the unit—pull it out or flip the breaker.
- Remove the fan cage or top grille. Most units have screws or clips holding it in place.
- Gently vacuum the fins with a soft brush attachment. Work from top to bottom. Don’t use a high-pressure washer—it will bend the fins.
- If the fins are dirty, spray them with a commercial coil cleaner. Follow the instructions on the label. Let it sit for 5–10 minutes, then rinse with a gentle stream of water.
- Use a fin comb to straighten any bent fins. Bent fins restrict airflow and reduce heat transfer.
- Check the fan blade for damage and clean it with a damp cloth.
- Reassemble the unit and restore power.
How often should you do this? At least once a year, ideally in the spring before heavy use. If you live near a busy road or in a dusty area, do it twice a year.
One thing to watch: the fins are fragile. They’re made of thin aluminum and bend easily. A fin comb is essential for straightening them without causing damage. If you don’t have one, a butter knife can work in a pinch, but it’s not ideal.
Safely Rinsing Coils and Fins
When rinsing, use a garden hose with a spray nozzle set to a gentle stream. Hold the nozzle at a 45-degree angle and spray from the inside out. This pushes debris out rather than deeper into the coil.
If you use a coil cleaner, wear gloves and safety glasses. These cleaners contain alkaline chemicals that can irritate skin and eyes. Rinse thoroughly to remove all residue—leftover cleaner can corrode the coils over time.
Never use a pressure washer. The high pressure will flatten the fins and damage the coil. A few minutes with a hose and a soft brush will do the job.
Clearing the Condensate Drain Line
The condensate drain line removes moisture from the air during cooling. When it clogs, water backs up into the system. This can cause humidity issues, water damage, and even system shutdown.
Here’s how to clear it:
- Locate the drain line—a PVC pipe near the indoor unit. It usually has a T-shaped access point.
- Turn off the system.
- Remove the cap from the T-access point.
- Pour a cup of white vinegar down the line. Let it sit for 30 minutes.
- Flush with water from a hose or a wet/dry vacuum. If you use a vacuum, seal the hose around the drain opening with a rag.
- Check the outdoor end of the line for water flow. If water comes out, the line is clear.
Do this every 1–3 months during the cooling season. In humid climates, algae grows faster, so check more often.
Some people use bleach instead of vinegar. Bleach works but can damage PVC over time. Vinegar is safer and just as effective.
DIY vs. Professional Tune-Ups: What’s the Real Cost?
DIY cleaning saves money on labor, but it’s not free. You’ll spend time and buy tools. Professional tune-ups cost $100–$200 per visit, but they include inspections and adjustments you can’t do yourself.
Here’s a breakdown:
| Task | DIY Cost | Pro Cost | DIY Difficulty | DIY Time |
|---|---|---|---|---|
| Air filter replacement | $5–$20 per filter | Included in tune-up | Easy | 5 minutes |
| Condenser coil cleaning | $15–$30 for cleaner | Included in tune-up | Moderate | 1–2 hours |
| Condensate drain clearing | $3 for vinegar | Included in tune-up | Easy | 30 minutes |
| Blower wheel cleaning | $10 for brush | Included in tune-up | Moderate | 1 hour |
| Full system inspection | N/A | $100–$200 | N/A | N/A |
If you’re comfortable with basic tools and follow safety procedures, you can handle most cleaning tasks. But have a professional inspect the system every 2–3 years. They’ll check refrigerant levels, electrical connections, and the heat exchanger—things you can’t see or fix safely.
For a deeper comparison, read our DIY vs professional cleaning analysis.
Measuring Your Success: The Temperature Drop Test
How do you know your cleaning actually worked? The temperature drop test. This measures the difference between the air entering the evaporator coil and the air leaving it. A healthy system shows a drop of 15–20°F.
Here’s how to do it:
- Turn on the AC and let it run for 15 minutes.
- Find the return air duct (where air goes in) and the supply vent (where air comes out).
- Use a thermometer to measure the temperature at both points. A digital thermometer with a probe works best.
- Subtract the supply temperature from the return temperature.
If the difference is less than 15°F, your system isn’t cooling efficiently. Possible causes: dirty coils, low refrigerant, or a failing compressor. If the difference is more than 20°F, the airflow may be too low—check the filter and blower.
Run this test before and after cleaning. You’ll see a measurable improvement. For example, a dirty system might show a 10°F drop. After cleaning, it should jump to 15–18°F. That’s your proof the cleaning made a difference.
If you want to track efficiency over time, keep a log of your temperature drop readings. It helps identify when something is going wrong before it becomes a major repair.
When to Call a Pro (Signs You’ve Hit Your DIY Limit)
DIY cleaning has limits. Some problems require specialized tools and training. Here’s when to stop and call a professional:
- Refrigerant issues: If the temperature drop test shows a low drop and cleaning didn’t help, you may have a refrigerant leak. Handling refrigerant requires EPA certification.
- Electrical problems: If you smell burning, see sparks, or the breaker trips repeatedly, don’t touch it. Call an electrician or HVAC tech.
- Compressor failure: If the system runs but doesn’t cool, and the condenser fan spins, the compressor may be dead. This is a major repair.
- Mold or mildew: If you see mold on the coils or in the ducts, it’s a health hazard. Professional cleaning may be needed.
- Unusual noises: Grinding, squealing, or rattling sounds indicate mechanical problems. Don’t ignore them.
Professional tune-ups also include combustion safety checks for gas furnaces. Carbon monoxide leaks are silent and deadly. If you have a gas furnace, have it inspected annually.
DIY cleaning is great for routine maintenance, but it’s not a substitute for professional expertise. Know your limits.
Final Thoughts: What to Do This Weekend
You don’t need to be an HVAC technician to make a difference. Start with these steps:
- Replace or clean your air filter today. Check it monthly.
- Clear the area around your outdoor condenser. Remove any debris.
- Clean the condenser coils and straighten bent fins with a fin comb.
- Pour vinegar down the condensate drain to prevent clogs.
- Run the temperature drop test to establish a baseline.
- Schedule a professional inspection every 2–3 years.
These tasks take a few hours and cost almost nothing. They’ll keep your system running efficiently, lower your energy bills, and extend the life of your equipment. Start with the filter—it’s the easiest win. Then move to the condenser. Your energy bill will thank you.
For more detailed guidance, check our effective HVAC cleaning tips and energy efficiency inspection guide.

HeaterGuides covers home heating, water heating and HVAC: how the equipment works, what it costs to run, and how to use it safely.
