Modernizing old central heating radiators involves cleaning, painting, adding covers, and upgrading valves. The job usually takes a few hours to a day and can be a DIY project if you follow safety steps carefully.
Many people think upgrading old radiators means costly replacements, but that’s only half true. While new radiators offer fresh looks and tech, you can modernize existing units effectively with simple fixes. This guide breaks down practical steps to improve appearance, efficiency, and control without swapping out your whole system.
How To Modernize Old Central Heating Radiators
To modernize old central heating radiators without replacing them, clean the metal, repair surface rust, apply radiator-safe paint, add a properly ventilated cover, bleed trapped air, and upgrade usable valves to thermostatic or smart controls. Energy-efficient central heating radiators still depend on clear airflow, the right water flow, and room-by-room control, so a sound old radiator can often do the job without becoming a scrap-metal project.
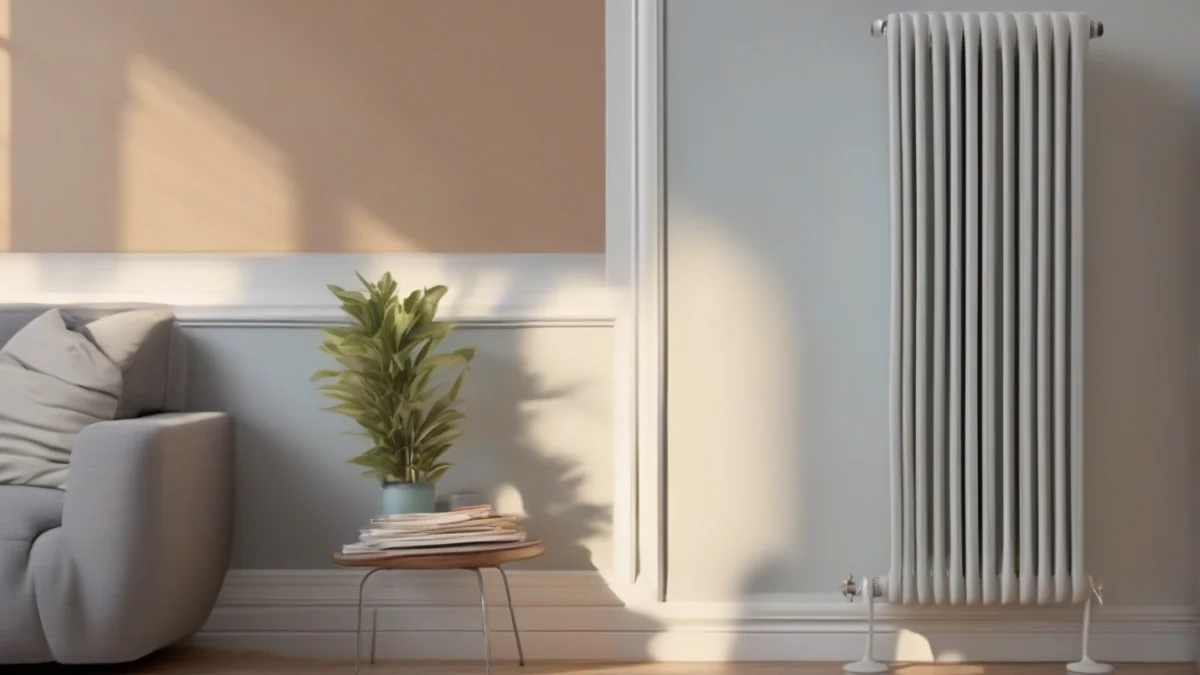
This upgraded radiator demonstrates effective modernization techniques.
Full replacement usually isn’t necessary when the radiator heats evenly, has no active corrosion or leaks, and is large enough for the room. A new radiator may improve appearance or heat output, but paint, airflow and valve control can solve the problems you actually have; if the panel stays cold after basic checks or leaks at a seam, replacement belongs in a separate decision.
Gather Before You Start
Radiator-safe metal paint, compatible primer for any bare or rusty metal, small brushes and a short-nap roller
Vacuum cleaner, soft brush, degreaser, cloths, scraper and fine abrasive paper
Radiator key or bleed key, adjustable wrenches, a bowl and towels
Replacement valve caps or thermostatic radiator valve heads that match the existing valve
Smart thermostatic valve kit, if you want app-based or scheduled room control
Tape measure, screwdriver, gloves, eye protection and the valve manufacturer’s instructions
Let The System Cool
Turn the heating off and wait until the radiator and nearby pipework are cool before cleaning, painting, bleeding or touching a valve. Hot water can scald you, and loosening a valve on a pressurized system can release water quickly. Put towels and a bowl below any fitting, never force a stuck valve, and don’t remove a valve body unless you know how the system is isolated and drained.
1
Inspect The Radiator
Check both ends, the bottom seam, brackets and pipe connections for dampness, green or white deposits, bubbling paint and active rust. Press gently around damaged paint with a scraper; soft metal, a pinhole or a weeping joint is a repair problem, not a painting job. Confirm the radiator is firmly supported and that furniture or curtains aren’t blocking its front or top.
2
Clean The Surface
Switch off the heating, let the radiator cool, then vacuum dust from between the fins and behind the panel. Wipe the outside with a mild degreaser and a damp cloth, removing soot, grease and loose flakes; dry it fully. Lightly sand sound glossy paint so the new coating can grip, and remove loose rust without grinding deeply into the metal. A dedicated guide can walk you through cleaning and maintaining a central heating radiator before you paint.
3
Prime And Paint
Mask the wall, floor, valve bodies, bleed screw and pipe connections. Spot-prime bare steel or rust with a primer approved for radiators, then apply thin coats of radiator paint according to its label, keeping the bleed opening and moving valve parts clear. Thin coats dry more evenly than one heavy coat, which can trap moisture and leave runs. Don’t turn the heating back on until the paint label’s drying time has passed and the room is ventilated.
4
Bleed The Radiator
With the system cool, use the bleed key to release trapped air slowly, stopping when water appears; keep a cloth under the bleed screw and close it without overtightening. Check the boiler pressure afterward if your system has a pressure gauge, because releasing air or adding water can change the reading. Bleeding is a small job, but the exact sequence matters; follow how to bleed a central heating radiator if you’re unsure.
5
Fit A Radiator Cover
Choose a cover that leaves the radiator’s front, top and sides ventilated and follows the radiator and cover manufacturer’s clearances. Secure it so it can’t tip, and keep curtains, furniture and electrical cables away from the warm air path. A solid box or tightly fitted decorative panel can slow convection and make the boiler run longer, so appearance shouldn’t win an argument with airflow.
6
Upgrade The Valve Control
A thermostatic radiator valve, or TRV, adjusts water flow as the room reaches its set temperature; a smart TRV adds schedules and app or room-by-room control. First photograph the existing valve, note the connection and check the smart valve’s compatibility list. Many smart kits replace only the thermostatic head and don’t require draining the system, while replacing a complete manual valve body usually requires isolation and draining. If the instructions call for draining, pipework changes or force on a seized fitting, stop and use a qualified heating professional.
7
Test One Change At A Time
Restore power to the heating controls, open the valve, and watch the radiator warm across its surface. Check every joint for drips after the system reaches normal operating temperature, then test the valve’s manual setting, schedule and fail-safe behavior. Keep the old valve parts and instructions until the new control has worked through a heating cycle.
Myth
A new coat of paint makes an old radiator energy efficient.
Fact
Paint mainly changes the finish and protects the surface; it doesn’t correct trapped air, sludge, poor sizing or a valve that won’t open. Efficient central heating comes from letting heat leave the radiator, matching heat output to the room, and controlling water flow. Heavy paint on the fins can reduce airflow, so remove loose layers rather than repeatedly painting over them.
When A Cover Helps
A cover can hide chipped paint and make a radiator safer around children, but it won’t increase heat output. Measure the radiator and the available wall space first, and leave the airflow and clearance required by the cover instructions. If you need to compare output before spending on a replacement, use a room-sizing calculation rather than choosing by appearance alone.
Common Mistakes That Cause Radiator Damage or Leaks
Most radiator leaks start with force, blocked service points, or corrosion hidden under fresh paint, so inspect first and tighten fittings only as much as the manufacturer specifies. A cosmetic upgrade can quickly become a plumbing repair if the valve body or threaded connection gets damaged.
A new radiator connects across the existing flow and return pipes, so the radiators operate in parallel rather than one after another. Adding one may require new pipe runs, a radiator valve and lockshield, system balancing, and a check that the central-heating pump can move the added water. Don’t install a second pump in parallel as a shortcut; pump sizing, check valves, controls and hydraulic separation need to be designed together.
For the basic sequence and connection details, use how to add a radiator to your central heating system. Gas central-heating problems are a separate safety issue: a boiler that smells of gas, repeatedly loses its flame, produces soot, or trips its safety control should be switched off and assessed by a qualified gas professional rather than repaired during radiator modernization.
Inspect Before You Paint
Look for green, white, orange or dark corrosion around valve threads, joints, drain points and the bottom edge.
Check for dampness, staining, flaking metal or a pinhole leak; dry metal can hide a slow seep.
Confirm the bleed valve is accessible and its square or screw head isn’t seized.
Make sure the valve spindle and control knob can move freely before applying paint or fitting a cover.
Never paint over a moving valve spindle, thermostatic sensor, lockshield adjustment, or the bleed valve itself. Paint can glue the moving parts in place and leave you unable to isolate, balance or vent the radiator. Covers must also leave the bleed valve and both valves reachable.
Use A Light Touch
Overtightening a valve fitting can split a compression olive, distort a washer, crack an old valve body, or damage the radiator thread. Hold the valve body with one wrench while turning the nut with another, and stop when the joint is secure; more muscle isn’t a leak test.
After Any Plumbing Change
Turn the heating on gradually and inspect every joint while the system warms, then check again after it cools. A joint that stays dry during the first few minutes can still seep as metal expands and contracts.
When To Get A Permit Or Hire A Licensed Professional
Call a licensed plumber or HVAC technician for gas, boiler, structural or concealed-pipe work, and check your local building department before modifying the heating circuit. Rules differ by state, city and sometimes utility, so valve replacement or plumbing modifications may require a permit even when the job looks smaller than the old radiator.
Central heating radiator replacement costs depend on the radiator’s size and type, pipe alterations, access, disposal and local labor rates; a like-for-like swap is usually simpler than relocating a radiator or adding a new branch. See central heating radiator replacement costs explained for the cost factors to collect before requesting quotes.
Job
DIY boundary
Professional or permit check
Cleaning, light surface preparation and radiator-safe painting
Usually suitable if the system is cool and the metal is sound
Stop if corrosion has weakened the panel or section.
Replacing a manual valve or altering radiator pipework
May be allowed as minor plumbing work in some locations
Check local permit rules; hire a licensed plumber if draining, cutting or rerouting pipes.
Replacing, relocating or adding a radiator
Requires planning for flow, return piping, supports and system balancing
Ask the local authority about permits and have the installation checked where required.
Boiler, gas line, flue, electrical supply or heating controls
Don’t DIY gas or mains-voltage work
Use the appropriately licensed gas professional, electrician or HVAC technician.
Local code controls the final answer, especially for gas appliances and concealed plumbing.
Gas central-heating problems need prompt professional attention because a faulty burner, flue or connection can create fire or carbon-monoxide danger. Leave the boiler off if you smell gas, see soot, hear abnormal combustion, or a carbon-monoxide alarm sounds; follow your local emergency-gas procedure and don’t relight it.
Safety Standards
Radiator supports, valve materials, pipe joints, working clearances and pressure controls must suit the equipment and local code. Read central heating radiator safety standards before covering, relocating or replacing a radiator, and never remove or defeat a boiler safety control.
From HeaterGuides · our own guideHeating System Upgrade PlannerChoose between a heat pump, a furnace, a boiler or a hybrid with your own numbers, and hire the right installer.Every system compared side by side25 questions for contractors, red flagsRunning-cost, payback and quote calculator (Excel)$14.99$9.99Get it for $9.99See what's inside and watch the 2-minute video →16-page printable PDF + Excel calculator · instant download · 30-day refund
How To Improve Radiator Efficiency With Bleeding And Cleaning
To improve a central heating radiator, bleed trapped air first, then remove dust from the fins and surfaces; a radiator that’s cold at the top usually has air, while one that’s cold across its whole face may have a closed valve or poor water flow. Central heating water leaves the boiler through the flow pipe, enters the radiator, travels through its channels, and returns cooler through the return pipe. Air trapped at the top takes up space that hot water should occupy, so that section stays cold and circulation falls.
Proper bleeding can enhance radiator efficiency significantly.
Start with the simple diagnosis: a cold top and warm bottom points to air; a warm top and cold bottom can indicate sludge or restricted flow; a completely cold radiator needs its manual or thermostatic valve checked before bleeding. For a fuller fault sequence, use this guide to how to fix cold radiators.
1
Turn the heating off
Switch off the boiler and circulation pump, then wait until the radiator is cool. Hot water can scald when the bleed screw opens. Turn the radiator valve fully open, but don’t adjust the lockshield valve on the opposite side.
2
Open the bleed valve
Put a cloth and small container under the bleed valve at the radiator’s top edge. Fit the bleed key, turn it slowly anticlockwise about a quarter turn, and listen for a hiss. Air is escaping. Stop turning if the valve feels unusually tight.
3
Close and check pressure
When a steady trickle of water appears, turn the key clockwise until snug; don’t force it. Wipe the valve dry, restart the heating, and check the boiler pressure if your system is sealed. Repressurize only as the boiler manual directs, then check the bleed valve and pipe connections for drips.
Bleed one radiator at a time
If several radiators are cold at the top, bleed the highest or coolest one first and check the system pressure afterward. A detailed walk-through is available in this guide to how to bleed a central heating radiator.
Cleaning improves heat transfer by restoring the air movement that carries warmth from the metal into the room. Turn the system off, vacuum the top grille, front panel, sides, and the narrow fins behind the panel with a soft brush attachment; follow with a barely damp cloth, and straighten bent fins gently rather than crushing them.
Worked example
Say a radiator has a dusty fin section and a cold top caused by air. Bleeding may restore roughly 5% to 15% of its useful heat in that situation, while cleaning may add about 2% to 10% where dust is heavy. Those figures are estimates, not a promise: radiator size, water temperature, sludge, room draughts, and boiler flow all matter.
Stop for dirty water or a leak
Dark sludge, persistent cold spots after bleeding, falling boiler pressure, or water at a valve points to a system fault rather than a cleaning job. Don’t keep opening fittings; arrange a heating professional to diagnose flushing, circulation, or corrosion problems.
Choosing And Installing Smart Thermostatic Radiator Valves (TRVs)
Smart thermostatic radiator valves give you room-by-room temperature control, but they don’t make the radiator itself produce more heat. For the most efficient radiators in central heating, focus first on correct sizing, clean water circulation and good controls; a smart TRV then stops a spare bedroom or sunny room from being heated unnecessarily.
What Smart TRVs Can And Can’t Do
A smart TRV measures the air around the radiator and opens or closes the valve to hold your chosen temperature. App schedules, open-window detection and remote adjustments can reduce wasted heating when rooms are empty, although savings depend on your boiler, insulation, habits and how many rooms you control.
Set expectations
There isn’t a reliable single savings percentage for every home. A useful test is to compare similar cold-weather periods before and after installation, while keeping hot-water use and thermostat settings roughly the same.
A TRV won’t repair a cold radiator, balance an uneven system or replace the main wall thermostat. If the room thermostat is in the same room, the two controls can work against each other unless their schedules and temperature settings agree.
Check Compatibility Before Ordering
Look at the existing valve on the side of the radiator: a smart head can replace a thermostatic head only when its valve body and connection match, while a manual handwheel valve usually needs a new thermostatic valve body. Adapters are model-specific, so check the manufacturer’s compatibility list rather than assuming an old valve uses a standard fitting.
Before you buy
Confirm the system uses hot-water radiators, not steam radiators.
Photograph the existing valve and note its brand, connection and orientation.
Check whether the kit needs a hub, bridge or separate boiler relay.
Check the app, wireless range and battery type for your home.
Plan around the room containing the main wall thermostat.
Install The Smart Valve Head
1
Cool the system
Turn heating off and let the radiator cool. Put a towel beneath the valve, and don’t loosen a water connection just to remove the electronic head.
2
Remove the old head
Set the existing TRV to its highest position if the instructions call for it, then release its retaining ring or clip. Keep the small parts in case you need to refit the original control.
3
Fit and calibrate
Attach the smart head without forcing the threads, insert the batteries and run the valve’s calibration routine in the app. The actuator must be able to press the valve pin freely.
4
Test one room
Raise and lower the setpoint, listen for the valve motor and check that the radiator responds. Watch the connection and nearby pipework for leaks before fitting the final cover.
If the radiator has only a manual valve, changing the valve body can require draining part of the heating circuit and resealing pipe connections. That is the point to use a qualified heating professional unless you already know the system and local rules.
Battery life and wireless range vary by model, room temperature and signal path. Keep spare batteries available, avoid hiding the valve behind a thick cover, and choose a hub-based system if the valve cannot reliably reach your home network.
Questions People Ask
Will a radiator cover reduce heating efficiency?
It can, especially if the cover blocks the top grille, front opening, or air movement around the radiator. Choose a ventilated cover with enough clearance for the valves, and expect less heat if the design traps warm air behind solid panels.
Can I paint a radiator that already has rust or old paint?
Yes, if the rust is limited to the surface and the old coating is sound. Let the radiator cool, remove loose rust and flaking paint, clean off dust and grease, then use a primer and paint rated for radiators; active leaks or deep corrosion call for repair or replacement first.
Do I need to drain the whole heating system to replace a valve?
Not always: a valve can sometimes be isolated and replaced with only part of the circuit drained. The exact method depends on the valve, pipe layout, and whether the system is open-vented or sealed, so a plumber should handle the job if you can’t isolate the radiator without disturbing boiler pressure.
How do I measure my radiator to buy a cover?
Measure the radiator’s full width, height, and depth, including the valve positions and any pipework that the cover must clear. Add the clearance required by the cover manufacturer rather than ordering from the radiator’s nominal size alone; a tight box can restrict airflow and make the valves awkward to reach.
How long do radiators typically last before replacement?
A well-maintained radiator can remain in service for several decades, so age alone doesn’t set a replacement date. Persistent leaks, deep rust, blocked waterways, repeated cold sections after bleeding, or damage around the mounting points are stronger reasons to replace it.
Before you go · a welcome giftGet the Heating System Upgrade Planner for $4.99Choose between a heat pump, a furnace, a boiler or a hybrid with your own numbers, and hire the right installer. Normally $14.99; your welcome price saves $10.00. We'll email your link right now.One email with your link now. We never share your address.

 Heating System Upgrade PlannerChoose between a heat pump, a furnace, a boiler or a hybrid with your own numbers, and hire the right installer.Every system compared side by side25 questions for contractors, red flagsRunning-cost, payback and quote calculator (Excel)