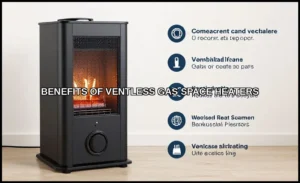
Connecting a gas heater involves safely attaching the gas line, ensuring proper venting, and testing for leaks. This job typically takes 2 to 4 hours and requires caution; some parts are DIY-friendly, but permits and pros may be needed depending on local rules.
Connecting a gas heater is more than just hooking up a pipe. It means following safety steps to prevent leaks, ensuring the heater vents properly, and confirming everything works before you turn it on.
Many believe connecting a gas heater is a simple DIY task, but the truth is it depends on your skills and local codes. You can do some parts yourself, but others require a licensed pro and permits.
What to remember
Always shut off the gas and power before starting any connection work.
Use the right tools and flexible gas lines rated for your heater type.
Proper venting or combustion air is mandatory to avoid dangerous gas buildup.
Test all connections with a gas leak detector or soapy water before use.
Check local codes for permits; some installations must be done or inspected by licensed pros.
How to Connect a Gas Heater Step by Step
Connecting a gas heater is about safely attaching the gas line with the right fittings, securing a shutoff valve nearby, ensuring proper venting or combustion air, and then testing for leaks before lighting the pilot or restoring power. Start by shutting off both the gas supply and the electrical power to avoid hazards.
Ensure proper attachment of the gas line and shutoff valve.
1
Shut off gas and power
Locate and turn off the main gas valve feeding the heater’s line. Then switch off the breaker supplying electricity to the heater. This prevents leaks and electric shock during installation.
2
Use correct fittings and flexible gas hose
Select fittings rated for gas use—black iron pipe fittings or flexible gas hoses marked for your fuel type, natural gas or propane. Flexible hoses help absorb movement and simplify connection.
3
Connect gas line securely with sealant
Apply gas-rated pipe thread sealant or tape to male threads before assembly. Tighten connections firmly by hand, then use a wrench to snug them up without over-tightening, which can crack fittings.
4
Install shutoff valve near heater
Mount a dedicated gas shutoff valve as close as possible to the heater. This lets you quickly cut gas if needed for maintenance or emergencies.
5
Attach venting or ensure combustion air
Install vent pipes per the heater’s instructions, using proper materials and clearances. For unvented heaters, confirm adequate combustion air supply through vents or openings to the outdoors.
6
Test for leaks with soapy water or detector
Brush a soapy water solution onto all gas connections. Look for bubbles indicating leaks. Alternatively, use a handheld gas detector. Never use an open flame to check for leaks.
7
Restore gas and power and light pilot if present
Slowly reopen the gas valve and switch on the electrical breaker. Follow the manufacturer’s instructions for lighting the pilot light or igniting the heater’s burner safely.
Flexible hose connection
12 Feet 1/2 Inch ID Natural Gas Hose with Quick Disconnect for weber,…
A CSA-certified flexible gas hose like product 1 simplifies connecting your heater’s gas line safely and securely.
Never skip shutting off gas and power before working. Gas leaks or electric shocks are serious risks that installers must avoid at all costs.
Use the right sealant
Only use pipe thread sealant or tape specifically rated for gas lines. Standard plumbing sealants aren’t safe for fuel gas.
How to Choose and Install Proper Venting for Gas Heaters
Venting is non-negotiable for most gas heaters; it directs combustion gases safely outside and supplies fresh air for burning fuel efficiently.
Proper venting is essential for safe gas heater operation.
You cannot install a gas heater indoors without a vent unless it’s explicitly designed as vent-free and allowed by local code, which is rare and often restricted.
Gas wall heaters with a flue require a vent pipe that carries exhaust gases outdoors. The vent must be installed with a proper wall thimble—a metal sleeve that protects combustible materials where the vent passes through a wall—and a vent cap to keep out rain and debris.
There are three main venting types: natural draft, power vented, and direct vent. Natural draft relies on hot gases rising through a vertical flue. Power vented uses an electric fan to push exhaust through horizontal or longer vent runs, often into a side wall. Direct vent heaters pull fresh combustion air from outside and exhaust gases back outside through a sealed pipe, which is safer for indoor air quality.
Combustion air requirements are set by code to prevent backdrafting and carbon monoxide buildup. This usually means providing a dedicated air supply through vents or ductwork if the room is sealed or small.
1
Install vent pipe
Measure and cut vent pipe sections to fit between the heater’s flue collar and outside wall or roof vent.
2
Fit wall thimble
Insert a metal thimble through the wall hole to protect framing from heat and seal gaps with fire-resistant insulation.
3
Attach vent cap
Secure a vent cap on the outside end to prevent weather intrusion and animal entry.
Improper venting risks
Failing to vent correctly can cause carbon monoxide poisoning, inefficient burner operation, and soot buildup. Always follow manufacturer instructions and local codes.
Venting Essentials
Correct vent type for your heater model
Combustion air openings per code
Properly sized and sealed vent pipe
Wall thimble and vent cap installed
No obstructions in vent path
Common Mistakes That Cause Gas Leaks or Damage
Faulty connectors on portable gas heaters are often due to loose fittings or damaged hoses; always inspect and replace worn parts before connecting a new gas cylinder.
If your gas heater doesn’t work after connecting a new gas cylinder, check the shutoff valve is open, the regulator is compatible, and that connections are tight without leaks.
Over-tightening fittings or cross-threading is a top cause of leaks and damaged pipes. Tighten fittings by hand first, then use a wrench snugly—never force them.
Using the wrong type of pipe or sealant leads to leaks and unsafe conditions. Black iron pipe is standard for gas lines; flexible gas connectors must be approved for gas use. Avoid thread sealants not rated for gas lines—never use ordinary tape or pipe dope.
Skipping the shutoff valve is a common mistake that makes emergency gas shutoff impossible and violates code. Always install a manual shutoff valve near the heater.
Failing to test for leaks after installation is a safety hazard. Use a soapy water solution on all joints and watch for bubbles before turning the system on.
Ignoring vent blockage or combustion air needs can cause flame failure or carbon monoxide buildup, even if the gas line is perfect. Keep vents clear and ensure air supply meets code.
Gas leak danger
Never use a flame to check for leaks. Gas leaks can cause explosions or poisoning—stick to soap solution or an approved gas detector.
Avoid these mistakes
Don’t overtighten or cross-thread fittings
Use only approved gas pipes and sealants
Always install a shutoff valve at the heater
Test every joint with soap solution for leaks
Keep venting clear and combustion air adequate
When to Hire a Licensed Professional and Get Permits
Whether you need a permit or a licensed professional depends on your local building codes and the type of gas heater installation you’re doing. In most US jurisdictions, a permit and inspection are required for installing or altering natural gas lines inside a residence.
Permit Requirement
Natural gas connections almost always need a permit and inspection. Propane setups may have different rules but also often require permits.
Jobs that involve modifying existing gas lines, running new black iron pipe, or connecting a gas water heater to a natural gas supply almost always require a licensed plumber or gas fitter. These pros have training to ensure the connections comply with codes and avoid leaks that could cause fire or carbon monoxide hazards.
Safety and insurance are strong reasons to hire a pro. Improper installation can void insurance coverage if a fire or damage occurs. Licensed professionals carry liability insurance and are familiar with code-compliant materials, venting requirements, and safety devices like shutoff valves and pressure regulators.
Confirm Before You Start
Check your local building department’s rules for permits and inspections
Verify if your gas supplier has specific installation requirements
Confirm if your insurance requires licensed installation
Ask if the job involves new gas piping or venting upgrades
To find a licensed professional, start with your local building department or gas utility company; they often have a list of licensed plumbers and gas fitters. Verify the license status online or by phone before hiring. Don’t accept an unlicensed handyman for gas line work.
Natural gas connections in a house are common enough that most pros have experience with typical gas heaters and water heaters. Still, confirm they hold current licenses specifically for gas plumbing, not just general plumbing or HVAC.
What to Do Next After Connecting Your Gas Heater
1
Confirm the gas line connection is tight and secure
Before lighting the pilot, double-check that all fittings are hand-tightened plus a quarter turn with a wrench. Avoid overtightening black iron or flexible gas pipes, which can damage threads or cause leaks.
2
Test for gas leaks
Turn the gas valve on slowly and apply a mixture of water and dish soap to each joint. Look for bubbles indicating leaks. If you find any, shut off the gas and tighten fittings again.
3
Light the pilot safely
Locate the pilot assembly, usually behind a panel or near the burner. Turn the gas valve to “pilot” and press the knob to release gas. Hold a lit match or use the built-in igniter to light the pilot. Keep the knob pressed for 30 seconds after ignition to heat the thermocouple and keep the gas flowing.
4
Turn on the heater
Once the pilot stays lit, turn the gas valve to “on” and switch on the heater’s power if needed. Monitor for steady flame and no unusual smells.
5
Schedule an inspection if required
Check your local code or permit requirements. Some areas require a professional inspection within days of installation, especially for new or relocated gas water heaters or wall heaters.
6
Establish a maintenance routine
Inspect the heater annually for debris, corrosion, or loose parts. Clean the burner and pilot assembly to prevent clogging. Replace worn hoses and verify venting clearance to avoid carbon monoxide buildup.
7
Troubleshoot common issues
If the pilot won’t light or keep burning, check the thermocouple alignment and cleanliness. For weak flames, verify gas pressure and vent blockages. Consult a professional if problems persist.
Post-Installation Safety Checklist
Gas shutoff valve is accessible and labeled
No gas smell near the heater or connections
Pilot light stays lit after release of control knob
Venting is unobstructed and properly installed
Carbon monoxide alarm is installed nearby and functional
Electrical connections (if any) are grounded and safe
Lighting Pilot Reminder
Always keep your face and hands away from the burner area when lighting the pilot to avoid burns or gas exposure.
Gas Line Connection
Only connect the gas line to the heater after confirming the supply is off and you have the correct fittings. Use pipe thread sealant rated for gas, never household Teflon tape.
How to Connect a Gas Heater Step by Step
A gas heater should be connected by a licensed gas technician who matches the heater, gas supply, shutoff valve, regulator, fittings and venting to the installation manual and local code. The safe sequence is to confirm the heater is rated for your fuel, close the supply, install the listed connector and nearby shutoff, connect any required combustion-air and vent components, then leak-test every joint with leak-detection solution before lighting it.
A propane cylinder needs the correct regulator and hose for that heater; a natural-gas wall heater needs a correctly sized house gas connection and approved venting if the model requires it. Never use a patio, torpedo or construction heater indoors, and never route combustion gases into the room. Vent-free models still need the ventilation, oxygen-depletion protection and local-code approval specified by the manual. A 300,000 BTU natural-gas heater is a professional installation because the gas line, regulator, venting and combustion air must be sized for the load.
Stop if you smell gas
Do not light the heater or operate electrical switches. Leave the area, shut off the gas only if you can do so safely, and call the gas supplier or emergency service from outside.
How to Connect a Gas Line to a Tankless Water Heater
Connecting a tankless water heater means tying in the correctly sized gas line, shutoff, sediment trap, vent system, water lines, condensate drain where required and electrical supply according to the manufacturer’s manual. A licensed plumber or gas technician should do the gas, venting and combustion-air work; a 240-volt connection, if the model needs one, belongs to a licensed electrician.
A flexible connector may be allowed only when it is listed for that appliance, matches the fitting size and length limits, and is installed where local code permits; it cannot compensate for an undersized gas line. Five tankless units for a laundromat require a designed manifold, individual isolation valves, venting and gas capacity calculation, not five improvised tees. The heater’s flow rating and temperature rise determine hot-water output, while its BTU input determines the gas supply and venting requirements.
Questions People Ask
Can I install a gas heater indoors without venting?
Most gas heaters require proper venting or combustion air to operate safely and efficiently. Installing one indoors without venting risks dangerous buildup of carbon monoxide and incomplete combustion. Only vent-free models approved by local codes can be used without external venting, and even then, a working CO alarm is essential.
What tools are absolutely necessary for gas heater installation?
You’ll need a pipe wrench or adjustable wrench for fittings, a pipe thread sealant rated for gas, a shutoff valve, and a gas leak detector solution or soapy water for leak testing. A drill and mounting hardware may be required for wall brackets or venting installation. Avoid makeshift tools that can damage fittings or cause leaks.
How do I test for gas leaks after connecting the heater?
Turn on the gas supply slowly and apply a leak detection solution or soapy water to all joints and fittings. Look for bubbles forming, which indicate leaks. Never use an open flame. If you find leaks, tighten connections or replace faulty parts before lighting the heater.
Can I use a flexible gas line to connect my gas water heater?
Flexible gas lines are often allowed for connecting gas water heaters but must be approved for gas use and meet local code requirements. They simplify installation in tight spaces but should be inspected regularly for damage or wear. Use only black iron pipe or flexible lines rated for gas, never standard garden hoses or other tubing.
How long does a typical gas heater installation take?
On average, installing a gas heater takes between 2 to 4 hours, depending on complexity. Simple replacements with existing gas lines and venting can be quicker, while new installations requiring venting, permits, or electrical connections take longer. Planning and preparation reduce unexpected delays.
What should I do if my gas heater doesn’t light after connecting?
First, check that the gas valve is fully open and the pilot light or ignition system is clean and functional. Ensure the thermostat calls for heat and the power supply or batteries are working if applicable. If it still won’t light, inspect for clogged burner ports or faulty thermocouples, and consider consulting a licensed technician.
Can I connect a plug-in water heater to one sink?
Only if the water heater is specifically designed as a plug-in point-of-use unit and its manual permits that installation. Use the required grounded or GFCI-protected receptacle and circuit, never an extension cord or power strip, and have the plumbing and electrical work checked if the instructions call for fixed wiring.
How do I connect a Jinyu gas heater?
Use the exact Jinyu manual for your model because hose, regulator, fuel type and venting connections vary. A licensed gas technician should make the connection, leak-test it with approved solution and confirm the heater is approved for indoor use; don’t substitute a cylinder regulator or hose that merely fits.
Can I connect a 4-inch heater pipe into the room?
No. A flue pipe carries combustion gases outdoors; it must not discharge into a room or be used as a warm-air pipe unless the heater is specifically listed for that ducting. Follow the heater’s vent diameter, clearances and termination instructions, and have the installation inspected.
Why does a gas burner get no gas after connecting a cylinder?
Close the cylinder valve and check that the regulator is the correct type, the connector is fully seated and the hose is not kinked or damaged. Don’t loosen fittings while the cylinder is open or test with a flame; if the connection still supplies no gas, have the cylinder valve, regulator and appliance checked by the supplier or a qualified technician.
How do I connect baseboard heaters?
Baseboard heaters are usually electric or hydronic, so their connection is different from a gas heater. Electric baseboard wiring is fixed electrical work, while hydronic units connect to a boiler loop; follow the equipment manual and use a licensed electrician or plumber for the supply connections.
Why doesn’t my gas heater work after connecting a new cylinder?
Turn the cylinder valve off and check the regulator connection, hose condition and fuel type before trying again. If the heater still will not light, the regulator may not be resetting or the appliance may have air in the line; don’t bypass a safety valve, and have the supplier or a qualified technician inspect it.