You’ve got the rotten egg smell, or maybe your hot water just isn’t as hot as it used to be. You’ve done the research and know the fix is a new anode rod. Then you hit the first wall: getting the old one out. It’s a 1-1/16 inch hex head buried under insulation, and it hasn’t moved since the tank left the factory. You wrench on it, the whole water heater rocks, and nothing gives.
This isn’t a job for a basic socket set. Removing a Rheem anode rod requires the right combination of tools, technique, and patience to avoid rounding off the hex head or snapping the nipple off inside the tank. This guide covers the physical extraction process, from identifying the anode type to breaking loose a rod that’s been seized for years, without turning a 30-minute job into a full tank replacement.
You’ll walk away knowing exactly which tools to grab, how to use them safely on a gas or electric Rheem, and what to look for once the rod is out. This is the practical, hands-on stuff that separates a smooth swap from a disaster.
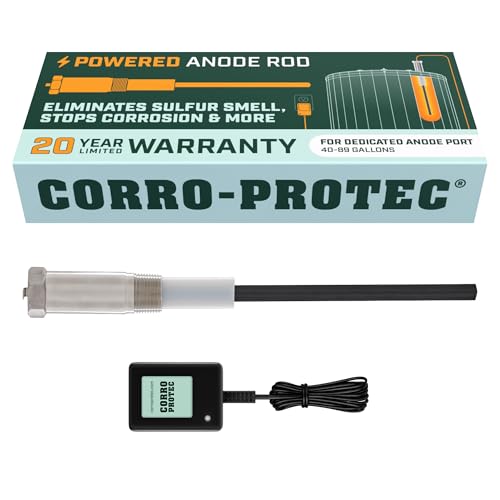
If you’re dealing with hard water and frequent anode failures, the replacement rod kit for hard water areas is worth considering after you get the old one out, but the removal process is identical regardless of the new rod’s material.
Why the Right Removal Tool Matters for Your Rheem
An anode rod is a sacrificial metal core, usually magnesium or aluminum, wrapped around a steel wire. That steel wire is threaded into a plug that screws into the top of your tank. On Rheem units, that plug is almost always a hex head, not a square plug like some older models. The hex head size is typically 1-1/16 inch, though a 15/16 inch socket fits some smaller models.
Using an adjustable wrench or the wrong socket size is the quickest way to strip the corners off that hex head. Once it’s rounded, you’re in a world of hurt. You’ll be hammering on a socket, trying to weld a nut onto it, or cutting the rod off and drilling out the plug. None of those are fun. A proper six-point socket, not a 12-point, grabs the full flat of the hex and distributes the torque evenly.
The second issue is torque. These rods are torqued to around 25-30 ft-lbs at the factory, but after years of thermal cycling and mineral deposits, the threads can effectively weld themselves in place. A standard 1/2-inch drive ratchet simply doesn’t provide the leverage. You need either a long breaker bar or an impact wrench to deliver a sharp, high-torque shock to the connection.
Identifying Your Rheem Anode Type (Hex Head vs. Plug)
Before you buy anything, pop the plastic cover off the top of your water heater and look. On most Rheem gas models, you’ll see a large hex head protruding from the tank top, often covered by a foam cap. On electric models, the anode is usually hidden under a separate access panel, or it might be combined with the hot water outlet nipple.
The standard hex head is the easiest to deal with. It’s a bare metal hexagon, typically 1-1/16 inch across the flats. You can get a socket directly on it. That’s the ideal scenario.
However, some Rheem models, particularly those with a flexible anode rod installed, use a different setup. The anode is located inside the hot water outlet. There’s no visible hex head. Instead, you’ll see a standard dielectric nipple with a threaded cap. The anode is installed through that nipple, and you need a special socket that fits over the nipple to unscrew the entire assembly. This is the hidden anode trap. If you try to remove just the cap, you’ll likely break the nipple or strip the threads.
Check your owner’s manual or the Rheem website for your specific model number to confirm the configuration. A quick visual check of the top of the tank saves you from buying the wrong tool.
The Essential Tools: Socket, Breaker Bar, and Impact Wrench
For a standard hex head anode, you’ll need three things: a socket, a drive tool, and an extension. A 1/2-inch drive six-point socket in the correct size is non-negotiable. Do not use a 12-point socket. The 12-point has a higher chance of slipping and rounding the bolt.
For the drive tool, you have two solid options. A 24-inch or longer breaker bar gives you the raw mechanical advantage to apply a slow, steady, immense force. An impact wrench, either electric or pneumatic, delivers rapid, high-torque pulses that can break the corrosion bond more effectively than a steady pull. Both work. Many pros start with an impact wrench and fall back to the breaker bar if the impact doesn’t do it.
The ‘Cheater Bar’ Method for Stubborn Bolts
If you don’t have an impact wrench, a breaker bar is your best friend. The longer the bar, the more torque you generate with the same arm strength. You can add a length of steel pipe over the handle of your breaker bar to extend it even further. This is called a cheater bar.
Place the socket firmly on the hex head. Make sure it’s fully seated. Slip the pipe over the breaker bar handle. Pull steadily and smoothly. Do not jerk it. You want to apply constant pressure until something gives. The risk here is that you can tip the water heater over if it’s not secured. Have a second person stabilize the tank, or wedge something solid against the base.
If you’re using a 1/2-inch drive breaker bar, be aware that you can snap the drive tang if you’re applying extreme force. A 3/4-inch drive setup is stronger but requires an adapter for a 1/2-inch socket. It’s rare, but it happens.
Using an Impact Wrench Safely
An impact wrench is faster and often more effective. The hammering action breaks the rust bond. Use a heavy-duty impact-rated socket, not a chrome one. Chrome sockets can shatter under impact. Set the wrench to its highest torque setting and give it a few bursts.
Here’s the key: don’t just hold the trigger and let it hammer for 30 seconds. Give it three or four solid bursts of 2-3 seconds each. If it doesn’t move, stop and reassess. The impact action can generate significant heat, and if the rod is truly seized, you’re not going to win a long battle. You’ll just risk rounding the hex head.
Also, be careful with a cordless impact. A compact 18V driver might not have enough torque for this job. You need a high-torque model, often marketed as a ‘high torque impact wrench,’ not a standard drill/driver.
Step-by-Step Removal Process for a Rheem Water Heater
Here’s the exact process I use, and it works on most Rheem tanks.
- Turn off the water heater. For gas, turn the gas valve to pilot or off. For electric, flip the breaker. You don’t need to drain the tank for anode removal, but you’ll lose a few gallons of water when you pull the rod out. Have a bucket and towels ready.
- Remove the top cover and insulation. Set them aside carefully. You’ll want to reinstall them.
- Clean the area around the hex head. Use a wire brush to remove any debris. You don’t want dirt falling into the tank.
- Attach a 6-point socket and a 1/2-inch drive breaker bar. Position the bar so you can pull it in a horizontal direction if possible. A vertical pull is awkward and less effective.
- Apply force. Pull steadily. If it doesn’t move, try a sharp, short jerk. If it still doesn’t move, move to the troubleshooting section below.
- Once loose, unscrew the rod by hand. It’s heavy, and the water will start draining. Lift it straight up and out. Be prepared for a gush of water.
- Inspect the old rod. Look for the signs described in the inspection section below.
- Install the new rod. Apply thread sealant or Teflon tape to the new anode’s threads. Screw it in by hand until snug, then tighten with the socket and breaker bar. Do not overtighten. Snug plus a quarter turn is usually enough.
- Refill the tank. Open the hot water tap in a sink to let air escape. Turn the water supply back on and let the tank fill completely before restoring power or gas.
Troubleshooting: When the Anode Rod Won’t Budge
You’ve got the breaker bar on it, you’re pulling with everything you’ve got, and the hex head hasn’t turned a single degree. This is where most people give up. Don’t. There are a few reliable methods to break the corrosion bond.
Applying Heat to the Tank Nipple
Heat is your most effective weapon. The steel plug and the steel tank threads expand at different rates. A quick, localized heat application can break the bond.
Use a propane or MAP gas torch. Apply the flame directly to the hex head, not the tank body. Heat it for 60-90 seconds. You don’t need to get it glowing red hot. Just hot enough to expand the plug. Then, immediately try the breaker bar. The heat often does the trick.
Be careful. The water inside the tank is hot, and you’re applying an open flame to the top of it. Keep a fire extinguisher nearby. Also, avoid heating the tank itself, as this can damage the glass lining. Just focus on the hex head and the immediate threads around it.
Penetrating Oil and Time
If heat doesn’t work, or you don’t want to use a torch, try a penetrating oil like PB Blaster or Kroil. These are designed to seep into the threads and break up corrosion.
Spray the base of the hex head where it meets the tank. Let it sit for at least 30 minutes, ideally a few hours. Reapply and let it sit overnight if you can. The oil needs time to work. Then, try the breaker bar again. This method is slow, but it’s non-destructive.
One trick is to combine heat and penetrating oil. Heat the hex head to expand it, then spray the oil at the base. As the metal cools, it contracts and pulls the oil into the threads. It’s a classic mechanic’s trick.
Rheem Model Variations: Gas vs. Electric and the ‘Hidden’ Anode
Rheem makes two basic types of tanks: gas and electric. The anode location differs, and so does the removal approach.
On gas models, the anode is almost always on the top of the tank, visible after you remove the top cover. It’s a direct, straightforward removal. The flue pipe runs through the center, so the anode is offset to one side. You have clear access.
On electric models, the anode is often hidden. It can be located under a separate access panel on the top, or it might be combined with the hot water outlet. That’s the hidden anode trap. On some Rheem electric models, the hot water outlet nipple has a hex head on it, and the anode is inserted through that nipple. You need a special socket, sometimes called a ‘water heater anode socket’ or ‘nipple socket,’ that fits over the nipple and engages the hex on the outside. It looks like a deep socket with a larger diameter.
Short and tall models also differ in the length of the anode rod. A tall model might have a 40-inch rod, while a short model has a 30-inch rod. The removal tool is the same, but the rod length matters for replacement. Also, some Rheem models have a separate anode rod that’s shorter and installed at an angle. Check your model number for the correct part.
If you have a combined nipple/anode assembly, the entire thing unscrews as one unit. The new assembly is installed the same way. This is where a specialized socket is essential. A standard socket won’t fit over the nipple.
Inspecting the Old Rod and Assessing Tank Health
Once you have the rod out, take a good look at it. The condition of the old rod tells you a lot about the health of your tank and what to expect in the future.
A rod that’s been consumed down to a thin wire, with the magnesium or aluminum completely gone, is a sign that the tank has been working hard. The sacrificial metal did its job. If the core wire is still intact but the surface is deeply pitted and covered in white or gray crust, that’s normal wear. The rod was nearing the end of its life.
What you’re looking for is a rod that’s still thick and solid, with only minor pitting. That means the water chemistry is relatively mild, and the tank is in good shape. A rod that’s completely gone, or has broken off in the tank, is a warning sign. It means the tank’s glass lining may have been exposed to corrosion for a while. You might get a few more years out of the tank, but you should start budgeting for a replacement.
Also, look at the color of the deposits. White and chalky deposits are typical calcium and magnesium scale. Black or dark brown sludge indicates iron or manganese in the water. If you see a lot of sediment, the tank needs a thorough flushing. This is the time to do it, while the anode is out and the tank is partially drained.
Choosing the Right Replacement (and Tool for Next Time)
You’ve conquered the removal. Now you need to pick a replacement. The material matters. Magnesium anodes corrode faster and are better for hard water. Aluminum anodes last longer but can cause a metallic taste in some water. Zinc anodes are a mix of aluminum and zinc, often used to combat sulfur smells. For a Rheem, the best anode rod depends on your water chemistry.
For the tool, if you used a breaker bar and it worked, you’re set. If you had to use heat or penetrating oil, consider buying an impact wrench for next time. It makes the job significantly easier. It’s a one-time investment that pays off every few years when you repeat this process.
Also, consider replacing the anode before it’s completely spent. Checking it every two to three years is a good habit. The removal process is much easier if the rod hasn’t been in there for a decade. The threads stay cleaner, and the hex head is less likely to be corroded.
Frequently Asked Questions (FAQs)
What size socket do I need for a Rheem water heater anode rod?
Most Rheem models use a 1-1/16 inch six-point socket. Some smaller or older models might use a 15/16 inch. Check the hex head size with a wrench before buying a socket. It’s stamped on most sockets, so you can verify the fit.
Can I use an adjustable wrench to remove the anode rod?
You can, but you shouldn’t. An adjustable wrench is prone to slipping and rounding the corners of the hex head. Once that happens, you’re in for a difficult extraction. A six-point socket that fits snugly is the only safe option.
Do I need to drain the water heater to remove the anode rod?
No. You’ll lose a few gallons of water when you pull the rod out, but you don’t need to drain the entire tank. In fact, the water pressure in the tank can help push the rod out slightly once you break it loose. Have a bucket ready.
How do I know if my Rheem has a hidden anode in the hot water outlet?
Look at the top of the tank. If you don’t see a standalone hex head, the anode is likely combined with the hot water outlet nipple. You’ll need a specialized nipple socket to remove it. Check your model number online to confirm the configuration.
What if the anode rod breaks off inside the tank?
If the steel core snaps and the plug comes out, but the rest of the rod falls into the tank, you have a few options. You can try to fish it out with a wire hook or a flexible pickup tool. If it’s a flexible anode, it might be easier. If you can’t retrieve it, you can install a new rod anyway. The broken piece will just sit in the bottom of the tank. It’s not ideal, but it’s not a catastrophic failure. The new rod will still provide protection.
What You Should Remember Next Time
- Always use a 6-point socket in the correct size (usually 1-1/16 inch) to avoid rounding the hex head.
- Start with a 24-inch breaker bar for maximum leverage before reaching for an impact wrench.
- If the rod is seized, apply localized heat to the hex head for 60-90 seconds, then try again.
- Penetrating oil needs time to work. Spray it and wait at least 30 minutes, ideally overnight.
- Check if your Rheem has a hidden anode in the hot water outlet. This requires a specialized nipple socket.
- Inspect the old rod for deep pitting or a skeletonized core. That tells you if the tank is nearing the end of its life.
- Replace the anode every 2-3 years to avoid the seized bolt problem altogether. Prevention is far easier than extraction.

I am a mechanical engineer and love doing research on different home and outdoor heating options. When I am not working, I love spending time with my family and friends. I also enjoy blogging about my findings and helping others to find the best heating options for their needs.
Related guides

Do You Need Conduit for Water Heater Wiring?
Yes, using a conduit for water heater wire is recommended to protect the wiring from damage and ensure…
Ultimate Guide to Winterizing Your Water Heater: Expert Tips
Get expert tips on winterizing your water heater to prevent damage and save money on energy bills. Ensure…
Hot Water Tank Red Light Flashing? Here’s What It Means
A flashing red light on your hot water tank typically indicates a malfunction or error, often requiring a…