

Many homeowners know geothermal systems save energy but get stuck on the technical terms and components involved. This article explains the main parts of a geothermal heat pump system clearly, how they work together, and what to expect in terms of performance, maintenance, and installation.
You’ll also learn which loop types suit different properties, how control systems optimize operation, and practical tips before buying or retrofitting. Understanding these components helps you ask the right questions and get a system designed to fit your home.
Key Components of a Geothermal System and Their Roles
A geothermal system’s main parts are the ground loop, heat pump unit, and distribution system. The ground loop exchanges heat with the earth, the heat pump moves that heat inside your home, and the distribution system delivers warm or cool air or water. This setup transfers heat rather than generating it, which makes geothermal efficient and reliable.
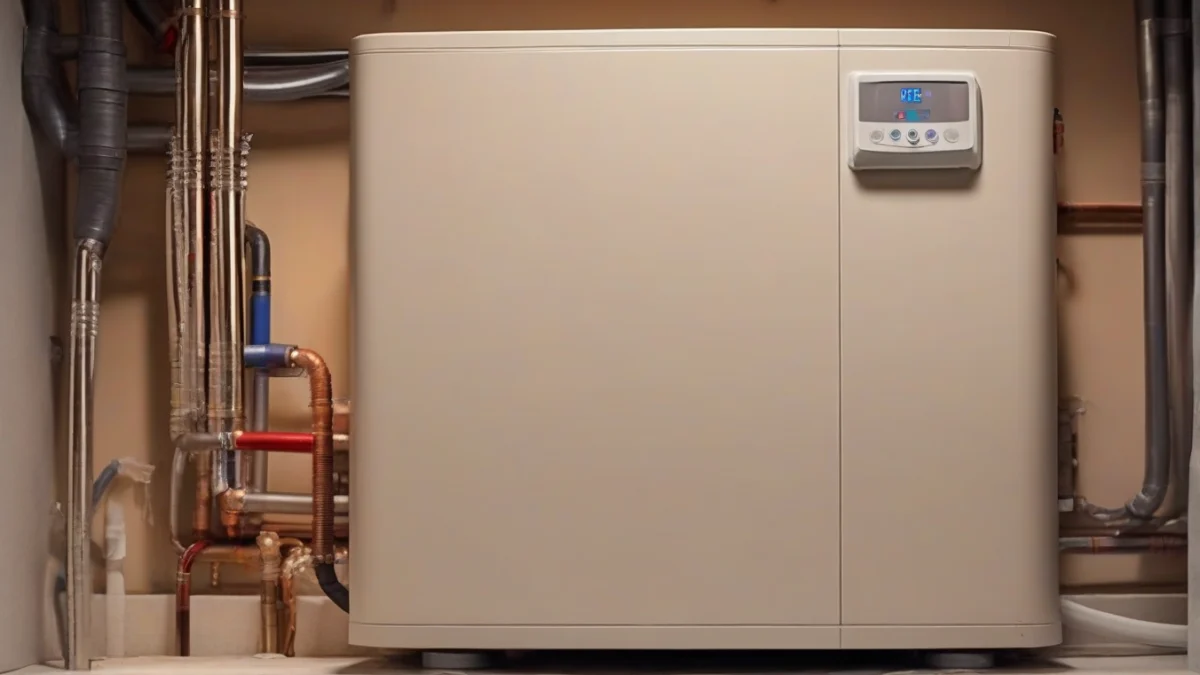
The ground loop is a buried network of pipes, usually made of high-density polyethylene (HDPE), that circulates a water-antifreeze mix. It taps the stable underground temperature—around 55°F at 10 feet deep—to absorb heat in winter or dump heat in summer. This steady temperature reduces the energy your heat pump needs to work.
Inside the heat pump, four main refrigerant cycle parts do the heavy lifting: the compressor, evaporator, condenser, and expansion valve. The evaporator absorbs heat from the ground loop fluid, turning liquid refrigerant into gas. The compressor then raises the gas temperature and pressure. Next, the condenser releases heat inside your home, cooling the refrigerant back to liquid. The expansion valve lowers refrigerant pressure to start the cycle again.
Optional components include a desuperheater, which recovers excess heat to preheat domestic hot water, and auxiliary heat, often electric resistance heaters that provide backup heat during very cold spells or high demand.
The distribution system connects the heat pump to your home’s ductwork or radiant floors, moving warmed or cooled air or water where you need it. While the heat pump requires electricity to run the compressor and fans, it doesn’t create heat from electricity but transfers it, offering up to five times the energy output for each unit of electricity used.
Ground Loop Construction and Choosing the Right Type
Ground loops come in three main types: horizontal, vertical, and pond/lake, each suited to different land and soil conditions. Horizontal loops lie in trenches about 4 to 6 feet deep and need plenty of yard space. Vertical loops go down 150 to 400 feet in boreholes, fitting smaller lots. Pond or lake loops submerge coils in nearby water bodies, needing at least an 8-foot depth and clean water.

Horizontal loops generally cost less to install but need more space. Vertical loops cost more due to drilling but save surface area and work well in rocky or poor soil. Pond loops are usually the cheapest if you have a suitable water source nearby, but not all properties qualify.
Loop pipes are almost always HDPE with a lifespan of 50 years or more underground. They must be sized correctly to match your heat pump’s load and the soil’s thermal conductivity. Oversized loops waste money, and undersized loops reduce performance and may shorten equipment life.
Sometimes builders embed loops in foundation slabs or around footings to save space and installation costs, but this requires careful design to avoid structural issues and ensure good heat transfer.
A common misconception is that longer loops always mean better performance. In reality, loops must be sized to the home’s heating and cooling needs and local soil conditions. More pipe length than necessary adds upfront cost without improving comfort or efficiency.
Control Systems and Thermostats in Geothermal Heat Pumps
Geothermal heat pump controls use electrical components to optimize comfort and efficiency by regulating compressor stages and auxiliary heat. The thermostat signals the system to run one or two compressor stages depending on the heating or cooling load, adjusting power use precisely. Variable-speed compressors modulate their speed smoothly, avoiding full on/off cycles and saving energy by running at lower capacity whenever possible.
Thermostats designed for geothermal systems differ from standard ones by managing these compressor speeds and triggering auxiliary electric heaters only when necessary, such as during extreme cold. This prevents wasted electricity and maintains steady indoor temperatures.
Geothermal controls connect with existing HVAC wiring and communication standards, enabling smooth operation with ductwork or radiant floor setups. Features often include defrost mode to stop ice buildup on outdoor coils in winter and fault diagnostics that notify homeowners or technicians of problems early.
| Feature | Purpose |
|---|---|
| Two-stage compressor control | Matches heating or cooling demand for efficiency |
| Variable-speed modulation | Smoothly adjusts compressor speed to save energy |
| Auxiliary heat control | Provides backup heat during extreme cold |
| Defrost mode | Prevents coil freezing in cold weather |
| Fault diagnostics | Alerts to system faults or maintenance needs |
Maintenance Requirements for Geothermal Systems
Ground loops in geothermal systems require little to no maintenance because they are buried and made of durable polyethylene pipes designed to last 50 years or more. The indoor components, however, need regular attention to keep the system running smoothly.
Indoor tasks include changing air filters every 1 to 3 months, cleaning coils to maintain heat exchange efficiency, and checking circulator pumps for proper operation. These help avoid common issues like reduced airflow or overheating.
Watch for signs of trouble such as a sudden drop in heating or cooling performance, unusual noises from the compressor, or higher electric bills that may indicate refrigerant leaks or blocked coils. Early detection prevents costly repairs.
Annual professional inspections are recommended. Technicians check refrigerant levels, electrical connections, and system controls, ensuring the heat pump and ground loop operate correctly and safely. A yearly tune-up extends system life and keeps energy costs down.
Retrofitting Geothermal Systems into Older Homes
Retrofitting a geothermal system into an older home is possible but requires careful planning. The system’s main components—the ground loop, heat pump unit, and distribution system—must fit the existing home layout and HVAC infrastructure.
Most geothermal heat pumps connect to your current ductwork or radiant floor heating. However, a Manual J load calculation is essential before installation. This calculation measures your home’s heating and cooling needs accurately, preventing oversized or undersized systems that waste energy or fail to keep you comfortable.
Duct design or radiant floor piping might need upgrading to match the geothermal heat pump’s lower temperature output compared to conventional furnaces. Sometimes a buffer tank is added to stabilize water temperature for radiant systems. Auxiliary heat, like electric resistance coils, may be necessary in very cold climates to supplement the heat pump during extreme cold snaps.
Space for the ground loop is often the biggest retrofit challenge. Horizontal loops need enough yard area for trenches, while vertical loops require drilling boreholes, which might be limited by property size or soil conditions. Also, your electrical panel may need upgrades to handle the geothermal system’s power requirements safely.
Environmental Benefits and Efficiency of Geothermal Systems
Geothermal systems stand out for efficiency, typically achieving a Coefficient of Performance (COP) between 3 and 5, meaning they deliver 3 to 5 units of heat for every unit of electricity consumed. Their Energy Efficiency Ratio (EER) for cooling often ranges from 15 to 30, much higher than conventional air conditioners.
Compared to traditional HVAC systems, geothermal heat pumps can reduce your heating and cooling energy use by 30% to 70%, cutting utility bills significantly. Their ground loops, made from durable polyethylene, last 50 years or more, while the heat pump units typically last 20 to 25 years.
| Metric | Typical Range |
|---|---|
| Coefficient of Performance (COP) | 3.0 to 5.0 |
| Energy Efficiency Ratio (EER) | 15 to 30 |
| Heating/Cooling Energy Savings | 30% to 70% |
Geothermal systems produce very low greenhouse gas emissions since they rely primarily on electricity rather than burning fossil fuels. This reduces your home’s carbon footprint and dependency on oil, gas, or propane.
While geothermal works well across much of the U.S., extremely rocky soil or limited outdoor space can restrict ground loop installation. Regions with consistently moderate climates gain the most efficiency, but advances in loop design and auxiliary heat allow cold areas to benefit too.
By tapping stable underground temperatures, geothermal systems provide reliable, sustainable heating and cooling that outperforms conventional systems in both energy savings and environmental impact. For more on their efficiency, see geothermal system efficiency.
Questions People Ask
How long do ground loops typically last underground?
What optional components like desuperheaters or auxiliary heat are worth installing?
Are there geographic limitations for installing geothermal systems?
How is the size of the ground loop determined for different home sizes and soil types?
What does a thermometer look like in a geothermal header system and what does it measure?

I am a mechanical engineer and love doing research on different home and outdoor heating options. When I am not working, I love spending time with my family and friends. I also enjoy blogging about my findings and helping others to find the best heating options for their needs.
Related guides

Geothermal Heating Systems: The Ultimate Sustainable Energy Solution
Your home's HVAC system likely eats up more than half your utility bill every year. In winter that…
Geothermal Systems: 7 Financial Benefits You Can’t Ignore
You know that feeling when you open your utility bill mid-January and just stare at the number? A…

6 Types Of Geothermal Heating Systems Explained
See the six geothermal heating system types, how each loop works, where each fits best, and what installation…