Is your gas water heater making strange noises? A sputtering sound or a pilot light that won’t stay lit can be incredibly frustrating. Often, the culprit isn’t a major failure but simply air trapped in the gas line. This common issue happens after maintenance, a supply interruption, or even a new installation.
Learning how to purge air from a gas line on a water heater is a valuable DIY skill. It can save you a service call and restore your hot water quickly. For this project, having the right tools makes a big difference. Many professionals recommend using a Master Quick Disconnect for a cleaner, safer, and faster process, which you can find here. It simplifies connecting and disconnecting your gas line without tools, minimizing the chance of leaks when you’re done.
Signs You Have Air in the Gas Line
Before you grab any tools, confirm the symptoms. Air in the gas line disrupts the smooth flow of fuel to your burner. This leads to specific, telltale signs that your system needs attention.
The most common symptom is a water heater sputtering or making popping sounds when it tries to ignite. You might hear the burner kick on for a second, then cut out with a “whoosh” or pop. This is the air pocket passing through and the gas briefly igniting. Another clear sign is a pilot light that won’t stay lit, or one that lights but the main burner fails to engage.
If your water heater is not heating properly, or it takes an unusually long time to recover, air in the line could be the reason. The unit isn’t getting the full, consistent gas supply it needs. These issues often appear right after you’ve had work done on your home’s gas supply line or after the gas company has shut off service. Recognizing these signs is the first step in effective gas water heater maintenance.
Safety First: Critical Precautions Before Starting
Working with gas requires respect and caution. A small mistake can have serious consequences. Follow these steps meticulously to ensure your safety and the safety of your home.
First, ensure the area is well-ventilated. Open windows and doors near the water heater. Never use open flames, sparks, or operate electrical switches in the area while you work. Have a fire extinguisher rated for Class B fires (flammable liquids and gases) nearby. It’s better to have it and not need it.
The single most important step is to turn off the gas supply. Locate the dedicated shut-off valve on the gas line leading to your water heater. It’s usually a lever-type valve. Turn it so the lever is perpendicular to the pipe. This stops all gas flow to the appliance. If you smell gas strongly at any point, stop immediately, leave the area, and call your gas company or emergency services from outside.
Tools and Materials You’ll Need
- Adjustable wrench or pipe wrench
- Medium-sized flat-head screwdriver
- A bowl of soapy water (for the critical leak test)
- Rag or towel
- A long lighter or matches for relighting the pilot
- (Recommended) A Master Quick Disconnect fitting for easier reconnection
Step-by-Step Guide to Purging Air from the Gas Line
Now, with safety protocols in place, you can begin the gas line purge. This process, often called bleeding the gas line, will clear the airlock and restore proper fuel flow.
Step 1: Access the Gas Control Valve
Remove the outer access panel on your water heater to reveal the gas control valve and thermostat. You’ll typically see a knob with settings like “ON,” “OFF,” and “PILOT.” Set this knob to the “OFF” position. Wait for at least five minutes. This allows any residual gas in the chamber to dissipate completely, a vital safety pause.
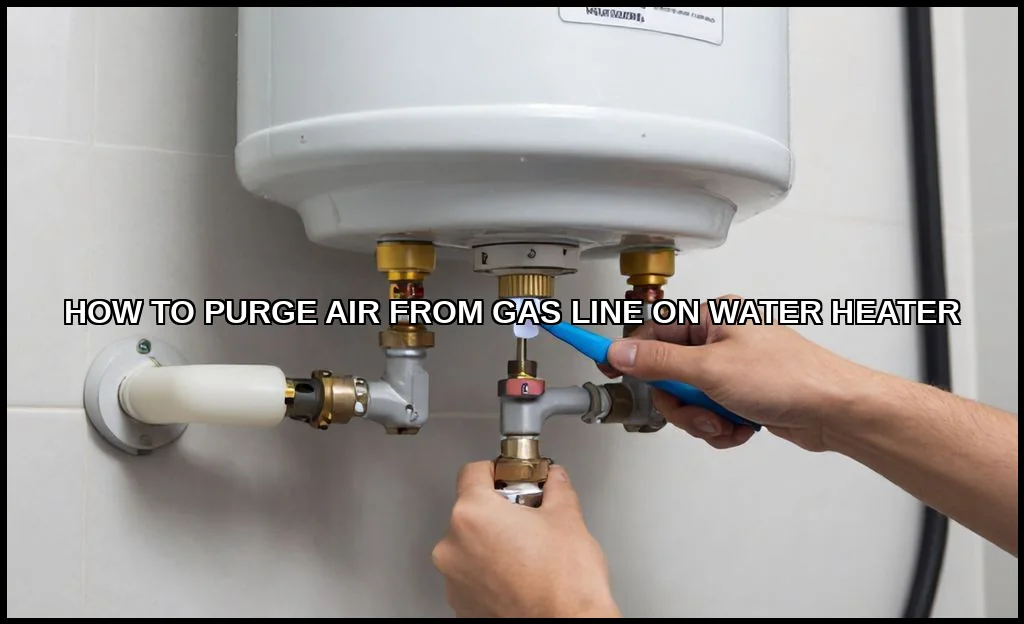
Step 2: Locate and Open the Purge Valve
Look for a small screw or nipple on the gas line, usually near the control valve. This is the sediment trap or drip leg, designed to catch debris and, in our case, provide a point to bleed air from gas line. Place your rag underneath it to catch any minimal drips. Using your flat-head screwdriver, slowly loosen this screw about one to two full turns. You should hear a faint hissing soundthis is the air (and a tiny amount of gas) escaping.
Let it hiss for about 30 to 60 seconds. This is the core act to remove airlock. If you have a newer setup with a quick-connect fitting, the process is even simpler, highlighting why that Master Quick Disconnect is so handy for gas water heater maintenance.
Step 3: Close the Valve and Restore Gas Flow
Once the hissing slows or stops, promptly tighten the purge screw securely with your screwdriver. Do not over-tighten, as you could strip the threads. Now, go back to the main gas shut-off valve you closed earlier. Slowly turn it back on, allowing the gas to fill the line gradually. Listen for the gas flowingit will be a soft, steady sound.
Testing Your Work and Relighting the Pilot
The job isn’t done once the gas is back on. You must verify your work is safe and then get the unit running again. This phase addresses common pilot light issues post-purge.
The Critical Soapy Water Test
This non-negotiable step checks for leaks. With the gas supply on, take your bowl of soapy water and a rag. Apply the soapy solution to all the connections you touched: the purge screw and the main gas valve connection. Watch closely for about a minute. If you see bubbles forming or growing, you have a leak. Tighten the connection slightly and re-test. If bubbles persist, turn off the gas supply immediately. This is a key moment when knowing when to call a professional is wise.
Relighting the Pilot Light
With no leaks confirmed, you can relight the pilot. Refer to the instructions on your water heater’s label. The general process involves setting the gas knob to “PILOT,” pressing it down (which allows gas to the pilot assembly), and using your long lighter to ignite the pilot at the burner assembly. Hold the knob down for 60 seconds after it lights, then release. If it stays lit, turn the knob to “ON.” You should hear the main burner ignite. This successful gas valve operation means you’ve solved the problem of air in gas line.
When to Call a Professional Plumber
While purging air is a manageable DIY task, some scenarios demand expert intervention. If you are ever uncomfortable or unsure, stop. Your safety is paramount.
Call a professional if:
- The soapy water test reveals a leak you cannot stop.
- The pilot light still won’t ignite or stay lit after multiple attempts.
- You smell gas strongly at any point, even after tightening connections.
- The water heater continues making unusual noises or fails to heat after purging.
- Your unit is very old, or you suspect other issues like a faulty thermocouple or gas valve.
A qualified technician can diagnose deeper pilot light issues or perform a comprehensive sediment flush if mineral buildup is also a problem. For those considering a new unit, it’s worth researching brands known for reliability. For instance, many homeowners find Bradford White water heaters to be a good investment for their durability. Similarly, if you’re exploring tankless options, you might wonder, is Navien a good tankless water heater? A pro can help you weigh these choices.
Successfully purging air from your water heater’s gas line restores peace, quiet, and most importantly, hot water. It’s a clear example of how understanding basic maintenance can empower you as a homeowner. Remember the core sequence: safety off, purge the air, test for leaks, and relight. For more on maintaining your system’s efficiency long-term, the Department of Energy offers an excellent official source for best practices. Keep your tools handy, listen to your appliance, and don’t hesitate to call for backup when the job gets beyond a simple air bubble. Now, go enjoy that hot shower.
